ASP Application Configuration
Before you can create an ASP application, you must create a virtual directory. To create a virtual directory on your web server, follow these steps (see Figure 4.2):
Right-click the web server on which you wish to create a virtual directory.
From the pop-up menu, select New → Virtual Directory.
Select a name for your virtual directory.
Select a physical directory to which your virtual directory is mapped.
Leave the default access (Allow Read Access and Allow Script Access) for ASP applications.
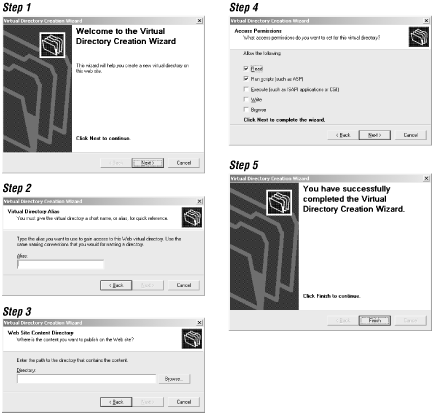
Figure D.2. Configuring a virtual directory
Now that you have created your virtual directory, you must configure it for your ASP application. To do this, right-click your virtual directory and select Properties from the pop-up menu to open the Properties dialog shown in Figure 4.3.
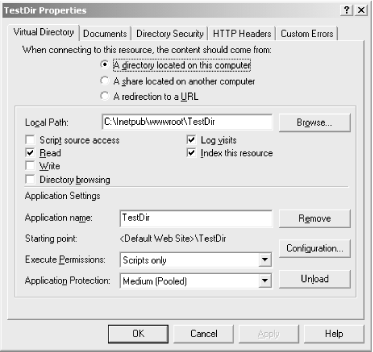
Figure D.3. The Virtual Directory Properties page
From this Virtual Directory tab, you can configure several features of your virtual directory. Before discussing those properties that affect ASP, let's briefly go over what the other tabs on this dialog do. The Documents tab allows you to set the default document for your virtual directory and/or enable document footers. The Directory Security tab, as its name implies, allows you to set various security settings for the virtual directory, including ...
Get ASP in a Nutshell, 2nd Edition now with the O’Reilly learning platform.
O’Reilly members experience books, live events, courses curated by job role, and more from O’Reilly and nearly 200 top publishers.

