Chapter 3 explored the coarse-grained application types defined by Apple in the mobile HIG. Choosing one of these types for your application is a helpful step in streamlining your UX decision making. The audience personae you define will differ in key ways for each application type. Utility applications are meant to be fast, lightweight, and mostly ambient with flat learning curves. Productivity applications tend to mimic or enhance physical processes, such as writing letters, planning an itinerary, or exploring complex datasets. Because productivity apps exist in a known problem domain, learning curves are often minimal if you employ good design. Immersive applications have steeper learning curves, require more of an investment (time, energy, concentration) for use, and tend to reward users with deeper experiences. Good examples of immersive applications are 3D games and the onboard movie player service.
Still, these three application types are somewhat arbitrary, and are occasionally intermixed to create experiences with multiple modes of interaction. Thinking about the primary bucket in which you would toss your application can help you with another important decision: the application architecture.
If you consider iterative, user-centered design processes for a moment, a project lifecycle might loosely adhere to the following sequence:
Identify a problem for a given audience.
Develop the core approach for solving the problem.
Explore the experience levels, expectations, priorities, and goals of the audience.
Develop an initial interface representing the simplest, most familiar implementation.
Expose this prototype to representative users and gather feedback.
Implement enhancements based on the feedback.
Repeat Steps 5 and 6 until a version of the application is ready for release.
To yield the greatest benefits from this process, youâll want to have a relatively stable idea of what your final interface will look like by Step 4. Once you know, roughly, the type of interface you want, you can use Xcode to create your project. Luckily, Xcode provides several core application templates that bootstrap the most common design patterns.
Note
This book assumes that users are familiar with Xcode and the Objective-C language, perhaps from developing Cocoa applications on the Mac.
To access the New Project window, open Xcode and navigate to File â New Project, or press Apple + Shift + N. Figure 4-1 shows the template chooser in the New Project dialog.
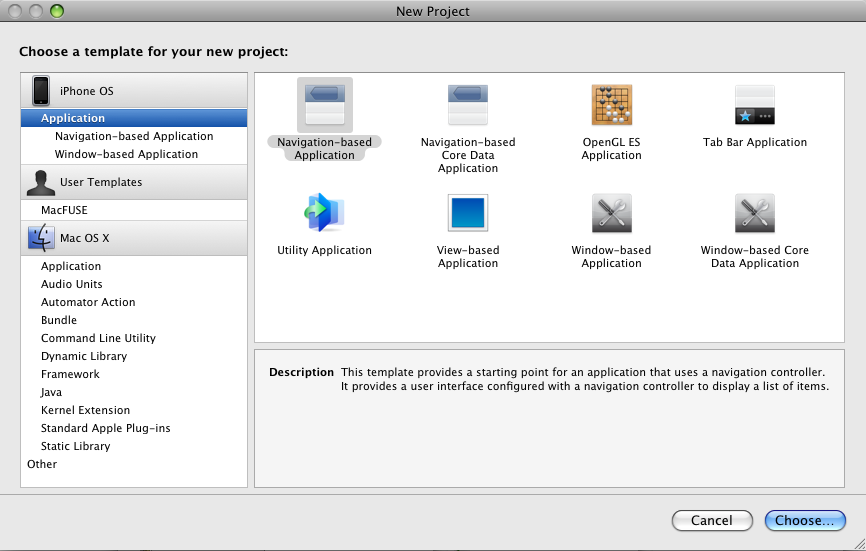
Project templates are grouped by platform, such as the iPhone OS or Mac OS X. You can click each template icon to access a very light description of the template. The information is only mildly useful, but it does provide a decent starting point and helpful refresher for each project type. Choosing a template is as simple as selecting it and clicking the Choose button.
Each template generates a project skeleton you can compile and run as a boilerplate application. Naturally, without custom code, the build will be pointless; still, creating one of each, building it, and running the resulting application in the iPhone simulator is a great way to familiarize yourself with each template, including the default executable.
Depending on your vision of how users will interact with your application, you might use one of the default structures and standard user interfaces. After all, each template is quite capable of providing a satisfactory (if generic) user experience.
More likely, however, you will develop custom views that handle their
own layouts and draw their own art, extending and enhancing core
UIKit classes. It is not uncommon to combine some of the
application structures in subordinate fashion. For example, using multiple
UITableViewController subclasses in a hierarchy and
having UITableViewController
subclasses as the view controllers for a tab in a tab-based application
template are both popular design patterns.
Apple provides navigation patterns that are quite flexible and will likely work for all but the most creative and distinct immersive applications.
As Apple advises in the mobile HIG, you should prioritize the needs of users and develop the simplest version of an application that reflects your own philosophy and approach to problem solving. This might be an incredibly innovative OpenGL ES application with entirely new modes of interaction, or it might leverage the default designs Apple gives developers. Either way, the sooner you can put prototypes in front of representative users, the sooner you can refine, streamline, incorporate feedback, andâmost importantlyâship!
A thorough understanding of the standard interaction design patterns
included in UIKit must include view controllers.
Cocoa and Cocoa Touch applications tend to follow a classic
model-view-controller (MVC) architectural pattern. Domain objects, or
models, are separated from the
controller code operating on them. Further separated
are the user interface views that allow users to
interact with controls, input data, and understand data in meaningful
ways.
In Cocoa Touch, controllers are most often instances of a view controller.
View controllers, as represented in UIKit by the
UIViewController class, manage the views
that comprise a given Cocoa Touch user interface. Controller classes mediate the communication between models
and views, manage asynchronous operations such as networking and
threading, and handle the configuration and logic that make your
particular application more than the sum of its logical domain objects. In
Cocoa Touch, view controllers take on a subset of the application duties
by managing the logic specifically around views, with each view controller
typically in charge of a single view.
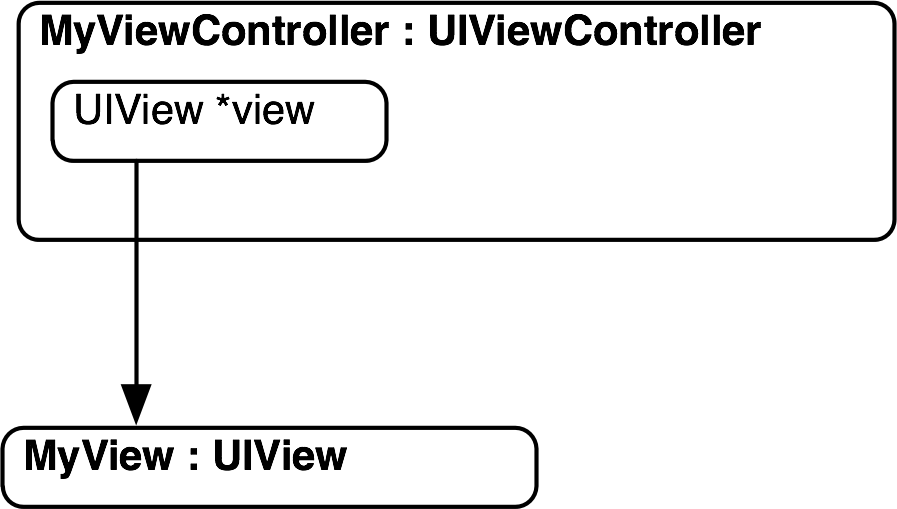
Figure 4-2 shows the relationship for the
simplest case: a UIViewController and a
UIView.
You may wonder why the UIViewController class
is being discussed in the context of choosing an application template.
The reason is that each application template corresponds to one of several
UIViewController subclasses. Choosing the application
template that works best for the
current iteration of your application requires a basic understanding of the stock view controller
subclasses.
There are three types of view controllers you will encounter when
creating new iPhone projects. The first is the simplest: the
UIViewController. The next is the UITableViewController. The final view
controller subclass is the UITabBarController.
Sometimes the best solution to a problem is a very simple application. For most of us, this is a dream scenario. Xcode supplies an application template that sets up a single view controller and an associated view.
View controller instances, as represented by the
UIViewController base class, each have an instance variable called
view that points to a UIView or
UIView subclass. As mentioned in the previous
section, the job of a view controller is to manage all logic for a
view, often acting as a delegate for event handling or as a data
source.
The view-based application template is a great place to start if your application wonât allow users to navigate across a set of data or across a linear process, such as a wizard. In those cases, a navigation-based application template is a more suitable foundation.
If youâd like to use a view-based application template for your application but would prefer to support an application configuration screen in your application, you should consider the utility application template.
The utility application template builds upon the simple view-based application template by generating code and Interface Builder files that let users alternate between your primary view and an alternate view. This structure originated in Mac OS X desktop widgets, and is in use for standard, lightweight applications that ship with the iPhone and iPod Touch, such as the Weather application.
Tab-based applications give users a very accessible and understandable mechanism for selecting among two or more sibling view controllers. Think of tab controllers the way you might think of TV channels. You can touch a tab to switch to its controller and view, which together make up the content for that tab. Proper use of tabs is to show separate functional areas of an application as separate but equal tabs. In other words, you donât want to have a high-level tab, and then a tab next to it that represents a lower-level bit of functionality that might otherwise belong âunderâ the first. The Tweetie application by Atebits uses a tab bar to display various types of messages on Twitter. For example, there is a tab for your main Twitter feed, one for replies sent to you, one for direct messages, and one for favorites.
Figure 4-3 shows the result of compiling the default tab bar application template.
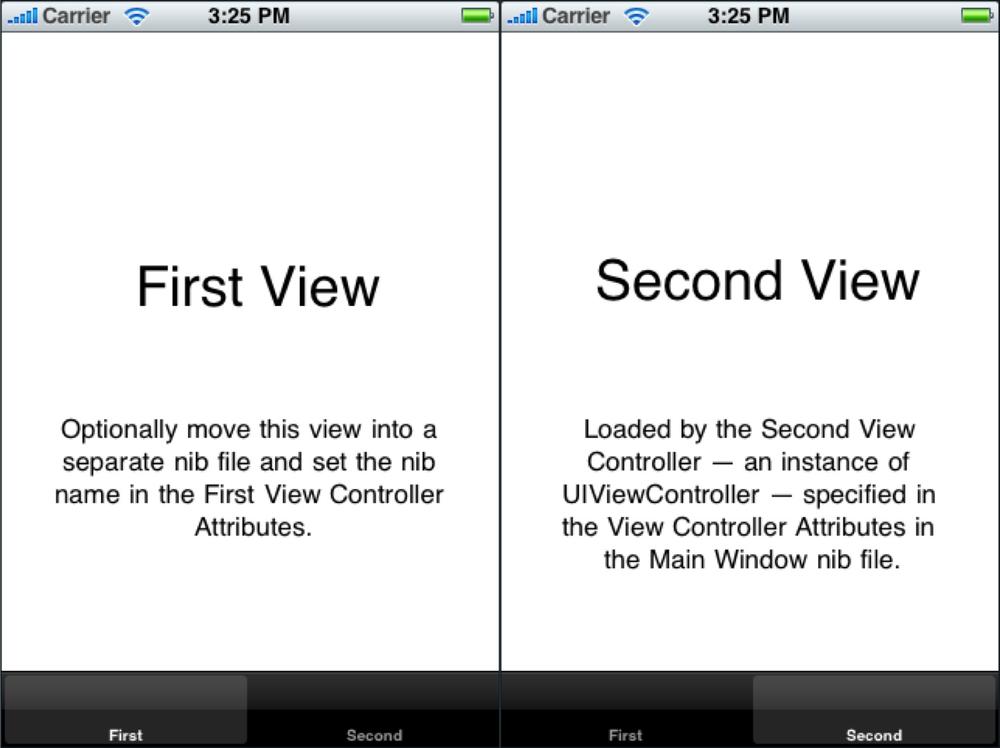
Note the two tabs at the bottom of each screen. Technically,
selecting a tab switches the current
UIViewController pointed to by the main
UITabBarController instance. From a non-technical
user perspective, selecting the second tab declares to the application that the user would like to
focus on a different area of functionality from that in the first
tab.
Each tab bar item in the tab bar represents a single
UIViewController or UIViewController subclass. That means
you can choose to combine your view controllers, such as using a
UINavigationController or
UITableViewController âinsideâ one of your
tabs.
Note
One note of advice: retrofitting an application into a tab-based application can be somewhat tedious, though far from the end of the world. Still, if you think you might switch to a tab-based architecture in the near future, itâs worth using the tab bar application template from the beginning of your development.
A navigation controller is a special UIViewController
subclass that allows users to build and drill into a stack of
UIViewController instances. This is useful when
users traverse nodes in a tree or linked list data structure.
Think of the stack of view controllers as a stack of paper. The navigation controller manages the stack and lets users trigger actions that add a new sheet to the top of the stack or that, alternately, remove a sheet from the stack. To programmers, this is called âpushingâ and âpoppingâ items onto a stack.
When you tell a navigation controller to push a new view controller and view onto the top of the stack, the navigation controller will automatically load the new controller and view into memory and then trigger an animation that slides the current view offscreen, to the left, while sliding the new view onscreen, from the right. You can see this in the Mail application when selecting a message to read, for example. This mechanism is seen consistently among a large number of Cocoa Touch applications and has, in some ways, become an iconic transition for the platform.
Figure 4-4 shows the relationship
between a UINavigationController and its
subordinate UIViewController instances.
When prototyping your application, try to decide whether you
will be navigating down through a hierarchical dataset, such as a list
of messages. If so, consider choosing an application template that
builds upon a UINavigationController
foundation.
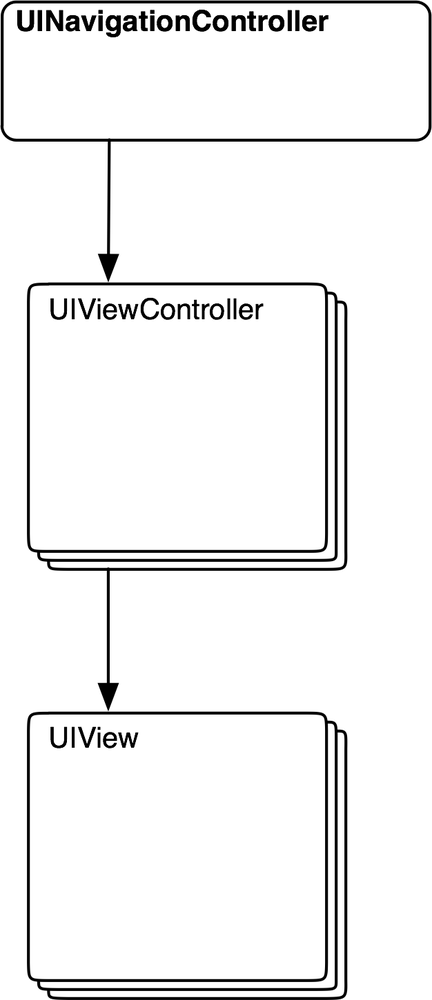
Table views are used to manage a list of table cells, with each cell representing a distinct item of some sort. Typically, there is a one-to-one relationship among onscreen table view cells and model objects. For example, the Contacts application that ships with the iPhone maps onscreen cells, or rows, with each user stored in the address book.
When using a UITableViewController in a
navigation-based application, the typical pattern is to represent data
as a tree with the first level of objects listed in the table. When
tapping a single cell, a new view controller is added to the top of
the navigation controller stack and its view is transitioned in from
right to left. Depending on your data structure, the new view
controller might be another UITableViewController
representing all child nodes for
the selected node, or it might be a custom UIView
that shows custom art and
layout.
Given the extensibility of UITableViewControllerCell instances,
itâs worth exploring the use of table views for many problems.
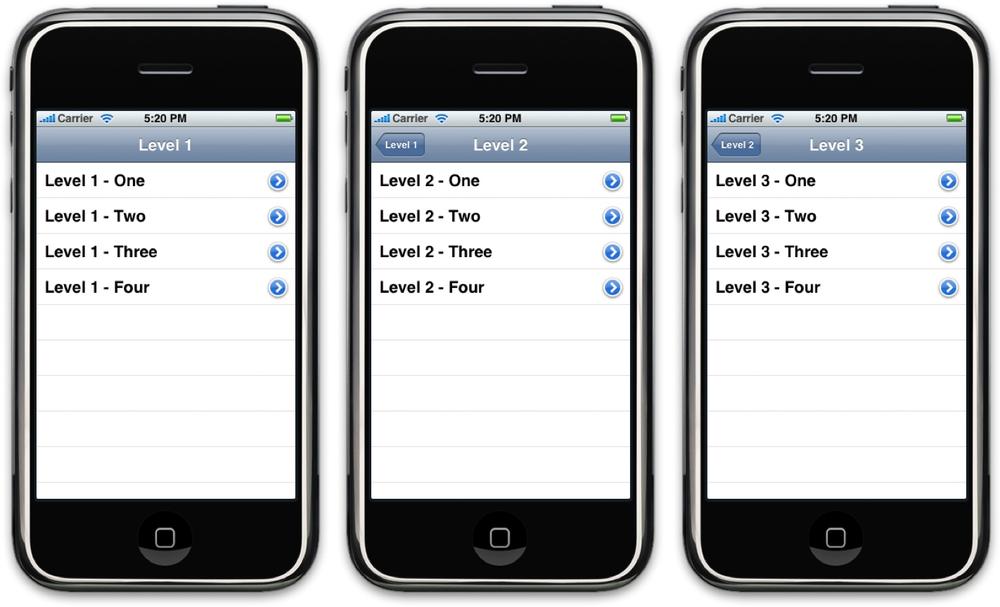
Figure 4-5 shows screenshots of an
application that traverses a set of nodes using sequential
UITableViewControllers on a
UINavigationController stack.
Applications that are based on the OpenGL ES application template do not use UIViewController subclasses. Instead,
the default template uses an EAGLViewâa subclass of
UIViewâto an instance variable in the application
delegate class. The EAGLView class sets up an
OpenGL ES context, using an instance of the EAGLContext class. The
EAGLView instance also creates a timer that
triggers a routine for drawing to the
EAGLContext.
This book doesnât cover OpenGL ES applications in depth, but generally you will want to use OpenGL ES to develop any 3D games. Additionally, many 2D immersive applications could take advantage of the power of OpenGL ES to do custom drawing.
Get Programming the iPhone User Experience now with the O’Reilly learning platform.
O’Reilly members experience books, live events, courses curated by job role, and more from O’Reilly and nearly 200 top publishers.

