Chapter 3. Technology Fundamentals
Solid familiarity with the following concepts will make your time with D3 a lot less frustrating and a lot more rewarding. Consider this a brief refresher course on Web-Making 101.
Warning
Beware! This is a pretty dense chapter, packed with years’ worth of web development knowledge, and nothing in here is specific to D3. I recommend skimming just the sections on information that is new to you, and skipping the rest. You can always reference this chapter later as questions arise.
The Web
If you’re brand new to making web pages, you will now have to think about things that regular people blissfully disregard every day, such as this: How does the Web actually work?
We think of the Web as a bunch of interlinked pages, but it’s really a collection of conversations between web servers and web clients (browsers).
The following scene is a dramatization of a typical such conversation that happens whenever you or anyone else clicks a link or types an address into your browser (meaning, this brief conversation is had about 88 zillion times every day):
CLIENT: I’d really like to know what’s going on over at somewebsite.com. I better call over there to get the latest info. [Silent sound of Internet connection being established.]
SERVER: Hello, unknown web client! I am the server hosting somewebsite.com. What page would you like?
CLIENT: This morning, I am interested in the page at somewebsite.com/news/.
SERVER: Of course, one moment.
Code is transmitted from SERVER to CLIENT.
CLIENT: I have received it. Thank you!
SERVER: You’re welcome! Would love to stay on the line and chat, but I have other requests to process. Bye!
Clients contact servers with requests, and servers respond with data. But what is a server and what is a client?
Web servers are Internet-connected computers running server software, so called because they serve web documents as requested. Servers are typically always on and always connected, but web developers often also run local servers, meaning they run on the same computer that you’re working on. Local means here; remote means somewhere else, on any computer but the one right in front of you.
There are lots of different server software packages, but Apache is the most common. Web server software is not pretty, and no one ever wants to look at it.
In contrast, web browsers can be very pretty, and we spend a lot of time looking at them. Regular people recognize names like Firefox, Safari, Chrome, and Internet Explorer, all of which are browsers or web clients.
Every web page, in theory, can be identified by its URL (Uniform Resource Locator) or URI (Uniform Resource Identifier). Most people don’t know what URL stands for, but they recognize one when they see it. By obsolete convention, URLs commonly begin with www, as in http://www.calmingmanatee.com, but with a properly configured server, the www part is wholly unnecessary.
Complete URLs consist of four parts:
- An indication of the communication protocol, such as HTTP or HTTPS
- The domain name of the resource, such as calmingmanatee.com
- The port number, indicating over which port the connection to the server should be attempted
- Any additional locating information, such as the path of the requested file, or any query parameters
A complete URL, then, might look like this: http://alignedleft.com:80/tutorials/d3/.
Typically, the port number is excluded, as web browsers will try to connect over port 80 by default. So the preceding URL is functionally the same as the following: http://alignedleft.com/tutorials/d3/
Note that the protocol is separated from the domain name by a colon and two forward (regular) slashes. Why two slashes? No reason. The inventor of the Web regrets the error.
HTTP stands for Hypertext Transfer Protocol, and it’s the most common protocol for transferring web content from server to client. The “S” on the end of HTTPS stands for Secure. HTTPS connections are used whenever information should be encrypted in transit, such as for online banking or e-commerce.
Let’s briefly step through the process of what happens when a person goes to visit a website.
- User runs the web browser of her choice, then types a URL into the address bar, such as alignedleft.com/tutorials/d3/. Because she did not specify a protocol, HTTP is assumed, and “http://” is prepended to the URL.
- The browser then attempts to connect to the server behind alignedleft.com across the network, via port 80, the default port for HTTP.
- The server associated with alignedleft.com acknowledges the connection and is taking requests. (“I’ll be here all night.”)
- The browser sends a request for the page that lives at /tutorials/d3/.
- The server sends back the HTML content for that page.
- As the client browser receives the HTML, it discovers references to other files needed to assemble and display the entire page, including CSS stylesheets and image files. So it contacts the same server again, once per file, requesting the additional information.
- The server responds, dispatching each file as needed.
- Finally, all the web documents have been transferred over. Now the client performs its most arduous task, which is to render the content. It first parses through the HTML to understand the structure of the content. Then it reviews the CSS selectors, applying any properties to matched elements. Finally, it plugs in any image files and executes any JavaScript code.
Can you believe that all that happens every time you click a link? It’s a lot more complicated than most people realize, but it’s important to understand that client/server conversations are fundamental to the Web.
HTML
Hypertext Markup Language is used to structure content for web browsers. HTML is stored in plain text files with the .html suffix. A simple HTML document looks like this:
<!DOCTYPE html><html><head><title>Page Title</title></head><body><h1>Page Title</h1><p>This is a really interesting paragraph.</p></body></html>
HTML is a complex language with a rich history. This overview will address only the current iteration of HTML (formerly known as HTML5) and will touch on only what is immediately relevant for our practice with D3.
Content Plus Structure
The core function of HTML is to enable you to “mark up” content, thereby giving it structure. Take, for example, this raw text:
Amazing Visualization Tool Cures All Ills A new open-source tool designed for
visualization of data turns out to have an unexpected, positive side effect:
it heals any ailments of the viewer. Leading scientists report that the tool,
called D3000, can cure even the following symptoms: fevers chills general
malaise It achieves this end with a patented, three-step process. Load in data.
Generate a visual representation. Activate magic healing function.
Reading between the lines, we can infer that this is a very exciting news story. But as unstructured content, it is very hard to read. By adding structure, we can differentiate between the headline, for example, and the body of the story.
Amazing Visualization Tool Cures All Ills
A new open-source tool designed for visualization of data turns out to have an unexpected, positive side effect: it heals any ailments of the viewer. Leading scientists report that the tool, called D3000, can cure even the following symptoms:
- fevers
- chills
- general malaise
It achieves this end with a patented, three-step process.
- Load in data.
- Generate a visual representation.
- Activate magic healing function.
That has the same raw text content, but with a visual structure that makes the content more accessible.
HTML is a tool for specifying semantic structure, or attaching hierarchy, relationships, and meaning to content. (HTML doesn’t address the visual representation of a document’s structure—that’s CSS’ job.) Here is our story with each chunk of content replaced by a semantic description of what that content is.
Headline
Paragraph text
- Unordered list item
- Unordered list item
- Unordered list item
Paragraph text
- Numbered list item
- Numbered list item
- Numbered list item
This is the kind of structure we specify with HTML markup.
Adding Structure with Elements
“Marking up” is the process of adding tags to create elements. HTML tags begin with < and end with >, as in <p>, which is the tag indicating a paragraph of text. Tags usually occur in pairs, in which case adding an opening and closing pair of tags creates a new element in the document structure.
Closing tags are indicated with a slash that closes or ends the element, as in </p>. Thus, a paragraph of text may be marked up like the following:
<p>This is a really interesting paragraph.</p>
Some elements can be nested. For example, here we use the em element to add emphasis.
<p>This is a<em>really</em>interesting paragraph.</p>
Nesting elements introduces hierarchy to the document. In this case, em is a child of p because it is contained by p. (Conversely, p is em’s parent.)
When elements are nested, they cannot overlap closures of their parent elements, as doing so would disrupt the hierarchy. For example:
<p>This could cause<em>unexpected</p><p>results</em>, and is best avoided.</p>
Some tags never occur in pairs, such as the img element, which references an image
file. Although HTML no longer requires it, you will sometimes see such
tags written in self-closing fashion, with a trailing slash before the
closing bracket:
<imgsrc="photo.jpg"/>
As of HTML5, the self-closing slash is optional, so the following code is equivalent to the preceding code:
<imgsrc="photo.jpg">
Common Elements
There are hundreds of different HTML elements. Here are some of the most common. We’ll cover additional elements in later chapters. (Reference the excellent Mozilla Developer Network documentation for a complete listing.)
-
<!DOCTYPE html> - The standard document type declaration. Must be the first thing in the document.
-
html - Surrounds all HTML content in a document.
-
head -
The document
headcontains all metadata about the document, such as itstitleand any references to external stylesheets and scripts. -
title - The title of the document. Browsers typically display this at the top of the browser window and use this title when bookmarking a page.
-
body -
Everything not in the
headshould go in thebody. This is the primary visible content of the page. -
h1,h2,h3,h4 -
These let you specify headings of
different levels.
h1is a top-level heading,h2is below that, and so on. -
p - A paragraph!
-
ul,ol,li -
Unordered lists are specified with
ul, most often used for bulleted lists. Ordered lists (ol) are often numbered. Bothulandolshould includelielements to specify list items. -
em - Indicates emphasis. Typically rendered in italics.
-
strong - Indicates additional emphasis. Typically rendered in boldface.
-
a - A link. Typically rendered as underlined, blue text, unless otherwise specified.
-
span -
An arbitrary
spanof text, typically within a larger containing element likep. -
div - An arbitrary division within the document. Used for grouping and containing related elements.
Our earlier example could be given semantic structure by marking it up using some of these element’s tags:
<h1>Amazing Visualization Tool Cures All Ills</h1><p>A new open-source tool designed for visualization of data turns out to have an unexpected, positive side effect: it heals any ailments of the viewer. Leading scientists report that the tool, called D3000, can cure even the following symptoms:</p><ul><li>fevers</li><li>chills</li><li>general malaise</li></ul><p>It achieves this end with a patented, three-step process.</p><ol><li>Load in data.</li><li>Generate a visual representation.</li><li>Activate magic healing function.</li></ol>
When viewed in a web browser, that markup is rendered as shown in Figure 3-1.
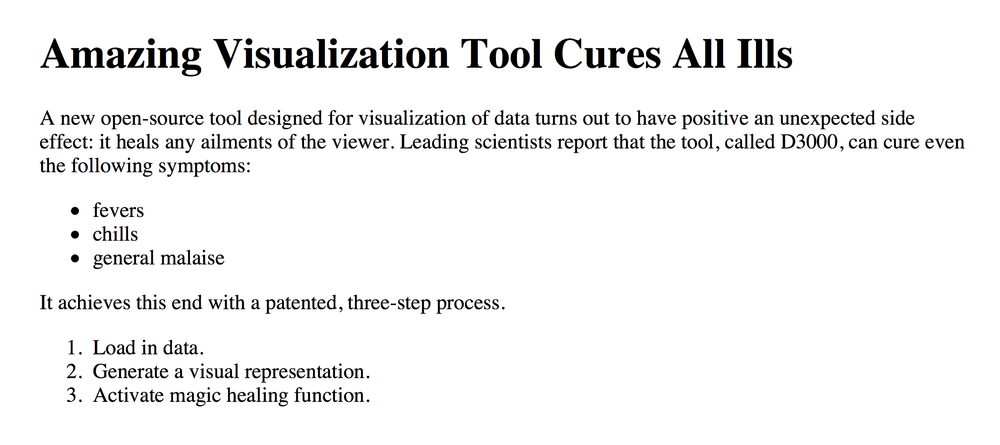
Notice that we specified only the semantic structure of the content; we didn’t specify any visual properties, such as color, type size, indents, or line spacing. Without such instructions, the browser falls back on its default styles, which, frankly, are not too exciting.
Attributes
All HTML elements can be assigned attributes by including property/value pairs in the opening tag.
<tagnameproperty="value"></tagname>
The name of the property is followed by an equals sign, and the value is enclosed within double quotation marks.
Different kinds of elements can be assigned different attributes. For
example, the a link tag can be given an href attribute, whose value
specifies the URL for that link. (href is short for “HTTP reference.”)
<ahref="http://d3js.org/">The D3 website</a>
Some attributes can be assigned to any type of element, such as
class and id.
Classes and IDs
Classes and IDs are extremely useful attributes, as they can be referenced later to identify specific pieces of content. Your CSS and JavaScript code will rely heavily on classes and IDs to identify elements. For example:
<p>Brilliant paragraph</p><p>Insightful paragraph</p><pclass="awesome">Awe-inspiring paragraph</p>
These are three very uplifting paragraphs, but only one of them is truly
awesome, as I’ve indicated with class="awesome". The third paragraph
becomes part of a class of awesome elements, and it can be selected
and manipulated along with other class members. (We’ll get to that in a
moment.)
Elements can be assigned multiple classes, simply by separating them with a space:
<pclass="uplifting">Brilliant paragraph</p><pclass="uplifting">Insightful paragraph</p><pclass="uplifting awesome">Awe-inspiring paragraph</p>
Now, all three paragraphs are uplifting, but only the last one
is both uplifting and awesome.
IDs are used in much the same way, but there can be only one ID per element, and each ID value can be used only once on the page. For example:
<divid="content"><divid="visualization"></div><divid="button"></div></div>
IDs are useful when a single element has some special quality, like
a div that functions as a button or as a container for other content
on the page.
As a general rule, if there will be only one such element on the page,
you can use an id. Otherwise, use a class.
Warning
Class and ID names cannot begin with numerals; they must
begin with alphabetic characters. So id="1" won’t work, but
id="item1" will. The browser will not give you any errors; your code
simply won’t work, and you will go crazy trying to figure out why.
Comments
As code grows in size and complexity, it is good practice to include comments. These are friendly notes that you leave for yourself to remind you why you wrote the code the way you did. If you are like me, you will revisit projects only weeks later and have lost all recollections of it. Commenting is an easy way to reach out and provide guidance and solace to your future (and very confused) self.
In HTML, comments are written in the following format:
<!-- Your comment here -->Anything between the <!-- and --> will be ignored by the web browser.
DOM
The term Document Object Model refers to the hierarchical structure of HTML. Each pair of bracketed tags (or, in some cases, a single tag) is an element, and we refer to elements’ relative relationships to each other in human terms: parent, child, sibling, ancestor, and descendant. For example, in this HTML:
<html><body><h1>Breaking News</h1><p></p></body></html>
body is the parent element to both of its children, h1 and p
(which are siblings to each other). All elements on the page are
descendants of html.
Web browsers parse the DOM to make sense of a page’s content.
As coders building visualizations, we care about the DOM, because our
code must navigate its hierarchy to apply styles and actions to
its elements. We don’t want to make all the div elements blue; we
need to know how to select just the divs of the class sky and make
them blue.
Developer Tools
In the olden days, the web development process went like this:
Browsers were notoriously secretive about what went on inside the rendering engine, which made debugging a total nightmare. (Seriously, in the late 1990s and early 2000s, I literally had nightmares about this.) Fortunately, we live in a more enlightened age, and every modern-day browser has built-in developer tools that expose the inner workings of the beast and enable us to poke around under the hood (to mix incompatible metaphors).
All this is to say that developer tools are a big deal and you will rely on them heavily to both test your code and, when something breaks, figure out what went wrong.
Let’s start with the simplest possible use of the developer tools: viewing the raw source code of an HTML page (see Figure 3-2).
Every browser supports this, although different browsers hide this option in different places. In Chrome 23.0, it’s under View→Developer→View Source. In Firefox 17.0, look under Tools→Web Developer→Page Source. In Safari 6.0, it’s under Develop→Show Page Source (although you must first set the “Develop” menu to display under Safari→Preferences→Advanced). Going forward, I’m going to assume that you’re using the newest version of whatever browser you choose.

That gets you the raw HTML, but if any D3 or JavaScript code has been executed, the current DOM may be vastly different.
Fortunately, your browser’s developer tools enable you to see the current state of the DOM. And, again, the developer tools are different in every browser. In Chrome, find them under View→Developer→Developer Tools. In Firefox, try Tools→Web Developer. In Safari, first enable the developer tools (in Safari→Preferences→Advanced). Then, in the Develop menu, choose Show Web Inspector. In any browser, you can also use the corresponding keyboard shortcut (as shown adjacent to the menu item) or right-click and choose “inspect element” or something similar.
Until recently, Safari and Chrome shared the same developer tools, but with Safari 6.0, Apple completely redesigned their dev tools, much to the dismay of many web-developing Safari fans. (The new tools are very hard to navigate, and I don’t think I’m the only one who feels that way.) Whichever browser you use might look a bit different from my screenshots, but the functionality will be very similar.
Figure 3-3 shows the Elements tab of Chrome’s web inspector. Here we can see the current state of the DOM. This is useful because your code will modify DOM elements dynamically. In the web inspector, you can watch elements as they change.
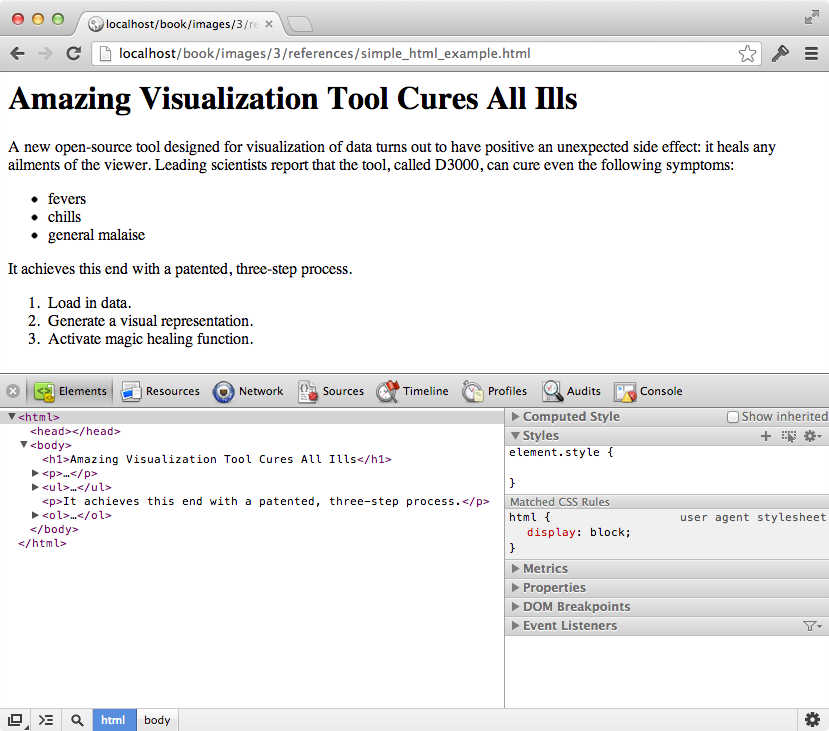
If you look closely, you’ll already see some differences between the raw
HTML and the DOM, including the fact that Chrome generated the required
html, head, and body elements. (I was lazy and didn’t include them
in my original HTML.)
One more thing: why am I focusing on Chrome, Firefox, and Safari? Why not Internet Explorer, Opera, or the many other browsers out there? For one, it’s best to develop your projects using a browser with the broadest support for web standards. Internet Explorer made huge progress with versions 9 and 10, but Chrome, Firefox, and Safari are understood to have the broadest standards support, and they are updated more frequently.
Second, you’re going to spend a lot of time using the developer tools, so you should develop with a browser that has tools you enjoy using. I was pretty devoted to Safari until the 6.0 update changed everything. Now I’m going back and forth between Chrome and Firefox’s new dev tools. I recommend you try them all and decide what works best for you.
Rendering and the Box Model
Rendering is the process by which browsers, after parsing the HTML and generating the DOM, apply visual rules to the DOM contents and draw those pixels to the screen.
The most important thing to keep in mind when considering how browsers render content is this: to a browser, everything is a box.
Paragraphs, divs, spans—all are boxes in the sense that they are
two-dimensional rectangles, with properties that any rectangle can have,
such as width, height, and positions in space. Even if something looks
curved or irregularly shaped, rest assured, to the browser, it is merely
another rectangular box.
You can see these boxes with the help of the web inspector. Just mouse over any element, and the box associated with that element is highlighted in blue, as shown in Figure 3-4.
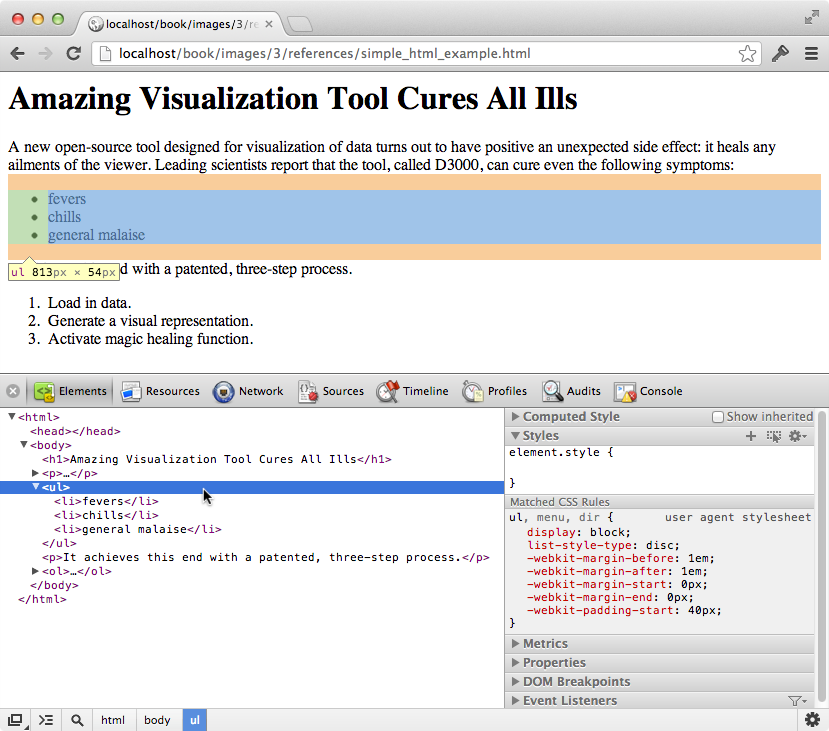
There’s a lot of information about the ul unordered list here. Note
that the list’s total dimensions (width and height) are shown in the
yellow box at the element’s lower-left corner. Also, the list’s position
in the DOM hierarchy is indicated in the lower-left corner
of the inspector: html > body > ul.
The box for the ul expands to fill the width of the entire window
because it is a block-level element. (Note how under “Computed Style”
is listed display: block.) This is in contrast to inline elements,
which rest in line with each other, not stacked on top of each other
like blocks. Common inline elements include strong, em, a, and
span.
By default, block-level elements expand to fill their container elements and force any subsequent sibling elements further down the page. Inline elements do not expand to fill extra space, and happily exist side by side, next to their fellow inline neighbors. (Discussion question: what kind of element would you rather be?)
CSS
Cascading Style Sheets are used to style the visual presentation of DOM elements. A simple CSS stylesheet looks like the following:
body{background-color:white;color:black;}
CSS styles consist of selectors and properties. Selectors are followed by properties, grouped in curly brackets. A property and its value are separated by a colon, and the line is terminated with a semicolon, like the following:
selector{property:value;property:value;property:value;}
The same properties can be applied to multiple selectors at once by separating the selectors with a comma, as in the following:
selectorA,selectorB,selectorC{property:value;property:value;property:value;}
For example, you might want to specify that both p paragraphs and li
list items should use the same font size, line height, and color.
p,li{font-size:12px;line-height:14px;color:orange;}
Collectively, this whole chunk of code (selectors and bracketed properties) is called a CSS rule.
Selectors
D3 uses CSS-style selectors to identify elements on which to operate, so it’s important to understand how to use them.
Selectors identify specific elements to which styles will be applied. There are several different kinds of selectors. We’ll use only the simplest ones in this book.
h1/* Selects all level 1 headings */p/* Selects all paragraphs */strong/* Selects all strong elements */em/* Selects all em elements */div/* Selects all divs */
h1em/* Selects em elements contained in an h1 */divp/* Selects p elements contained in a div */
.caption/* Selects elements with class "caption" */.label/* Selects elements with class "label" */.axis/* Selects elements with class "axis" */
Because elements can have more than one class, you can target elements with multiple classes by stringing the classes together, as in the following:
.bar.highlight/* Could target highlighted bars */.axis.x/* Could target an x-axis */.axis.y/* Could target a y-axis */
.axis could be used to apply styles to both axes, for example, whereas
.axis.x would apply only to the x-axis.
#header/* Selects element with ID "header" */#nav/* Selects element with ID "nav" */#export/* Selects element with ID "export" */
Selectors get progressively more useful as you combine them in different ways to target specific elements. You can string selectors together to get very specific results. For example:
div.sidebar/* Selects divs with class "sidebar", butnot other elements with that class */#button.on/* Selects element with ID "button", butonly when the class "on" is applied */
Remember, because the DOM is dynamic, classes and IDs can be added and removed, so you might have CSS rules that apply only in certain scenarios.
For details on additional selectors, see the Mozilla Developer Network.
Properties and Values
Groups of property/value pairs cumulatively form the styles:
margin:10px;padding:25px;background-color:yellow;color:pink;font-family:Helvetica,Arial,sans-serif;
At the risk of stating the obvious, notice that each property expects a
different kind of information. color wants a color, margin requires
a measurement (here in px or pixels), and so on.
By the way, colors can be specified in several different formats:
-
Named colors:
orange -
Hex values:
#3388aaor#38a -
RGB values:
rgb(10, 150, 20) -
RGB with alpha transparency:
rgba(10, 150, 20, 0.5)
You can find exhaustive lists of properties online; I won’t try to list them here. Instead, I’ll just introduce relevant properties as we go.
Comments
/* By the way, this is what a comment looks likein CSS. They start with a slash-asterisk pair,and end with an asterisk-slash pair. Anythingin between will be ignored. */
Referencing Styles
There are three common ways to apply CSS style rules to your HTML document.
Embed the CSS in your HTML.
If you embed the CSS rules in your HTML document, you can keep
everything in one file. In the document head, include all CSS code
within a style element.
<html><head><styletype="text/css">p{font-size:24px;font-weight:bold;background-color:red;color:white;}</style></head><body><p>If I were to ask you, as a mere paragraph, would you say that I have style?</p></body></html>
That HTML page with CSS renders as shown in Figure 3-5.

Embedding is the simplest option, but I generally prefer to keep different kinds of code (for example, HTML, CSS, JavaScript) in separate documents.
Reference an external stylesheet from the HTML.
To store CSS outside of your HTML, save it in a plain-text file with a
.css suffix, such as style.css. Then use a link element in the
document head to reference the external CSS file, like so:
<html><head><linkrel="stylesheet"href="style.css"></head><body><p>If I were to ask you, as a mere paragraph, would you say that I have style?</p></body></html>
This example renders exactly the same as the prior example.
Attach inline styles.
A third method is to attach style rules inline directly to elements in
the HTML. You can do this by adding a style attribute to any element.
Then include the CSS rules within the double quotation marks. The result is shown in Figure 3-6.
<pstyle="color: blue; font-size: 48px; font-style: italic;">Inline styles are kind of a hassle</p>

Because inline styles are attached directly to elements, there is no need for selectors.
Inline styles are messy and hard to read, but they are useful for giving special treatment to a single element, when that style information doesn’t make sense in a larger stylesheet. We’ll learn how to apply inline styles programmatically with D3 (which is much easier than typing them in by hand, one at a time).
Inheritance, Cascading, and Specificity
Many style properties are inherited by an element’s descendants unless
otherwise specified. For example, this document’s style rule applies to
the div:
<html><head><title></title><styletype="text/css">div{background-color:red;font-size:24px;font-weight:bold;color:white;}</style></head><body><p>I am a sibling to the div.</p><div><p>I am a descendant and child of the div.</p></div></body></html>
Yet when this page renders, the styles intended for the div (red
background, bold text, and so on) are inherited by the second
paragraph, as shown in Figure 3-7, because that p is a descendant of the styled div.

Inheritance is a great feature of CSS, as children adopt the styles of their parents. (There’s a metaphor in there somewhere.)
Finally, an answer to the most pressing question of the day: why are
they called Cascading Style Sheets? It’s because selector matches
cascade from the top down. When more than one selector applies to an
element, the later rule generally overrides the earlier one. For
example, the following rules set the text of all paragraph elements in the document to be
blue except for those with the class of highlight applied, which will be black and have a yellow background, as shown in Figure 3-8. The rules for p are applied first, but then the rules for p.highlight override the less specific p rules.
p{color:blue;}p.highlight{color:black;background-color:yellow;}

Later rules generally override earlier ones, but not always. The true
logic has to do with the specificity of each selector. The
p.highlight selector would override the p rule even if it were
listed first, simply because it is a more specific selector. If two
selectors have the same specificity, then the later one will be applied.
This is one of the main causes of confusion with CSS. The rules for calculating specificity are inscrutable, and I won’t cover them here. To save yourself headaches later, keep your selectors clear and easy to read. Start with general selectors on top, and work your way down to more specific ones, and you’ll be all right.
JavaScript
JavaScript is the scripting language that can make pages dynamic by manipulating the DOM after a page has already loaded in the browser. As I mentioned earlier, getting to know D3 is also a process of getting to know JavaScript. We’ll dig in deeper as we go, but here is a taste to get you started.
Hello, Console
Normally, we write JavaScript code (or, a “script”) in a text file, and then load that file to the browser in a web page. But you can also just type JavaScript code directly into your browser. This is an easy and quick way to get your feet wet and test out code. We’ll also use the JavaScript console for debugging, as it’s an essential tool for seeing what’s going on with your code.
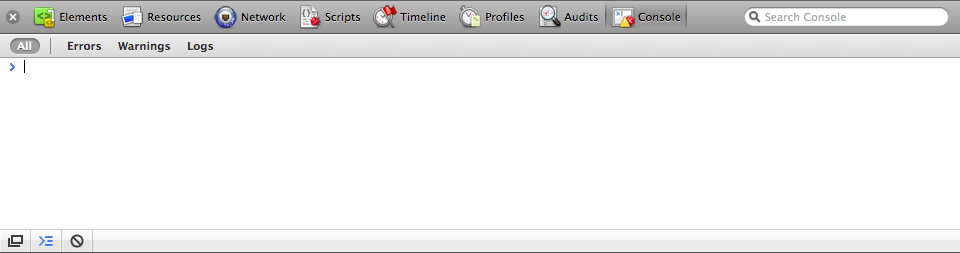
In Chrome, select View→Developer→JavaScript Console. In Firefox, choose Tools→Web Developer→Web Console. In Safari, go to Develop→Show Error Console (see Figure 3-9).
The console accepts one line of code at a time, and it always spits back
the result of whatever you input. For example, if you enter the number
7, the console returns the mind-numbingly obvious result of 7.
Brilliant.
Other times, you’ll want your script to print values out to the console
automatically, so you can keep an eye on what’s going on. As you’ll see
in some examples that follow, you can use console.log("something"); to do
that.
Type the following examples into the console to see how it works.
Variables
Variables are containers for data. A simple variable holds one value:
varnumber=5;
In that statement, var indicates you are declaring a new
variable, the name of which is number. The equals sign is an
assignment operator because it takes the value on the right (5) and
assigns it to the variable on the left (number). So when you see
something such as:
defaultColor="hot pink";
try to read the equals sign not as “equals” but as “is set to.” So that statement
could be stated in plain English as “The variable defaultColor is
set to hot pink.”
As you’ve just seen, variables can store numeric values as well as strings of text, so called because they are formed by stringing together individual characters of text. Strings must be enclosed by quotation marks. True or false (Boolean) values can also be stored:
varthisMakesSenseSoFar=true;
Also note that in JavaScript, statements are concluded with a semicolon.
You can try making some variables yourself in the console. For example,
type var amount = 200, then press Enter, then on a new line just enter
amount and press Enter. You should see 200 returned to you in the
console—proof that JavaScript remembered the value you assigned to
amount!
Other Variable Types
A variable is a datum, the smallest building block of data. The variable is the foundation of all other data structures, which are simply different configurations of variables.
Now we’ll address some of these more complex forms of data, including arrays, objects, and arrays of objects. You might want to skip this section for now, but reference it later, once you’re ready to load your own data into D3.
Arrays
An array is a sequence of values, conveniently stored in a single variable.
Keeping track of related values in separate variables is inefficient:
varnumberA=5;varnumberB=10;varnumberC=15;varnumberD=20;varnumberE=25;
Rewritten as an array, those values are much simpler. Hard brackets []
indicate an array, and each value is separated by a comma:
varnumbers=[5,10,15,20,25];
Arrays are ubiquitous in data visualization, so you will become very comfortable with them. You can access (retrieve) a value in an array by using bracket notation:
numbers[2]//Returns 15
The numeral in the bracket refers to a corresponding position in the array. Remember, array positions begin counting at zero, so the first position is 0, the second position is 1, and so on:
numbers[0]//Returns 5numbers[1]//Returns 10numbers[2]//Returns 15numbers[3]//Returns 20numbers[4]//Returns 25
Some people find it helpful to think of arrays in spatial terms, as though they have rows and columns, like in a spreadsheet:
| Position | Value |
0 | 5 |
1 | 10 |
2 | 15 |
3 | 20 |
4 | 25 |
Arrays can contain any type of data, not just integers:
varpercentages=[0.55,0.32,0.91];varnames=["Ernie","Bert","Oscar"];percentages[1]//Returns 0.32names[1]//Returns "Bert"
Although I don’t recommend it, different types of values can even be stored within the same array:
varmishmash=[1,2,3,4.5,5.6,"oh boy","say it isn't",true];
Objects
Arrays are great for simple lists of values, but with more complex datasets, you’ll want to put your data into an object. For our purposes,
think of a JavaScript object as a custom data structure. We use curly
brackets {} to indicate an object. In between the brackets, we include
properties and values. A colon : separates each property and its value,
and a comma separates each property/value pair:
varfruit={kind:"grape",color:"red",quantity:12,tasty:true};
To reference each value, we use dot notation, specifying the name of the property:
fruit.kind//Returns "grape"fruit.color//Returns "red"fruit.quantity//Returns 12fruit.tasty//Returns true
Think of the value as “belonging” to the object. Oh, look, some fruit.
“What kind of fruit is that?” you might ask. As it turns out,
fruit.kind is "grape". “Are they tasty?” Oh, definitely, because
fruit.tasty is true.
Objects and Arrays
You can combine these two structures to create arrays of objects, or objects of arrays, or objects of objects or, well, basically whatever structure makes sense for your dataset.
Let’s say we have acquired a couple more pieces of fruit, and we want to
expand our catalog accordingly. We use hard brackets [] on the
outside, to indicate an array, followed by curly brackets {} and
object notation on the inside, with each object separated by a comma:
varfruits=[{kind:"grape",color:"red",quantity:12,tasty:true},{kind:"kiwi",color:"brown",quantity:98,tasty:true},{kind:"banana",color:"yellow",quantity:0,tasty:true}];
To access this data, we just follow the trail of properties down to the
values we want. Remember, [] means array, and {} means object.
fruits is an array, so first we use bracket notation to specify an
array index:
fruits[1]
Next, each array element is an object, so just tack on a dot and a property:
fruits[1].quantity//Returns 98
Here’s a map of how to access every value in the fruits array of
objects:
fruits[0].kind=="grape"fruits[0].color=="red"fruits[0].quantity==12fruits[0].tasty==truefruits[1].kind=="kiwi"fruits[1].color=="brown"fruits[1].quantity==98fruits[1].tasty==truefruits[2].kind=="banana"fruits[2].color=="yellow"fruits[2].quantity==0fruits[2].tasty==true
Yes, that’s right, we have fruits[2].quantity bananas.
JSON
At some point in your D3 career, you will encounter JavaScript Object Notation. You can read up on the details, but JSON is basically a specific syntax for organizing data as JavaScript objects. The syntax is optimized for use with JavaScript (obviously) and AJAX requests, which is why you’ll see a lot of web-based application programming interfaces (APIs) that return data formatted as JSON. It’s faster and easier to parse with JavaScript than XML, and of course D3 works well with it.
All that, and it doesn’t look much weirder than what we’ve already seen:
{"kind":"grape","color":"red","quantity":12,"tasty":true}
The only difference here is that our property names are now surrounded by
double quotation marks "", making them string values.
JSON objects, like all other JavaScript objects, can of course be stored in variables like so:
varjsonFruit={"kind":"grape","color":"red","quantity":12,"tasty":true};
GeoJSON
Just as JSON is just a formalization of existing JavaScript object syntax, GeoJSON is a formalized syntax of JSON objects, optimized for storing geodata. All GeoJSON object are JSON objects, and all JSON objects are JavaScript objects.
GeoJSON can store points in geographical space (typically as longitude/latitude coordinates), but also shapes (such as lines and polygons) and other spatial features. If you have a lot of geodata, it’s worth it to parse it into GeoJSON format for best use with D3.
We’ll get into the details of GeoJSON when we talk about geomaps, but for now, just know that this is what simple GeoJSON data could look like the following:
{"type":"FeatureCollection","features":[{"type":"Feature","geometry":{"type":"Point","coordinates":[150.1282427,-24.471803]},"properties":{"type":"town"}}]}
Confusingly, longitude is always listed before latitude. Get used to thinking in terms of lon/lat instead of lat/lon.
Mathematical Operators
You can add, subtract, multiply, and divide values using the following operators, respectively:
+   //Add
-   //Subtract
*   //Multiply
/   //Divide
For example, type 8 * 2 into the console, press Enter, and you should
see 16. More examples:
1+2//Returns 310-0.5//Retuns 9.533*3//Returns 993/4//Returns 0.75
Comparison Operators
You can compare values against each other using the following operators:
==//Equal to!=//Not equal to<//Less than>//Greater than<=//Less than or equal to>=//Greater than or equal to
These all compare some value on the left to some value on the right. If
the result is true, then true is returned. If the result is false,
false is returned.
Try it! Type each of the following into the console and see what you get:
3==33==53>=33>=2100<2298!=298
(JavaScript also offers the === and !== operators, which perform equality comparisons without type coercion, but I won’t be addressing that distinction in this book.)
Control Structures
Whenever your code needs to make a decision or repeat something, you
need a control structure. There are lots to choose from, but we are
primarily interested in if statements and for loops.
if() only
An if statement uses comparison operators to determine if a statement
is true or false:
if(test){//Code to run if true}
If the test between parentheses is true, then the code between the
curly brackets is run. If the test turns up false, then the bracketed
code is ignored, and life goes on. (Technically, life goes on either
way.)
if(3<5){console.log("Eureka! Three is less than five!");}
In the preceding example, the bracketed code will always be executed,
because 3 < 5 is always true. if statements are more useful when
comparing variables or other conditions that change.
if(someValue<anotherValue){//Set someValue to anotherValue, thereby restoring//a sense of balance and equilibrium to the world.someValue=anotherValue;}
for() now
You can use for loops to repeatedly execute the same code, with slight
variations. A for loop uses this syntax:
for(initialization;test;update){//Code to run each time through the loop}
They are so-called because they loop through the code for as many
times as specified. First, the initialization statement is run. Then,
the test is evaluated, like a mini if statement. If the test is true,
then the bracketed code is run. Finally, the update statement is run,
and the test is reevaluated.
The most common application of a for loop is to increase some variable
by 1 each time through the loop. The test statement can then control
how many times the loop is run by referencing that value. (The variable
is often named i, purely by convention, because it is short and easy
to type.)
for(vari=0;i<5;i++){console.log(i);//Prints value to console}
The preceding for loop prints the following to the console:
0
1
2
3
4
The first time through, a variable named i is declared and set to
zero. i is less than five, so the bracketed code is run, printing the
current value of i (zero) to the console. Finally, the value of i is
increased by one. (i++ is shorthand for i = i + 1.) So now i is
1, so the test again evaluates as true, the bracketed code is run
again, but this time the value printed to the console is 1.
As you can see, reading prose descriptions of loops is about as
interesting as executing them by hand yourself. This is why we invented
computers. So I’ll skip to the end and point out that after the final
iteration, i is increased to 5, after which the test returns false,
and the loop is over.
It’s important to note that counting began at zero, and not one. That
is, the “first” value of i was 0. Why not 1? This is another
arbitrary convention, but it nicely parallels how computers count arrays
of values.
What arrays are made for()
Code-based data visualization would not be possible without arrays and
the mighty for() loop. Together, they form a data geek’s dynamic duo.
(If you do not consider yourself a “data geek,” then may I remind you
that you are reading a book titled Interactive Data Visualization for
the Web?)
An array organizes lots of data values in one convenient place. Then
for() can quickly “loop” through every value in an array and perform
some action with it—such as, express the value as a visual form. D3
often manages this looping for us, such as with its magical data()
method.
Note this example, which loops through each of the values in an array
called numbers:
varnumbers=[8,100,22,98,99,45];for(vari=0;i<numbers.length;i++){console.log(numbers[i]);//Print value to console}
See that numbers.length? That’s the beautiful part. length is a
property of every array. In this case, numbers contains six values, so
numbers.length resolves to 6, and the loop runs six times. If
numbers were 10 positions long, the loop would run 10 times. If it
were 10 million positions long … yeah, you get it. This is what
computers are good at: taking a set of instructions and executing them
over and over. And this is at the heart of why data visualization can be
so rewarding—you design and code the visualization system, and the
system will respond appropriately, even as you feed it different data.
The system’s mapping rules are consistent, even when the data is not.
Functions
Functions are chunks of code that do things.
More specifically, functions are special because they can take arguments or parameters as input, and then return values as output. Parentheses are used to call (execute) a function. If that function requires any arguments (input values), then they are passed to the function by including them in the parentheses.
Whenever you see something like the following code, you know it’s a function:
calculateGratuity(38);
In fact, you’ve already seen functions at work with console.log, as
in the following:
console.log("Look at me. I can do stuff!");
But the best part about functions is that you can define your own. There are several ways to define functions in JavaScript, but here’s the simplest, which I’ll use throughout this book:
varcalculateGratuity=function(bill){returnbill*0.2;};
This declares a new variable named calculateGratuity. Then, instead of
assigning a simple number or string, we store an entire function in the
variable. In the parentheses, we name bill, another variable to be
used only by the function itself. bill is the expected input. When
called, the function will take that input, multiply it by 0.2, and
return the result as its output.
So now if we call:
calculateGratuity(38);
the function returns 7.6. Not bad—a 20 percent tip!
Of course, you could store the output to use it elsewhere later, as in:
vartip=calculateGratuity(38);console.log(tip);//Prints 7.6 to the console
There are also anonymous functions that, unlike calculateGratuity,
don’t have names. Anonymous functions are used all the time with D3, but
I’ll introduce them later.
Comments
/* JavaScript supports CSS-style comments like this. */// But double-slashes can be used as well.// Anything following // on the same line will be ignored.// This is helpful for including brief notes to yourself// as to what each line of code does, as in:console.log("Brilliant");//Prints "Brilliant" to the console
Referencing Scripts
Scripts can be included directly in HTML, between two script tags, as in:
<body><scripttype="text/javascript">alert("Hello, world!");</script></body>
or stored in a separate file with a .js suffix, and then referenced
somewhere in the HTML (could be in the head, as shown here, or also just before the end of the closing body tag):
<head><title>Page Title</title><scripttype="text/javascript"src="myscript.js"></script></head>
JavaScript Gotchas
As a bonus, and at no extra charge, I would like to share with you my top four JavaScript gotchas: things that, had I known earlier, would have saved me many hours of late-night debugging sessions, anxiety-induced panic, and increased cortisol levels. You might want to come back and reference this section later.
Dynamic typing
I do love how your fingers flutter across the keyboard, but that’s not
what I’m talking about. No, JavaScript is a loosely typed language,
meaning you don’t have to specify what type of information will be
stored in a variable in advance. Many other languages, like Java (which
is completely different from JavaScript), require you to declare a
variable’s type, such as int, float, boolean, or String:
//Declaring variables in Javaintnumber=5;floatvalue=12.3467;booleanactive=true;Stringtext="Crystal clear";
JavaScript, however, automatically types a variable based on what kind
of information you assign to it. (Note that '' or "" indicate string
values. I prefer double quotation marks "", but some people like
singles ''.)
//Declaring variables in JavaScriptvarnumber=5;varvalue=12.3467;varactive=true;vartext="Crystal clear";
How boring—var, var, var, var!—yet handy, as we can declare
and name variables before we even know what type of data will go into
them. You can even change a variable’s type on-the-fly without
JavaScript freaking out on you:
varvalue=100;value=99.9999;value=false;value="This can't possibly work.";value="Argh, it does work! No errorzzzz!";
I mention this because one day a numeric value will be accidentally
stored as a string, and it will cause some part of your code to behave
strangely, and basically I don’t want you to come crying to me when that
happens. Thus, know that whenever a variable’s type is in doubt, you can
employ the typeof operator:
typeof67;//Returns "number"varmyName="Scott";typeofmyName;//Returns "string"myName=true;typeofmyName;//Returns "boolean"
Variable hoisting
Contrary to what you would expect, JavaScript code is usually, but not
always, executed in linear, top-to-bottom order. For example, in this
code, when would you expect the variable i to be established?
varnumLoops=100;for(vari=0;i<numLoops;i++){console.log(i);}
In many other languages, i would be declared right when the for loop
begins, as you’d expect. But thanks to a phenomenon known as variable
hoisting, in JavaScript, variable declarations are hoisted up to the
top of the function context in which they reside. So in our example, i
is actually declared before the for loop even begins. The following
is equivalent:
varnumLoops=100;vari;for(i=0;i<numLoops;i++){console.log(i);}
This can be problematic when you have conflicting variable names, as a variable that you thought existed only later in the code is actually present right at the beginning.
Function-level scope
In programming, the concept of variable scope helps us identify which variables are accessible in which contexts. Generally, it is a bad idea to have every value accessible from everywhere else because you’d end up with so many conflicts and accidental value changes that you would just go crazy.
Many languages use block-level scope, in which variables exist only
within the current “block” of code, usually indicated by curly braces.
With block-level scope, our i would exist only within the context of
the for loop, for example, so any attempts to read the value of i or
change i outside of the loop would fail. This is nice because you
could establish other variables from within your loop and know that they
wouldn’t conflict with variables that exist elsewhere.
In JavaScript, however, variables are scoped at the function level, meaning they are accessible anywhere within the function (not block) in which they reside.
This is primarily something to be aware of if you’re used to other languages. Bottom line: You can keep values contained by wrapping them within functions.
Global namespace
Speaking of variable conflicts, please do me a favor: open any web page,
activate the JavaScript console, type window, and click the gray disclosure triangle to view its contents.
I know it feels like you just entered the matrix, but this is actually called “the global namespace,” which might sound even cooler (see Figure 3-10).
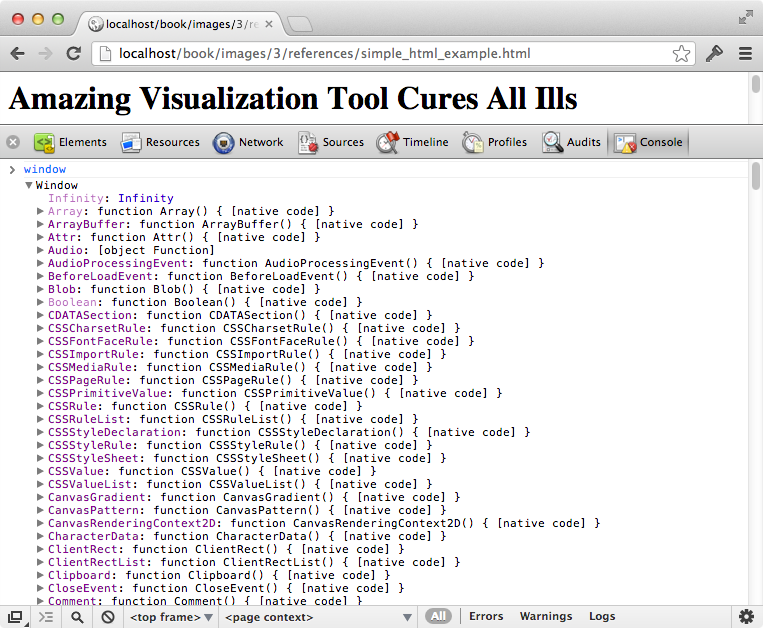
window is the topmost object in the browser’s hierarchy of JavaScript
elements, and all of these objects and values you see beneath window
exist at the global level. What this means is that every time you
declare a new variable, you are adding a new value to window. Or, as
righteous JavaScript coders like to say, you are polluting the global
namespace. (Surprisingly, most people who write things like this in
online forums are actually quite friendly in person.)
For example, try typing this into the console: var zebras = "amazing".
Then type window again, and scroll all the way down to the bottom,
where you should now see zebras, as shown in Figure 3-11.
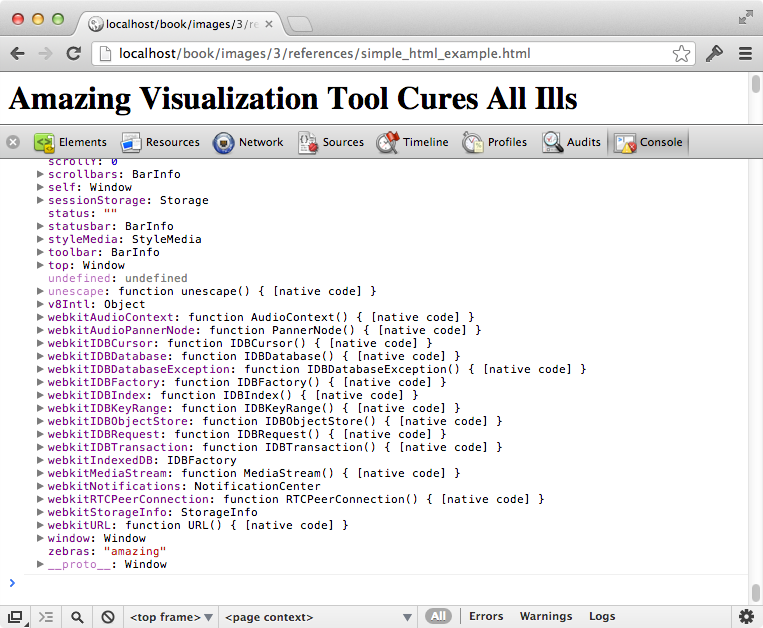
(Confusingly, it is also possible to define new variables in JavaScript without using the standard var declaration, so typing simply zebras = "amazing" would have the same effect as that shown.)
What’s so wrong with adding values to window? As you get started,
nothing at all. But as your projects grow in complexity, and especially
if you begin to incorporate other non-D3 JavaScript code (such as
jQuery, Facebook “Like” buttons, or Google Analytics tracking code), at
some point you’re bound to run into a conflict because you’re using the
variable zebras for your project, but zebraTracker.js is also using
a variable with the same name! The result: chaos. Or at least some bad
data, which could lead to unexpected behavior or errors.
There are two easy workarounds (and, to clarify, you probably don’t have to worry about this until later):
- Declare variables only within other functions. This is not usually feasible, but the function-level scope will prevent local variables from conflicting with others.
- Declare a single global object, and attach all of your would-be global variables to that object. For example:
varVis={};//Declare empty global objectVis.zebras="still pretty amazing";Vis.monkeys="too funny LOL";Vis.fish="you know, not bad";
All of your weird animal-related variables are no longer polluting the global namespace, but instead they all exist as values stored within your single, global object, Vis. Of course, Vis could be named whatever you like, but Menagerie is harder to type. Regardless, the only naming conflict you’ll have with other scripts is if one of them also wants to have a global object with the same name (Vis), which is far less likely.
SVG
D3 is most useful when used to generate and manipulate visuals as
Scalable Vector Graphics (SVG). Drawing with divs and other native HTML
elements is possible, but a bit clunky and subject to the usual
inconsistencies across different browsers. Using SVG is more reliable,
visually consistent, and faster.
Figure 3-12 shows a small circle, and its SVG code follows.
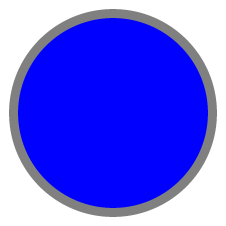
<svgwidth="50"height="50"><circlecx="25"cy="25"r="22"fill="blue"stroke="gray"stroke-width="2"/></svg>
Vector drawing software like Illustrator can be used to generate SVG files, but we need to learn how to generate them with code.
The SVG Element
SVG is a text-based image format. Each SVG image is defined using markup code similar to HTML, and SVG code can be included directly within any HTML document, or inserted dynamically into the DOM. Every web browser supports SVG except Internet Explorer versions 8 and earlier. SVG is XML-based, so you’ll notice that elements that don’t have a closing tag must be self-closing. For example:
<element></element><!-- Uses closing tag --><element/><!-- Self-closing tag -->
Before you can draw anything, you must create an SVG element. Think of
the SVG element as a canvas on which your visuals are rendered. (In that
respect, SVG is conceptually similar to HTML’s canvas element.) At a
minimum, it’s good to specify width and height values. If you don’t
specify these, the SVG will behave like a typically greedy, block-level
HTML element and take up as much room as it can within its enclosing
element:
<svgwidth="500"height="50"></svg>
Note that pixels are the default measurement units, so we can specify
dimensions of 500 and 50, not 500px and 50px. We could have
specified px explicitly, or any number of other supported units,
including em, pt, in, cm, and mm.
Simple Shapes
There are a number of visual elements that you can include between those
svg tags, including rect, circle, ellipse, line, text, and
path. (Sorry, zebras is not valid in this context.)
If you’re familiar with computer graphics programming, you’ll recognize
the usual pixel-based coordinates system in which 0,0 is the top-left
corner of the drawing space. Increasing x values move to the right,
while increasing y values move down (see Figure 3-13).

rect draws a rectangle. Use x and y to specify the coordinates of
the upper-left corner, and width and height to specify the
dimensions. This rectangle fills the entire space of our SVG, as shown in Figure 3-14:
<rectx="0"y="0"width="500"height="50"/>

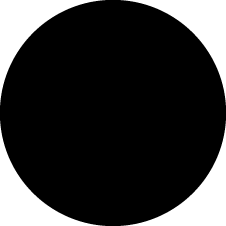
circle draws a circle. Use cx and cy to specify the coordinates of
the center, and r to specify the radius. This circle is centered in
the middle of our 500-pixel-wide SVG because its cx (“center-x”) value
is 250 (see Figure 3-15):
<circlecx="250"cy="25"r="25"/>
ellipse is similar, but expects separate radius values for each axis.
Instead of r, use rx and ry to obtain the result shown in Figure 3-16:
<ellipsecx="250"cy="25"rx="100"ry="25"/>
line draws a line, as shown in Figure 3-17. Use x1 and y1 to specify the coordinates of one
end of the line, and x2 and y2 to specify the coordinates of the
other end. A stroke color must be specified for the line to be
visible:
<linex1="0"y1="0"x2="500"y2="50"stroke="black"/>

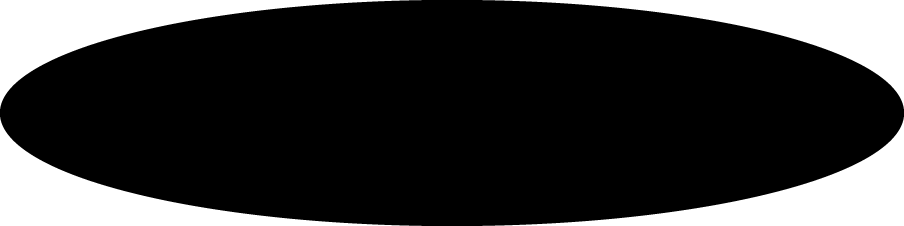
text renders text. Use x to specify the position of the left edge,
and y to specify the vertical position of the type’s baseline. (Baseline is a typographical term for the invisible line on which the letters appear to rest. Portions of letters such as “p” and “y” that extend below the baseline are called descenders.) The result of the following code is displayed in Figure 3-18:
<textx="250"y="25">Easy-peasy</text>

text will inherit the CSS-specified font styles of its parent element
unless specified otherwise. (More on styling text in a moment.) We could
override that formatting as follows and obtain the result shown in Figure 3-19:
<textx="250"y="25"font-family="serif"font-size="25"fill="gray">Easy-peasy</text>

Also note that when any visual element runs up against the edge of the
SVG, it will be clipped. Be careful when using text so your descenders
don’t get cut off (ouch!). You can see this happen in Figure 3-20 when we set the
baseline (y) to 50, the same as the height of our SVG:
<textx="250"y="50"font-family="serif"font-size="25"fill="gray">Easy-peasy</text>

path is for drawing anything more complex than the preceding shapes (like
country outlines for geomaps), and will be explained separately. For
now, we’ll work with simple shapes.
Styling SVG Elements
SVG’s default style is a black fill with no stroke. If you want anything else, you’ll have to apply styles to your elements. Common SVG properties are as follows:
-
fill - A color value. Just as with CSS, colors can be specified as named colors, hex values, or RGB or RGBA values.
-
stroke - A color value.
-
stroke-width - A numeric measurement (typically in pixels).
-
opacity - A numeric value between 0.0 (completely transparent) and 1.0 (completely opaque).
With text, you can also use these properties, which work just like in
CSS:
-
font-family -
font-size
In another parallel to CSS, there are two ways to apply styles to an SVG element: either directly (inline) as an attribute of the element, or with a CSS style rule.
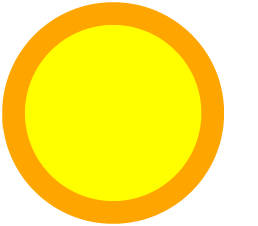
Here are some style properties applied directly to a circle as
attributes, with the result shown in Figure 3-21:
<circlecx="25"cy="25"r="22"fill="yellow"stroke="orange"stroke-width="5"/>
Alternatively, we could strip the style attributes and assign the circle
a class (just as if it were a normal HTML element):
<circlecx="25"cy="25"r="22"class="pumpkin"/>
and then put the fill, stroke, and stroke-width rules into a CSS
style that targets the new class:
.pumpkin{fill:yellow;stroke:orange;stroke-width:5;}
The CSS approach has a few obvious benefits:
- You can specify a style once and have it applied to multiple elements.
- CSS code is easier to read than inline attributes.
- For those reasons, the CSS approach might be more maintainable and make design changes faster to implement.
Using CSS to apply SVG styles, however, can be disconcerting for some.
fill, stroke, and stroke-width, after all, are not CSS
properties. (The nearest CSS equivalents are background-color and
border.) It’s just that we are using CSS selectors to apply SVG-specific properties. If it helps you remember which rules in your stylesheet are
SVG-specific, consider including svg in those selectors:
svg.pumpkin{/* ... */}
Layering and Drawing Order
There are no “layers” in SVG and no real concept of depth. SVG does not
support CSS’s z-index property, so shapes can be arranged only within
the two-dimensional x/y plane.
And yet, if we draw multiple shapes, they overlap:
<rectx="0"y="0"width="30"height="30"fill="purple"/><rectx="20"y="5"width="30"height="30"fill="blue"/><rectx="40"y="10"width="30"height="30"fill="green"/><rectx="60"y="15"width="30"height="30"fill="yellow"/><rectx="80"y="20"width="30"height="30"fill="red"/>
The order in which elements are coded determines their depth order. In Figure 3-22, the purple square appears first in the code, so it is rendered first. Then, the blue square is rendered “on top” of the purple one, then the green square on top of that, and so on.

Think of SVG shapes as being rendered like paint on a canvas. The pixel-paint that is applied later obscures any earlier paint, and thus appears to be “in front.”
This aspect of drawing order becomes important when you have some visual elements that should not be obscured by others. For example, you might have axes or value labels that appear on a scatterplot. The axes and labels should be added to the SVG last, so they appear in front of any other elements.
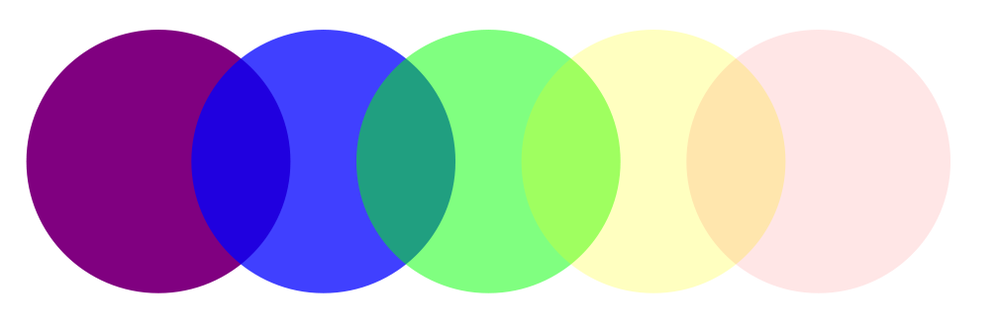
Transparency
Transparency can be useful when elements in your visualization overlap but must remain visible, or you want to deemphasize some elements while highlighting others, as shown in Figure 3-23.
There are two ways to apply transparency: use an RGB color with alpha,
or set an opacity value.
You can use rgba() anywhere you specify a color, such as with fill
or stroke. rgba() expects three values between 0 and 255 for red,
green, and blue, plus an alpha (transparency) value between 0.0 and 1.0:
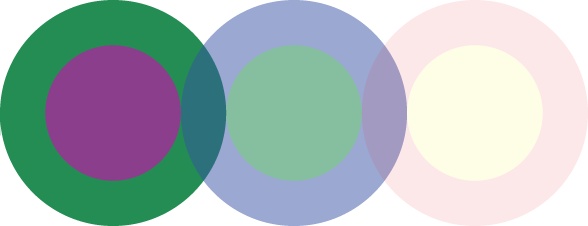
<circlecx="25"cy="25"r="20"fill="rgba(128, 0, 128, 1.0)"/><circlecx="50"cy="25"r="20"fill="rgba(0, 0, 255, 0.75)"/><circlecx="75"cy="25"r="20"fill="rgba(0, 255, 0, 0.5)"/><circlecx="100"cy="25"r="20"fill="rgba(255, 255, 0, 0.25)"/><circlecx="125"cy="25"r="20"fill="rgba(255, 0, 0, 0.1)"/>
Note that with rgba(), transparency is applied to the fill and
stroke colors independently. The following circles’ fill is 75 percent
opaque, and their strokes are only 25 percent opaque:
<circlecx="25"cy="25"r="20"fill="rgba(128, 0, 128, 0.75)"stroke="rgba(0, 255, 0, 0.25)"stroke-width="10"/><circlecx="75"cy="25"r="20"fill="rgba(0, 255, 0, 0.75)"stroke="rgba(0, 0, 255, 0.25)"stroke-width="10"/><circlecx="125"cy="25"r="20"fill="rgba(255, 255, 0, 0.75)"stroke="rgba(255, 0, 0, 0.25)"stroke-width="10"/>
With this transparency applied, and the result shown in Figure 3-24, we can see that strokes are aligned to the center of each shape’s edge. That is, the stroke is neither fully inside nor outside the object, but is both half in and half out. As a result of this transparency, these individual 10px strokes look more like two separate 5px strokes.
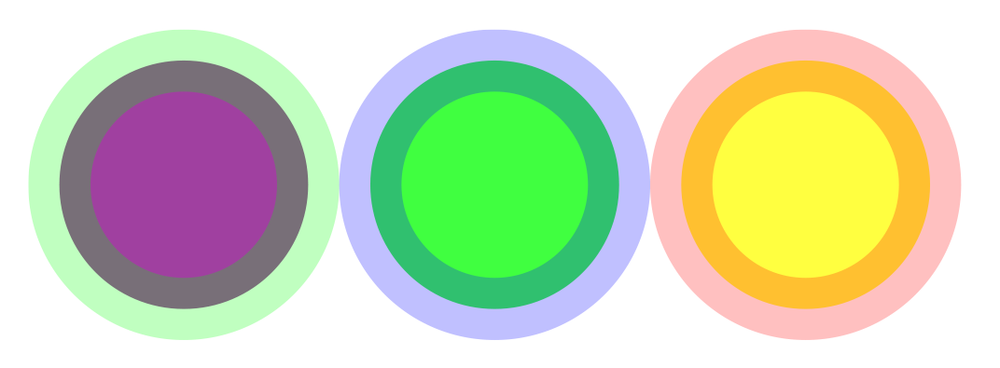
To apply transparency to an entire element, set an opacity attribute. Figure 3-25 illustrates some completely opaque circles.
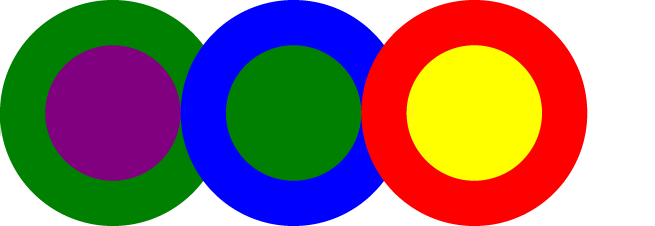
Figure 3-26 shows the same circles, with opacity values:
<circlecx="25"cy="25"r="20"fill="purple"stroke="green"stroke-width="10"opacity="0.9"/><circlecx="65"cy="25"r="20"fill="green"stroke="blue"stroke-width="10"opacity="0.5"/><circlecx="105"cy="25"r="20"fill="yellow"stroke="red"stroke-width="10"opacity="0.1"/>
You can employ opacity on an element that also has colors set with
rgba(). When doing so, the transparencies are multiplied. The
circles in Figure 3-27 use the same RGBA values for fill and stroke. The
first circle has no element opacity set, but the other two do:
<circlecx="25"cy="25"r="20"fill="rgba(128, 0, 128, 0.75)"stroke="rgba(0, 255, 0, 0.25)"stroke-width="10"/><circlecx="65"cy="25"r="20"fill="rgba(128, 0, 128, 0.75)"stroke="rgba(0, 255, 0, 0.25)"stroke-width="10"opacity="0.5"/><circlecx="105"cy="25"r="20"fill="rgba(128, 0, 128, 0.75)"stroke="rgba(0, 255, 0, 0.25)"stroke-width="10"opacity="0.2"/>
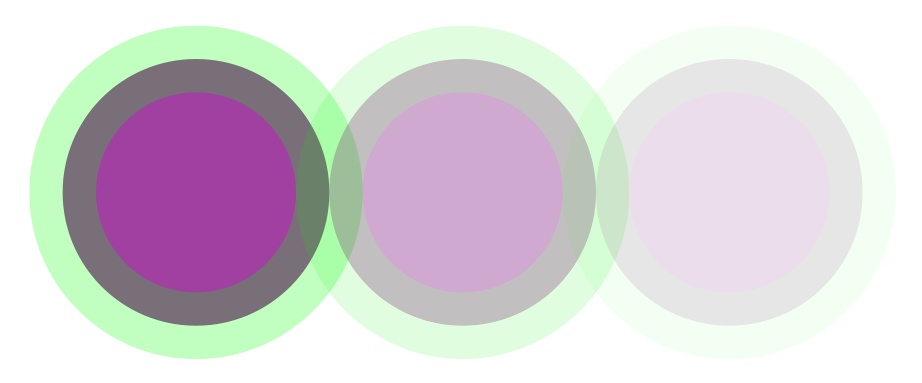
Notice how the third circle’s opacity is 0.2, or 20 percent. Yet its purple
fill already has an alpha value of 0.75, or 75 percent. The purple area, then,
has a final transparency of 0.2 times 0.75 = 0.15, or 15 percent.
A Note on Compatibility
Older browsers don’t support SVG. So, generally speaking, Internet Explorer version 8 and older will not display SVG images at all. This is a little annoying because people could visit your page only to see emptiness in place of a gorgeous visualization. On the other hand, D3 also does not work with older browsers (again, meaning IE8 and older), so it never would have worked in the first place.
Note
D3 can be made to work with IE8 by employing the Aight compatibility library, but that doesn’t help with older versions of IE. r2d3 is an adaptation of D3 that integrates Raphaël for drawing visuals, which should get you as far back as IE7.
In general, your best bet is to encourage people to upgrade and use a web browser that has been built in the last few years. The more people move to modern browsers, the better their web experiences will be, and the larger our potential audiences.
That said, it’s polite to notify users of older browsers why the piece isn’t working. I recommend using Modernizr or a similar JavaScript tool to detect whether or not the browser supports SVG. If it does, then you can load your D3 code and proceed as normal. If SVG is not supported, then you can display a static, noninteractive version of your visualization alongside a message explaining that a current browser is needed. (Be nice and provide links to the Chrome and Firefox download pages. I used to link to Safari as well, but Apple now distributes it as part of the Mac OS, so it’s no longer available as a separate download.)
For example, you can use Modernizr.load() to check the results of Modernizr’s tests. Then, if the tests pass (for example, because SVG support is detected), then tell Modernizr to go ahead and load D3 and your custom JavaScript code. I’d typically have something like this in the <head> of my document:
<scriptsrc="js/modernizr.js"></script><scripttype="text/javascript">Modernizr.load({test:Modernizr.svg&&Modernizr.inlinesvg,yep:['js/d3.v3.min.js','js/script.js']});</script>
This loads Modernizr in, performs the tests, and then bothers loading the other code only if the tests succeed. (That’s the “yep” part.) You can use CSS or more JavaScript to define what shows up to the user when the test fails, such as a static image of your visualization or a message encouraging the user to try a newer browser. Learn more about how to do this in the Modernizr documentation.
caniuse.com is a fantastic resource for supported browser features. See their list of browsers with SVG support.
People have tried to get D3 working in older browsers, sometimes by mashing it up with Raphaël to render to canvas, or other hacky means. It is technically possible, but I don’t recommend it.
Get Interactive Data Visualization for the Web now with the O’Reilly learning platform.
O’Reilly members experience books, live events, courses curated by job role, and more from O’Reilly and nearly 200 top publishers.

