Controlling the relay using the Raspberry Pi
To start with, we will control only the relay from the Raspberry Pi connected to it. This will be done using GPIO pins. First, we need to connect the relay to our Raspberry Pi in the correct way. The following table shows the connection scheme:
|
Wire (color |
GPIO pin |
Relay pin |
|
Red |
3.3V (pin 1) |
Power/VCC (+) |
|
Black |
GND (pin 6) |
GND (-) |
|
Yellow |
GPIO 17 (pin 11) |
IN (Signal/S) |
When this scheme is physically applied, it will look like the following figure. Remember that the exact order of the relay pins might look different between different models.
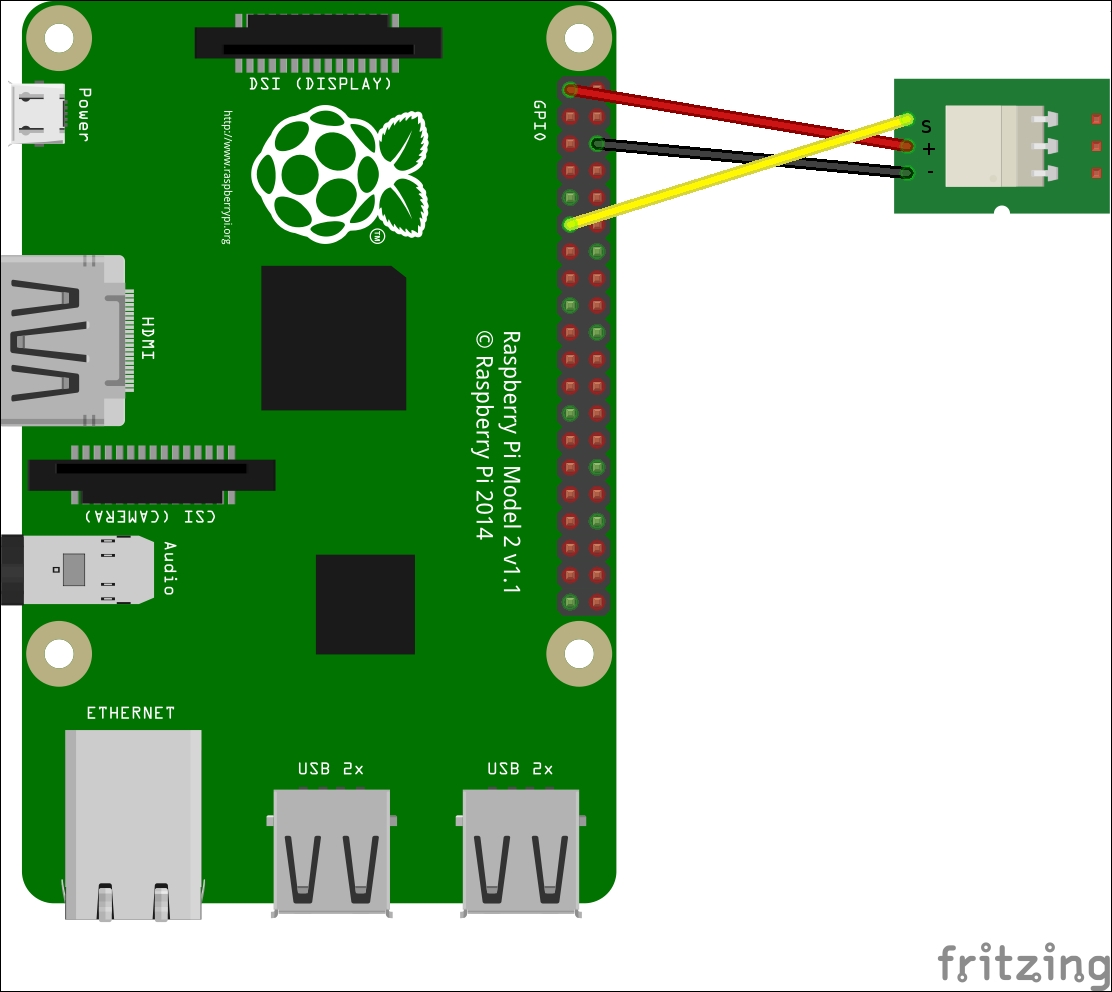
A Raspberry Pi 2 connected to a one-channel relay module, ...
Get Yocto for Raspberry Pi now with the O’Reilly learning platform.
O’Reilly members experience books, live events, courses curated by job role, and more from O’Reilly and nearly 200 top publishers.

