Enabling the Network Feature
You need to enable access to the network menu so you can set up the network and allow the creation of multiple sites. Follow these steps:
- Connect to your Web server via FTP.
If you need a refresher on FTP, refer to Book II, Chapter 2.
- Locate the wp-config.php file in the root or /public_html directory of your Web site.
This file is with the main WordPress files.
- Open the wp-config.php file for editing in your favorite text editor.
For Windows users, Notepad will do. For Macs, use TextMate.
- Find the line that reads define(‘DB_COLLATE’, ‘’);.
Click at the end of that line. Press Enter and a new, blank line is created.
 Some FTP clients let you right-click the filename on the server and choose Edit to edit the file within your FTP program, depending on which program you are using.
 - Type define(‘WP_ALLOW_MULTISITE’, true );.
This line of code tells WordPress that you intend to use the multisite feature; additionally, it activates the Network option under the Tools menu in your WordPress Dashboard (covered later in this chapter).
- Save the wp-config.php file and upload it to your Web site.
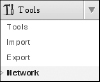
When you log in to the Dashboard of WordPress, you see the Network submenu under Tools, as shown in Figure 2-1.
Figure 2-1: The Network menu.
Choosing this menu item will ...
Get WordPress® All-in-One For Dummies® now with the O’Reilly learning platform.
O’Reilly members experience books, live events, courses curated by job role, and more from O’Reilly and nearly 200 top publishers.

