Lesson 14Using the WordPress Image Editor
After you upload images to WordPress, you can make corrections using the built-in Image Editor. Although it provides only basic functions, they're enough to handle the three most common issues users face:
- Replacing the default Thumbnail created by WordPress
- Changing the dimensions of the full-sized version of the image
- Mirroring an image left or right so that it faces a new direction
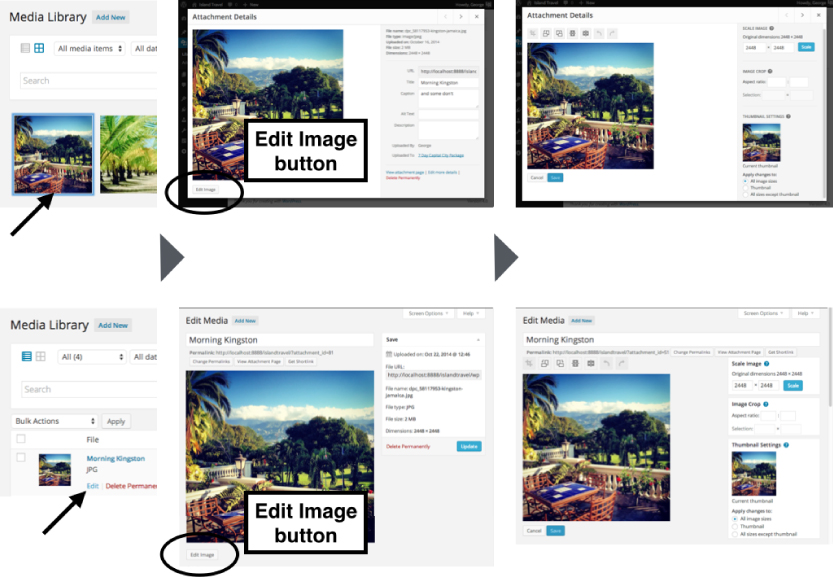
You can use the cropping, scaling, and flipping tasks to see how the Image Editor works. But first, check out a map of how to get to the Image Editor from the grid view of the Media Library and from the list view, as shown in Figure 14.1.
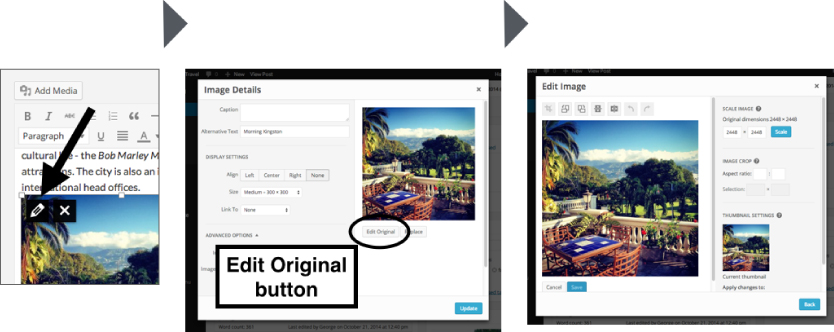
You can also get to a version of the Image Editor through the Image Details window, as shown in Figure 14.2.
As you can see, the Image Editor looks slightly different depending on where it's used, but they have the same functionality. For consistency, the examples in this lesson are based on the Edit Media screen.
If your screen is wide enough, on the Edit Media version, the image Save box will be to the right of the Image Editor, and that can crowd things. You can easily move it by switching to one column using Screen Options.
On tablets and smartphones the screen automatically switches ...
Get WordPress 24-Hour Trainer, 3rd Edition now with the O’Reilly learning platform.
O’Reilly members experience books, live events, courses curated by job role, and more from O’Reilly and nearly 200 top publishers.

