Accessing Other Computers
So far in this chapter, you’ve been reading from the point of view of the person doing the sharing. You’ve read the steps for preparing a PC for sharing by other people on the network.
This section details how to be one of them—that is, how to connect to other PCs whose disks, folders, and printers have been shared.
Fortunately, doing so is extremely easy.
Method 1: My Network Places
Most people view their network contents using a special window:
In Windows XP or Windows Me: Choose Start→My Network Places.
In earlier versions: Double-click the desktop icon called Network Neighborhood or My Network Places.
The very first time you open the network window, you see icons that correspond to the shared folders and files on the computers of your network (including those on your own machine). Just double-click one to open it, in readiness to work with its contents.
“View workgroup computers”
If you find the My Network Places window overwhelmingly crowded as your network grows, you might find clarity in the “View workgroup computers” link at the left side of the window. It shows you the icons of the computers on your network—not every last shared folder on all of them. Double-click one of these computer icons to see a list of the shared folders and printers on it (Figure 18-5).
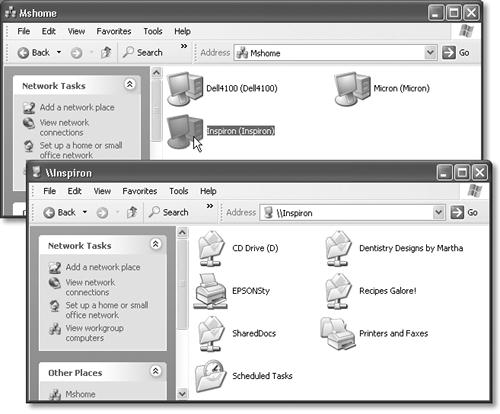
Figure 18-5. Top: If you know that the folder or file you’re looking for resides on a particular ...
Get Windows XP Home Edition: The Missing Manual now with the O’Reilly learning platform.
O’Reilly members experience books, live events, courses curated by job role, and more from O’Reilly and nearly 200 top publishers.

