This chapter covers some of the common tasks facing administrators when it comes to managing the Windows file system. I’ll not only touch on the really basic tasks such as creating, deleting, renaming, and moving files and folders, but more advanced topics such as viewing a list of all open files and identifying the process that has a file locked.
You are undoubtedly familiar with the all-purpose file, folder, and shared folder management tool, Windows Explorer. With it you can create, move, rename, and delete files and folders as well as hide, encrypt, and make them read-only. As you’ll see, this is the most used graphical tool in this chapter.
You are also probably familiar with the Shared Folder MMC snap-in, which is commonly seen as a part of the Computer Management tool. This snap-in allows you to do just about anything with shares (i.e., create, delete, see who is using them, etc.).
Sysinternals produces several graphical tools that are also very helpful. These include File Monitor (Recipe 4.19), Fundelete (Recipe 4.3), and Shareenum (Recipe 4.24).
Table 4-1 lists command-line tools used in this chapter and the recipes they are used in.
Table 4-1. Command-line tools used in this chapter
Tool | Windows Server 2003 | Windows 2000 Server | Recipes |
|---|---|---|---|
attrib | %SystemRoot%\system32 | %SystemRoot%\system32 | 4.12, 4.13 |
auditpol | Windows 2000 Resource Kit | Windows 2000 Resource Kit | 4.18 |
cipher | %SystemRoot%\system32 | %SystemRoot%\system32 | 4.15 |
compress | Windows 2003 Resource Kit | Windows 2000 Resource Kit | 4.14 |
copy | CMD shell | CMD shell | 4.10 |
creatfil | Windows 2003 Resource Kit | Windows 2000 Resource Kit | 4.1 |
del | CMD shell | CMD shell | 4.1 |
dir | CMD shell | CMD shell | 4.5 |
fc | %SystemRoot%\system32 | %SystemRoot%\system32 | 4.11 |
findstr | %SystemRoot%\system32 | %SystemRoot%\system32 | 4.9 |
forfiles | %SystemRoot%\system32 | Windows 2000 Resource Kit | 4.22 |
handle | 4.20 | ||
inuse | %SystemRoot%\system32 | Windows 2000 Resource Kit | 4.16 |
junction | 4.7 | ||
linkd | Windows 2003 Resource Kit | Windows 2000 Resource Kit | 4.7 |
mkdir | CMD shell | CMD shell | 4.2 |
move | CMD shell | CMD shell | 4.10 |
net file | %SystemRoot%\system32 | %SystemRoot%\system32 | 4.19 |
net share | %SystemRoot%\system32 | %SystemRoot%\system32 | 4.23, 4.24 |
openfiles | %SystemRoot%\system32 | N/A | 4.19 |
ren | CMD shell | CMD shell | 4.10 |
rmdir | CMD shell | CMD shell | 4.2 |
sdelete | 4.4 | ||
setacl | 4.18 | ||
shortcut | MKS Toolkit | MKS Toolkit | 4.6 |
strings | 4.9 | ||
subinacl | Windows 2003 Resource Kit | Windows 2000 Resource Kit | 4.17, 4.25 |
takeown | %SystemRoot%\system32 | Windows 2000 Resource Kit | 4.17 |
where | %SystemRoot%\system32 | Windows 2000 Resource Kit | 4.9 |
Between WMI and WSH, you have the ability to automate reading, writing, and searching files and folders. Unfortunately, the WMI file and folder classes don’t provide the capability to do basic manipulation, which is where WSH comes in. Table 4-2 lists all of the WSH and WMI classes used in this chapter.
Table 4-2. WMI and WSH classes used in this chapter
WMI class | Description | Recipes |
|---|---|---|
Cim_DataFile | WMI class that represents files | 4.1, 4.5, 4.10, 4.14, 4.17, 4.22 |
Scripting.FileSystemObject | WSH interface for reading, writing, and manipulating files and folders | 4.1, 4.2, 4.11, 4.12, 4.13 |
Win32_Directory | WMI class that represents folders | 4.5, 4.14 |
Win32_ShortcutFile | WMI class that represents shortcut files (.lnk) | 4.6 |
Win32_Share | WMI class that represents shared folders | 4.23, 4.24 |
In the left pane, browse to the folder where you want to create the file or that contains the file you want to delete. Click on the folder.
To create a new file, right-click in the right pane and select New and the type of file you want to create. To edit the file, double-click on it.
To delete a file, right-click the file in the right pane and select Delete. Click Yes to confirm. This moves the file to the Recycle Bin. You can also press Shift+Del to bypass the Recycle Bin and permanently delete the file.
There aren’t many options for creating files from the command line. You can create a simple text file by redirecting output from a command. Here is an example:
> echo hello > myfile.txt
One command you may not be familiar with is creatfil.exe from the Resource Kit. With it you can create files of arbitrary length. This is useful only if you need to create some files to test with or to test low disk space scenarios. The following command creates a 10 MB file named foobar.txt:
> creatfil foobar.txt 10240
To delete a file use the del command:
> del c:\scripts\foobar.vbs
If you want to delete a file on a remote server, you can use a psexec.exe command like this:
> psexec \\<ServerName> cmd.exe /c del c:\scripts\foobar.vbsTo provide alternate credentials with psexec use the /u and /p options to specify a username and
password, respectively.
See Chapter 1 for examples of creating and appending to files using VBScript.
' This code deletes a file
' ------ SCRIPT CONFIGURATION ------
strFilePath = "<FilePath>" ' e.g., "d:\scripts\test.txt"
' ------ END CONFIGURATION ---------
set objFSO = CreateObject("Scripting.FileSystemObject")
objFSO.DeleteFile(strFilePath)
WScript.Echo "Successfully deleted file"

' This code deletes a file using WMI
' ------ SCRIPT CONFIGURATION ------
strComputer = "."
strFilePath = "<FilePath>" ' e.g., "d:\scripts\test.txt"
' ------ END CONFIGURATION ---------
set objFile = GetObject("winmgmts:\\"& strComputer & _
                        "\root\cimv2:CIM_Datafile.Name='" & strFilePath & "'")
objFile.Delete
WScript.Echo "Successfully deleted file"
In the left pane, browse to the folder where you want to create a new folder or that contains the folder you want to delete. Click on the folder.
To create a new folder, right-click in the right pane and select New and the type of folder you want to create.
To delete a folder, right-click the folder in the right pane and select Delete. Click Yes to confirm. This moves the folder and its contents to the Recycle Bin.
Tip
If you want a New Folder option when you right-click in the left pane of Windows Explorer, see http://www.createwindow.com/freeware/newfold.htm.
To create a folder, use the mkdir command (or md for short):
> mkdir c:\scripts
To remove a folder, use the rmdir command (or rd for short):
> rmdir c:\scripts
Use the /s option to remove
a folder and all files and subfolders contained within it. Use the
/q option to bypass the
confirmation prompt when using /s.
To delete a folder on a remote server, use the psexec.exe command:
> psexec \\<ServerName> cmd.exe /c rmdir /s c:\tempTo provide alternate credentials with psexec, use the /u and /p options to specify a username and
password, respectively.
Files that you delete with Windows Explorer can be restored using the Recycle Bin:
Double-click the Recycle Bin icon on the desktop.
Right-click the file you want to undelete and select Restore.
This assumes that you didn’t use the Shift+Del key combination to delete the file or haven’t emptied the Recycle Bin since the file was deleted. One problem with this method is that the Recycle Bin captures only files deleted from Explorer. None of the files that are deleted over the network, via a command prompt, or with a script are sent to the Recycle Bin.
The Sysinternals Fundelete tool can be used as a replacement for the Recycle Bin. It works just like the Recycle Bin except it does more. The Recycle Bin icon on the desktop is replaced with a Fundelete Bin icon. The Fundelete Bin captures any type file deletion that occurs on the computer. And just like the Recycle Bin, you can restore files contained in the Fundelete Bin.
Fundelete hasn’t been updated since 2000, so if you are looking for something that is more recently updated, Executive Software makes a product that is similar to Fundelete with even more features called Undelete. Unlike Fundelete, you have to pay for Undelete. For more information, visit: http://www.undelete.com/.
Use the Sysinternals sdelete.exe command to securely delete files:
> sdelete <FileName>Use the -p option to
specify the number of passes to overwrite the disk segments. The
more passes, the less likely the file can be recovered.
The -s option can be used
to recursively delete everything within a folder:
> sdelete -p 4 -s c:\logs
' This code runs the sdelete command
' ------ SCRIPT CONFIGURATION ------
strCommand = "sdelete -p 5 c:\logs\tue.log"
' ------ END CONFIGURATION ---------
set objWshShell = WScript.CreateObject("WScript.Shell")
intRC = objWshShell.Run(strCommand, 0, TRUE)
if intRC <> 0 then
   WScript.Echo "Error returned from running the command: " & intRC
else
   WScript.Echo "Command executed successfully"
end ifWhen you delete a file through Windows Explorer, it is sent to the Recycle Bin. You can use the Recycle Bin to restore the file to its original location or you can permanently delete the file by emptying the Recycle Bin. But wait a second—the file doesn’t really get deleted when you empty the Recycle Bin. All that happens is that the link to the collection of bits on the hard disk that make up the file is deleted. The bits that make up the file are still present on the disk. And it stays like this until the file system overwrites those bits with a new file. That means that if a bad guy stole your computer, he could run a program to examine the hard drive and restore files that have been previously deleted and not overwritten. That is, unless you securely delete the file using the Sysinternals Sdelete program. Sdelete works by writing random characters to the bits that made up the file before. This prevents programs from piecing the file back together. This doesn’t prevent someone from restoring a previous copy of the file from backup, but someone won’t be able to take the hard drive and restore a deleted file on which you used Sdelete.
You want to view the creation or last modification timestamp of a file or folder or determine whether it is encrypted, archived, compressed, etc.
In the left pane, browse to the parent folder of the file or folder you want to view properties for. Click on the parent folder. This displays the list of subfolders and files in the right pane.
In the right pane, right-click on the file or folder you want to view and select Properties.
Several properties are displayed in the General tab. Click the Advanced button to see additional attributes.
The dir command can be run as part of a CMD session to display the last-modified time, size, and owner of a file or directory. Here is an example:
> dir /q <Path>You can also display other attributes of a file or folder with
the /A option. Run dir /?
for a complete list of options and parameters.
One way to view the files on a remote server is to use a UNC path. This command displays the contents of the c:\scripts folder on the host fs01:
> dir /q \\fs01\c$\scripts
You can use the runas.exe command to specify alternate credentials if needed or use the psexec.exe command.
' This code displays the properties and attributes of a file
' ------ SCRIPT CONFIGURATION ------
strFilePath = "d:\\myfile.txt"
strComputer = "."
' ------ END CONFIGURATION ---------
set objWMI = GetObject("winmgmts:\\" & strComputer & "\root\cimv2")
set objFile = objWMI.Get("CIM_Datafile=""" & strFilePath & """")
WScript.Echo objFile.Name

WScript.Echo " 8.3 Name: " & objFile.EightDotThreeFileName
WScript.Echo " Drive: " & objFile.Drive
WScript.Echo " FileName: " & objFile.FileName
WScript.Echo " Extension: " & objFile.Extension
WScript.Echo " FileType: " & objFile.FileType
WScript.Echo " Path: " & objFile.Path
WScript.Echo " InUse Counter: " & objFile.InUseCount

WScript.Echo " Creation Date: " & objFile.CreationDate
WScript.Echo " Last Accessed: " & objFile.LastAccessed
WScript.Echo " Last Modified: " & objFile.LastModified

WScript.Echo " Archive: " & objFile.Archive
WScript.Echo " Compressed: " & objFile.Compressed
WScript.Echo " Encrypted: " & objFile.Encrypted
WScript.Echo " System: " & objFile.System
WScript.Echo " Writeable: " & objFile.Writeable
WScript.Echo " Hidden: " & objFile.Hidden


' This code displays the properties and attributes of a folder
' ------ SCRIPT CONFIGURATION ------
strDirPath = "c:\\scripts"
strComputer = "."
' ------ END CONFIGURATION ---------

set objWMI = GetObject("winmgmts:\\" & strComputer & "\root\cimv2")
set objFile = objWMI.Get("Win32_Directory=""" & strDirPath & """")
WScript.Echo objFile.Name

WScript.Echo " 8.3 Name: " & objFile.EightDotThreeFileName
WScript.Echo " Drive: " & objFile.Drive
WScript.Echo " Folder Name: " & objFile.FileName
WScript.Echo " File Type: " & objFile.FileType
WScript.Echo " Path: " & objFile.Path
WScript.Echo " InUse Counter: " & objFile.InUseCount

WScript.Echo " Creation Date: " & objFile.CreationDate
WScript.Echo " Last Accessed: " & objFile.LastAccessed
WScript.Echo " Last Modified: " & objFile.LastModified

WScript.Echo " Archive: " & objFile.Archive
WScript.Echo " Compressed: " & objFile.Compressed
WScript.Echo " Encrypted: " & objFile.Encrypted
WScript.Echo " System: " & objFile.System
WScript.Echo " Writeable: " & objFile.Writeable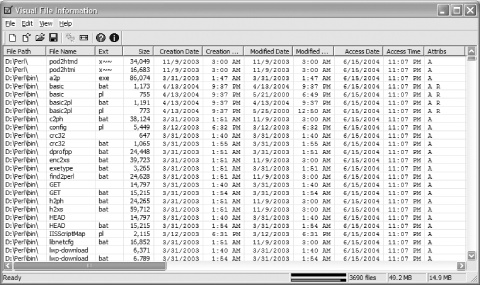
WScript.Echo " Hidden: " & objFile.HiddenAnother useful tool for displaying file information is Visual File Information (vfi.exe) from the Resource Kit. It can display file information for several files on a single screen. You start by selecting a folder and from there it enumerates every file contained within that folder and all subfolders. You can then sort by creation or modification date, size, extension, and a number of other attributes. The tool is good at enumerating over hundreds or even thousands of files very quickly, so if you wanted to find the largest file on a disk or find the most recently modified file, this would be a great tool for the job.
Figure 4-1 shows sample output from VFI.
You want to create a shortcut to a file or folder. A shortcut is simply a file with a .lnk extension that redirects you to another file or folder when clicked on in Windows Explorer. You can also distinguish shortcut files from regular files by a small arrow in the bottom left side of their icons.
The Windows NT Resource Kit had a tool called shortcut.exe that could be used to create shortcuts, but it isn’t present in the Windows 2000 or Windows Server 2003 Resource Kits. The MKS Toolkit (http://www.mkssoftware.com/products/tk/), an excellent product that provides numerous Unix-based utilities for the Windows platform, contains a shortcut.exe tool, which can create shortcuts. Here is the syntax for that tool:
> shortcut [-f dest-file] [-a arglist] [-w workdir] [-s show-keyword]
[-i iconpath[,iconindex]] [-d description] [-D] shortcut-file

-a arglist
defines any arguments to the executable file specified with the -f dest-file option.

-d description
specifies descriptive text to be embedded in the link file. description is only
displayed when you use the -p option to print the contents of the link file. If
description includes space, the text should be enclosed in double quotes (").

-D shortcut-file
specifies the shortcut-file is on the desktop.

-f dest-file
specifies the full path and file name of the executable file to be run when the link
file is double-clicked.

-i iconpath[,iconindex]
specifies the icon to be displayed for the link file. If the specified icon contains
multiple images, determine which image is to be displayed by entering the appropriate
number for iconindex.

-p
displays the contents of the specified shortcut file.

-s show-keyword
specifies how the executable is displayed when invoked. show-keyword can be one
of the following:

SW_SHOW             starts the program in standard mode
SW_SHOWMAXIMIZED    starts the program in full screen mode
SW_SHOWMINIMIZED    starts the program minimized
SW_SHOWMINNOACTIVE  displays the program as an icon but does not start it

When this option is not specified, shortcut defaults to SW_SHOW.

-w workdir
specifies the working directory in which the program is started.
Here is an example:
> shortcut -f c:/perl/bin/perl.exe -a -L perl-link.lnk
Tip
The MKS Toolkit isn’t free and can be quite expensive, but there is another shortcut utility from this site that is free: http://www.optimumx.com.
' This code creates a
shortcut.

set objWSHShell = CreateObject("WScript.Shell")

' Pass the path to the shortcut
set objSC = objWSHShell.CreateShortcut("d:\mylog.lnk")

' Description - Description of the shortcut
objSC.Description = "Shortcut to MyLog file"

' HotKey - hot key sequence to launch the shortcut
objSC.HotKey = "CTRL+ALT+SHIFT+X"

' IconLocation - Path of icon to use for the shortcut file
objSC.IconLocation = "notepad.exe, 0"  ' 0 is the index

' TargetPath = Path to source file or folder
objSC.TargetPath = "c:\windows\notepad.exe"

' Arguments - Any additional parameters to pass to TargetPath
objSC.Arguments = "c:\mylog.txt"

' WindowStyle - Type of window to create
objSC.WindowStyle = 1   ' 1 = normal; 3 = maximize window; 7 = minimize

' WorkingDirectory - Location of the working directory for the source app
objSC.WorkingDirectory = "c:\"
objSC.Save
WScript.Echo "Shortcut to mylog created"

' This code finds all shortcuts on a system.
' ------ SCRIPT CONFIGURATION ------
strComputer = "."
' ------ END CONFIGURATION ---------
set objWMI = GetObject("winmgmts:\\" & strComputer & "\root\cimv2")
set colSCs = objWMI.InstancesOf("Win32_ShortcutFile")
for each objSC in colSCs
    WScript.Echo "Name:   " & objSC.Name
    WScript.Echo "Target: " & objSC.Target
    WScript.Echo
    intCount = intCount + 1
next
WScript.Echo "Total shortcuts: " & intCountShortcuts can be useful to quickly access files and folders that are distributed across the filesystem or on remote servers. The problem with shortcuts is that they can quickly become out of date if not maintained. There is a tool in the Resource Kit to help identify dead shortcuts called chklnks.exe. It searches for all shortcuts whose target does not exist and displays them in a list. You can right-click on a shortcut to see the missing target location or delete selected dead shortcuts.
You want to create a link to a folder. This is sometimes referred to as a junction point. Links can be created only on NTFS file systems. Junction points are useful if you want to create a simplified path to a folder that is nested deeply in the file system.
The linkd.exe command from the Resource Kit can create a link:
> linkd<LinkName><Target>
This creates a link from folder c:\program files\perl to c:\perl:
> linkd c:\perl "c:\program files\perl"
This removes the link to perl.exe:
linkd c:\perl /d
You can also use the Sysinternals junction.exe tool to create and delete links:
> junction c:\perl "c:\program files\perl"
> junction /d c:\perl
A cool thing about junction.exe is that you can also use it to search for links:
> junction /s c:\
If you are browsing the file system with Windows Explorer, you
won’t be able to differentiate links from normal files and folders,
but in a CMD session you can. A link shows up as <JUNCTION>, as shown here:
> dir
 Volume in drive C is System
 Volume Serial Number is F0CE-2C6F

 Directory of C:\

01/02/2002  09:08 AM                 0 build.ini
10/06/2003  01:57 PM    <DIR>          Documents and Settings
11/02/2003  12:01 AM    <DIR>          Inetpub
11/18/2003  11:43 PM    <JUNCTION>     Perl
10/06/2003  02:14 PM    <DIR>          Program Files
11/16/2003  11:25 PM    <DIR>          scripts
12/04/2003  12:45 AM    <DIR>          WINDOWS
               6 File(s)    439,283,427 bytes
7 Dir(s) 1,575,822,336 bytes free' This code creates a link by shelling out to the linkd command.
' ------ SCRIPT CONFIGURATION ------
strLink = "c:\perl"
strTarget = "c:\program files\perl"
' ------ END CONFIGURATION ---------
strCommand = "linkd " & strLink & " " & strTarget
set objWshShell = WScript.CreateObject("WScript.Shell")
intRC = objWshShell.Run(strCommand, 0, TRUE)
if intRC <> 0 then
WScript.Echo "Error returned from running the command: " & intRC
else
WScript.Echo "Command executed successfully"
end ifLinks, or junction points, are different from shortcuts in that they are transparent to any process or application that accesses them. A shortcut is simply a file that redirects applications to a different location. A junction point is similar to a symbolic link in Unix. When you open a junction point, applications, such as Windows Explorer, behave as if you opened the source folder. The only difference is if you delete the junction point in Windows Explorer, the source directory isn’t deleted—only the junction point is deleted.
You want to create a program alias for an application or commonly accessed file. A program
alias is a little different from a shortcut or link. It is similar in
function to the alias command
common on most Unix platforms. The alias name can be used as an
alternative to typing the full program name. For example, let’s say
you use the Computer Management snap-in a lot and instead of going to
Start menu →
Administrative Tools →
Computer Management, you prefer to type compmgmt.msc from the Run dialog or from
the command line. You could create a program alias called cmp that points to compmgmt.msc, which reduces the number of
characters you have to type by nine.
The following is how you’d create the cmp alias I just described.
Create a new subkey under the following key:
HKLM\SOFTWARE\Microsoft\Windows\CurrentVersion\App Paths
The name of the subkey should be the alias name. So you don’t
have to type an extension when using the alias, put .exe at the end of the name. In this case,
the subkey name would be cmp.exe.
You can, in fact, call the alias anything you want, but if the alias
extension is not an executable extension such as .exe, you’ll have to type the complete
alias name when calling it. So it is perfectly fine to name the subkey
cmp.abc, but I’d have to type
cmp.abc instead of just
cmp when typing it in the Run
dialog.
Next, modify the default value under the new subkey; it shows up
with the name (Default) in Registry
Editor. Enter the full path to the program you are creating an alias
for, which in this example would be C:\Windows\system32\compmgmt.msc. Actually,
if the program is in your path, you only need to put the program name
and the system will find it for you, but you are probably better off
putting the complete path so there is no mistake which program you
want to run.
Now you’ll be able to run cmp from the Run dialog. From a command
prompt, you can’t just type cmp
and have it launch the program. Instead you need to type start cmp, which will do the trick.
There are a couple of things to keep in mind when entering the path to the program in the value under the subkey:
Don’t use environment variables such %SystemRoot%. It won’t work.
Passing parameters to the program (which would have made aliases even more useful) also doesn’t seem to work.
You can force the program to start in a particular directory by
creating a Path value under the
alias subkey. Create a REG_SZ value entry named Path, and for its value put the full path to
the directory where the program should start in.
On Windows Server 2003, select Search from the Start menu and click All files and folders.
On Windows 2000, select Search → For Files or Folders from the Start menu.
Now you’ll be able to search for a particular file or folder name (use * as the wildcard) or enter one or more words to search within text-based files.
Select the drive, drives, or folder you want to search.
Click the Search button (or Search Now on Windows 2000).
Below the Search button, you can select additional advanced search options, which allows you to search based on file timestamp, file size, and various file attributes.
The where.exe utility searches the files in your path that match a pattern. This command finds all files that begin with net and have a .exe extension:
> where net*.exe
You can also use where to
find files in a specific folder or tree of folders. This command
finds all .vbs scripts whose
names contain the letters foo:
> where /r c:\scripts *foo*.vbs
Windows comes with two other tools you can use to search for
files that contain a certain string: find.exe and findstr.exe. The latter is more robust.
If you only need to find the files in the current directory that
contain the letters log, you can
use this command:
> findstr log *
This next command performs a case-insensitive search (/i) for all nonbinary files (/p) on the d: drive (/s) that contain the text “confidential” (/c):
> findstr /s /p /i /c:"confidential" d:\*
findstr includes some regular expression support. For a list of all the features, look at the command help information (findstr /?).
If you want to search for strings within binary files, take a look at the Sysinternals strings.exe command. The following command displays any text strings contained in binary files within the Program Files directory:
> strings -s "c:\program files"
You want to copy or move a set of files or folders to another location on the file system or to another server.
In the left pane, browse to the parent folder of the file or folder you want to copy, move, or rename.
In the right pane, right-click the file or folder.
To rename, select Rename, enter the new name and hit Enter.
To move or copy, select Cut or Copy, respectively. Browse to the new location, right-click in the folder, and select Paste.
Moving, copying, and renaming files is pretty straightforward from the command line:
> move<Source><Destination>> copy<Source><Destination>> ren<Source><Destination>
' This code shows

 how to rename (same as move in WMI) and copy a file
' or folder.
' ------ SCRIPT CONFIGURATION ------
strComputer = "."
strCurrentFile = "<CurrentFilePath>"  ' Path to existing file or folder
strNewFile     = "<NewFilePath>"      ' New path of file or folder
' ------ END CONFIGURATION ---------
set objWMI = GetObject("winmgmts:\\" & strComputer & "\root\cimv2")
set objFile = objWMI.Get("Cim_Datafile='" & strCurrentFile & "'")
WScript.Echo "Renaming " & strCurrentFile & " to " & strNewFile
intRC = objFile.Rename(strNewFile)
if intRC <> 0 then
   WScript.Echo "There was an error renaming the file: " & intRC
else
   WScript.Echo "File rename successful"
end if

' ------ SCRIPT CONFIGURATION ------
strComputer = "."
strCurrentFile = "<CurrentFilePath>" ' Path to existing file or folder
strNewFile     = "<NewFilePath>"     ' Path to copy file or folder
' ------ END CONFIGURATION ---------
set objWMI = GetObject("winmgmts:\\" & strComputer & "\root\cimv2")
set objFile = objWMI.Get("Cim_Datafile='" & strCurrentFile & "'")
WScript.Echo "Copying " & strCurrentFile & " to " & strNewFile
intRC = objFile.Copy(strNewFile)
if intRC <> 0 then
   WScript.Echo "There was an error copying the file: " & intRC
else
   WScript.Echo "File copy successful"
end if
The fc.exe command compares two or more files:
> fc<File1Path><File2Path>
Here is an example:
> fc c:\netdiag.log c:\old\netdiag.log
To compare two binary files, include the /b option in the previous command.
' This code compares the contents of two text-based files.
' ------ SCRIPT CONFIGURATION ------
strFile1 = "<FilePath1>"  ' e.g., c:\scripts\test1.vbs
strFile2 = "<FilePath2>"  ' e.g., c:\scripts\test2.vbs
' ------ END CONFIGURATION ---------
set objFSO = CreateObject("Scripting.FilesystemObject")
set objFile1 = objFSO.opentextfile(strFile1,1)
set objFile2 = objFSO.opentextfile(strFile2,1)
arrFile1 = split(objFile1.ReadAll,vbNewLine)
arrFile2 = split(objFile2.ReadAll,vbNewLine)
objFile1.close
objFile2.close

if ubound(arrFile1) < ubound(arrFile2) then
   intLineCount = ubound(arrFile1)
   strError = strFile2 & " is bigger than " & strFile1
elseif ubound(arrFile1) > ubound(arrFile2) then
   intLineCount = ubound(arrFile2)
   strError = strFile2 & " is bigger than " & strFile1
else
   intLineCount = ubound(arrFile2)
end if

for i = 0 to intLineCount
   if not arrFile1(i) = arrFile2(i) then
      exit for
   end if
next

if i < (intLineCount + 1) then
   WScript.Echo "Line " & (i+1) & " not equal"
   WScript.Echo strError
elseif strError <> "" then
   WScript.Echo strError
else
   WScript.Echo "Files are identical."
end if
Of all of the methods I described, Windiff is by far the smartest in terms of identifying when lines have been added to a file or a section of text has been moved around. By comparison, the VBScript isn’t nearly as robust. It simply checks line by line to determine if two text files are identical.
To hide a file, use the attrib.exe command:
> attrib +H <Path>Here is an example:
> attrib +H d:\mysecretscript.vbs
To unhide a file, use the -H option:
> attrib -H <Path>Here is an example:
> attrib -H d:\mysecretscript.vbs
' This code hides or unhides
 a file.
' ------ SCRIPT CONFIGURATION ------
strFile = "<FilePath>"  ' e.g., d:\mysecretscript.vbs
boolHide = True         ' True to hide, False to unhide
' ------ END CONFIGURATION ---------
set objFSO = CreateObject("Scripting.FileSystemObject")

' Change this to GetFolder to hide/unhide a folder
set objFile = objFSO.GetFile(strFile)

if boolHide = True then
   if objFile.Attributes AND 2 then
      WScript.Echo "File already hidden"
   else
      objFile.Attributes = objFile.Attributes + 2
      WScript.Echo "File is now hidden"
   end if
else
   if objFile.Attributes AND 2 then
      objFile.Attributes = objFile.Attributes - 2
      WScript.Echo "File is not hidden"
   else
      WScript.Echo "File is already not hidden"
   end if
end ifThere are many operating system files that are hidden by default. Microsoft did this so you don’t get yourself into trouble by accidentally editing or deleting important system files. You also may want to do this if you don’t want users to see certain files or folders. The files and folders will still be accessible if the users know the full path; they just won’t be visible by default in Windows Explorer. That, however, can be easily circumvented. Windows Explorer provides an option to make all hidden files and folders viewable. From the menu, select Tools → Folder Options. Click the View tab. You just need to select Show hidden files and folders and you’ll be able to see them. If you truly don’t want users to be able to access certain files or folders, your best bet is to restrict access to them via NTFS permissions.
To make a file read-only, use the attrib.exe command:
> attrib +R <Path>Here is an example:
> attrib +R d:\mysecretscript.vbs
To make a file available for reading and writing, use the
-R option:
> attrib -R <Path>Here is an example:
> attrib -R d:\mysecretscript.vbs
' This code enables or disables the read-only attribute of a file.
' ------ SCRIPT CONFIGURATION ------
strFile = "<FilePath>"  ' e.g., d:\mysecretscript.vbs
boolReadOnly = True     ' True = read-only, False = not read-only
' ------ END CONFIGURATION ---------
set objFSO = CreateObject("Scripting.FileSystemObject")

' Change this to GetFolder to hide/unhide a folder
set objFile = objFSO.GetFile(strFile)

if boolReadOnly = True then
   if objFile.Attributes AND 1 then
      WScript.Echo "File already read-only"
   else
      objFile.Attributes = objFile.Attributes + 1
      WScript.Echo "File is now read-only"
   end if
else
   if objFile.Attributes AND 1 then
      objFile.Attributes = objFile.Attributes - 1
      WScript.Echo "File is not read-only"
   else
      WScript.Echo "File is already not


 read-only"
   end if
end ifIn the left pane, browse to the parent folder of the file or folder you want to compress. Click on the parent folder. This displays the list of subfolders and files in the right pane.
In the right pane, right-click on the target file or folder and select Properties.
Click the Advanced button.
Check the box beside Compress contents to save disk space.
Click OK and Apply.
The compact command can compress and decompress files similar to
Windows Explorer. The following command compresses all files in the
current directory (/c option) and
all subdirectories (/s
option):
> compact /c /s
This command also causes all future files added anywhere under the current directory to be compressed.
To decompress all the files in the current directory and cause
all future files to not be compressed, use the /u option with /s:
> compact /u /s
The following command compresses all of the files with the .doc extension (i.e., Word documents) in the c:\docs directory:
> compact /c /s:c:\docs *.doc
The compress.exe utility works a little bit differently from compact. It doesn’t compress files transparently within the filesystem using NTFS compression. Instead it creates a compressed copy of a file. Here is an example:
> compress largetextfile.txt compressedfile.txt
The source file (largetextfile.txt) remains unchanged and the target file (compressedfile.txt) is a compressed version of that file. To compress all of the files in a directory, use this command:
> compress -R *.*
This creates compressed versions of each file and names them by replacing the last character of the source file with an underscore. For example, the compressed version of test.txt would be named test.tx_.
' This code compresses a
folder and its contents using NTFS compression
' ------ SCRIPT CONFIGURATION ------
strComputer = "."
strFile     = "<FilePath>" ' e.g., d:\scripts\test.vbs
' ------ END CONFIGURATION ---------
set objWMI = GetObject("winmgmts:\\" & strComputer & "\root\cimv2")
set objFile = objWMI.Get("Cim_Datafile='" & strFile & "'")
WScript.Echo objFile.Name
intRC = objFile.Compress ' To uncompress change this to objFile.Uncompress
if intRC <> 0 then
   WScript.Echo "There was an error compressing the file: " & intRC
else
   WScript.Echo "File compression successful"
end if

' This code compresses a folder and its contents using NTFS compression
' ------ SCRIPT CONFIGURATION ------
strComputer = "."
strFolder   = "<FolderPath>" ' e.g. d:\scripts
' ------ END CONFIGURATION ---------
set objWMI = GetObject("winmgmts:\\" & strComputer & "\root\cimv2")
set objFolder = objWMI.Get("Win32_Directory='" & strFolder & "'")
intRC = objFolder.Compress  ' To uncompress change this to objFolder.Uncompress
if intRC <> 0 then
   WScript.Echo "There was an error compressing the folder: " & intRC
else
   WScript.Echo "Folder compression successful"
end if
NTFS compression is a great feature because once you compress a file, NTFS handles decompressing it automatically for you when you attempt to view it or copy/move it to another folder. However, you shouldn’t start using compression everywhere. Decompressing and compressing files is CPU intensive. Be very careful when enabling compression on frequently accessed or modified files because it can have an adverse impact on performance.
MS KB 171892 (Err Msg: The File System Does Not Support Compression), MS KB 198038 (INFO: Useful Tools for Package and Deployment Issues), MS KB 251186 (Best Practices for NTFS Compression in Windows), MS KB 307987 (HOW TO: Use File Compression in Windows XP), MS KB 314958 (How To Use the COMPRESS, COMPACT, and EXPAND Commands to Compress and Expand Files and Folders in Windows 2000), and MS KB 323425 (HOW TO: Use the COMPACT Command to Compress and Uncompress Files and Folders in Windows Server 2003)
In the left pane, browse to the parent folder of the file or folder you want to compress. Click on the parent folder. This displays the list of subfolders and files in the right pane.
In the right pane, right-click on the target file or folder and select Properties.
Click the Advanced button.
Check the box beside Encrypt contents to secure data.
Click OK and Apply.
With the cipher.exe command, you can encyrpt and decrypt files and folders. Running it without any options lists the files in the current directory with a flag indicating which ones are encrypted (U = unencrypted, E = encrypted):
> cipher
The following command encrypts a single file:
> cipher /e /a <FileName>Here is an example:
> cipher /e /a mysecretfile.doc
The following command causes any new file added to the scripts directory to get encrypted. Existing files are not encrypted:
> cipher /e d:\scripts
The following command encrypts all files in a directory and any subdirectories:
> cipher /e /f /a /s:d:\scripts
This is the same command, with /e replaced by /d, which causes everything within the
d:\scripts directory to become
unencrypted:
> cipher /d /f /a /s:d:\scripts
NTFS supports the Encrypting File System (EFS) for encrypting the contents of files. Similar to compression, EFS is built into the file system so encryption and decryption of EFS-enabled files and folders is seamless to the enduser. And just like compression, enabling EFS should only be done after much thought about its impact. EFS can have a significant hit on the performance of a server and the access times for files.
For more on how to use EFS, including the recovery mechanisms built-in to EFS, see MS KB 324897.
You can use the inuse.exe command to replace a file that is locked by a process. You need to reboot after running the command for the change to take effect.
> inuse c:\foo.dll c:\windows\system32\foo.dll
In this example, the file c:\windows\system32\foo.dll will be replaced by c:\foo.dll after the system reboots.
' This code executes the inuse
command to replace a file.
' ------ SCRIPT CONFIGURATION ------
' Modify the command string as necessary
strCmdString = "inuse.exe c:\foo.dll c:\windows\system32\foo.dll"
' ------ END CONFIGURATION ---------
set objWshShell = CreateObject("WScript.Shell")
set objExec = objWshShell.Exec(strCmdString)
do while not objExec.StdErr.AtEndOfStream
    WScript.Echo objExec.StdErr.ReadLine( )
loop
do while not objExec.StdOut.AtEndOfStream
    WScript.Echo objExec.StdOut.ReadLine( )
loopEver needed to replace a DLL or other file, but couldn’t because the system said it was in use? With the inuse utility, you can replace files that are currently locked. Simply pass inuse the location of the new version of the file and the location of the currently locked file, and on reboot, the file will be overwritten. inuse works by setting a registry value that Windows looks at when booting up to determine if there are any pending file renames. For more information on the specific key and value, see MS KB 181345.
On Windows 2000, inuse is a Resource Kit tool and therefore not officially supported by Microsoft, so use it at your own risk. On Windows Server 2003, the command is part of the default installation and is supported. Also keep in mind that there is no “undo” function. So once you’ve overwritten a file, unless you made a copy of the original previously, you won’t be able to revert back to it.
You want to take ownership of a file or folder. This may be necessary if you find that NTFS permissions have you locked out of a file or folder. As long as you are an administrator of the system, you should be able to take control of it and reset permissions as necessary.
In the left pane, browse to the parent folder of the file or folder you want to take ownership of. Click on the parent folder. This displays the list of subfolders and files in the right pane.
In the right pane, right-click on the target file or folder and select Properties.
Select the Security tab.
Click the Advanced button.
Select the Owner tab.
Under the Change owner to heading select the new owner and click Apply.
Use the following command to attempt to take ownership of a file:
> takeown <FileName>For example:
> takeown d:\iwanna.exe
If you want to grant ownership to someone else, use the subinacl.exe command:
> subinacl /file<FilePath>/setowner=<User>
For example:
> subinacl /file \\rallen-svr1\docs\guide.doc /setowner=AMER\rallen
Or you can even grant ownership to a user over all the files in a directory:
> subinacl /subdirectories \\rallen-svr1\docs\* /setowner=AMER\rallen
' This code transfers ownership
 of the specified file to the
' user running the script.  If strFile is set to a folder path
' then ownership of all files within the folder will be changed.
' ------ SCRIPT CONFIGURATION ------
strFile = "<FilePath>"       ' e.g., d:\scripts
strComputer = "<ServerName>" ' e.g., rallen-svr1 or . for local server
' ------ END CONFIGURATION ---------
set objWMI = GetObject("winmgmts:\\" & strComputer & "\root\cimv2")
set objFile = objWMI.Get("CIM_DataFile.Name='" & strFile & "'")
intRC = objFile.TakeOwnership
if intRC = 0 then
   WScript.Echo "File ownership successfully changed"
else
   WScript.Echo "Error transferring file ownership: " & intRC
end if
If you are taking ownership of a file or folder because you were locked out of it, even after you take ownership you still have to go in and grant yourself the necessary NTFS permissions to access and manipulate the file or folder.
With Windows Explorer on Windows 2000, you can only assign one of the members of the local administrators group as an owner of a file or folder. With Windows Server 2003, there is a new button called Other Users or Groups that lets you use the object picker to select any user as an owner.
To find who last opened or modified a file, you have to enable auditing on that file. To enable auditing, you have to enable auditing at the server level and then enable auditing on the particular object (in this case, a file) in which you are interested.
Do the following to enable auditing at the server level:
From the Administrative Tools, open the Local Security Policy snap-in.
In the left pane, expand Local Policy and click on Audit Policy.
In the right pane, double-click Audit object access.
Check the boxes beside Success or Failure (as needed).
Click OK.
Now you need to enable auditing on the target file(s) or folder(s):
Open Windows Explorer.
In the left pane, browse to the parent folder of the file or folder on which you want to enable auditing. Click on the parent folder. This displays the list of sub-folders and files in the right pane.
In the right pane, right-click on the target file or folder and select Properties.
Select the Security tab.
Click the Advanced button.
Select the Auditing tab.
Click the Add button.
Enter the user or group you want to audit access for (use the
Everyoneprincipal to audit all access) and click OK.In the Auditing Entry dialog box, select the types of access you want to audit. You have to select Success events separately from Failure events. Click OK when you are done.
Click Apply.
Use the auditpol.exe command to enable auditing at the server level:
> auditpol \\<ServerName> /enable /object:allMicrosoft doesn’t provide a tool to configure the audit
settings of files. However, you can do this with the setacl.exe tool. It is available for download from SourceForge
at http://setacl.sourceforge.net/. Here is an
example of setting an audit entry on the file
d:\myimportantfile.txt for all failed access
attempts by the Everyone
principal:
> setacl -on "d:\myimportantfile.txt" -ot file -actn ace -ace "n:everyone;p:full;m:
aud_fail;w:sacl"
Be careful when enabling auditing on a frequently accessed set of files or folders. The number of audit messages in the Security event log can grow quickly with just a few accesses of the file. Monitor the Security event log closely after initially enabling auditing just to make sure you don’t flood it.
There are two different categories of open files on a system. Since the days of Windows NT, the operating system has supported the capability to view the files that are open from shared folders. This is useful when you want to see who is accessing files on a file server, especially if you need to take the system down for maintenance and you want to notify the impacted users.
First seen in Windows XP and supported in Windows Server 2003 is the ability to view all open files on a system (not just shared folders). To use this feature, you first have to enable support for it. The reason this isn’t enabled by default is because there is a slight system-wide performance impact when tracking all open files.
None of the standard graphical tools provide a list of the open files on a system. The closest thing to it would be the Sysinternals File Monitor tool. For more information, see Recipe 4.21.
To view the open files from shared folders, do the following:
From the Administrative Tools, open the Computer Management snap-in.
In the left pane, expand System Tools → Shared Folders → Open Files.
To close an open file, right-click on it in the right pane and select Close Open File.
To view the open files from shared folders, run this command:
> net file
The output from that command displays open files and their associated ID. Using this ID, you can close a specific file:
> net file <ID> /closeTo view all open files, first enable support for it:
> openfiles /local on
You’ll need to reboot the system before this setting takes effect. At that point, you can see open files using this command:
> openfiles
Use the /s
<ServerName> option to target a
remote server. Similar to the net
file command, you can close any
open file by running this command:
> openfiles /disconnect /id <ID>You can also disconnect all the files open by a particular user:
> openfiles /disconnect /a <UserName>You want to find the process or processes that have a file open. This is often necessary if you want to delete or modify a file, but are getting errors because it is in use by another process.
Use the Sysinternals handle.exe command to view the processes that have a lock on a file:
> handle <FileName>This example commands shows all the processes that have a handle to the personal.pst file:
> handle personal.pst
' This code prints the output from the handle.exe command
' ------ SCRIPT CONFIGURATION ------
strFilePattern = "<FileName>" ' e.g., personal.pst
strHandleExec = "handle.exe"  ' If handle.exe isn't in your PATH, you will
                              ' need to specify the full path.
' ------ END CONFIGURATION ---------
set objWshShell = CreateObject("WScript.Shell")
set objExec = objWshShell.Exec(strHandleExec & " " & strFilePattern)
do while not objExec.StdOut.AtEndOfStream
    WScript.Echo objExec.StdOut.ReadLine( )
loopProcesses running on your system are constantly opening and closing files (see Recipe 4.21 for more on how to see this activity). When a process accesses a file, the process is said to have a handle to the file. Processes can also have handles to other system resources, such as Registry keys and values. For certain types of file accesses, a process may obtain an exclusive lock on the file (such as when it needs to write to the file), which means no other processes can modify the file; you may still be able to read the file, but you won’t be able to overwrite, move, or delete it.
This may be a bit annoying if there is a file you need to do something with. You have a couple of options. First, if you determine the process that has a handle to the file is not important, you could try to kill it (see Recipe 6.3). This will often remove the lock on the file, but this isn’t the most graceful approach. If you just want to replace the file, another option entails following the instructions in Recipe 4.16, which will replace a file after the next reboot.
Recipe 4.16, Recipe 4.21, Recipe 6.2, and MS KB 242131 (How to: Display a List of Processes That Have Files Open)
Open the Sysinternals File Monitor (filemon.exe ). It automatically starts logging all file activity when it is opened.
To stop capturing file activity, click the Capture icon
(magnifying glass), select File
→ Capture Events from the menu, or type
Ctrl-E.
To search the captured data, click the Find icon (binoculars),
select Edit → Find from
the menu, or type Ctrl-F. The
text you enter will be matched against any part of the captured data
(index, time, process name, request, and file path).
To filter the captured data so that only the entries that
match your filter are displayed, click the Filter icon, select Options → Filter/Hightlight from the menu, or type
Ctrl-L.
If you double-click a particular entry in File Monitor, it will open a Windows Explorer window to the directory containing the target file.
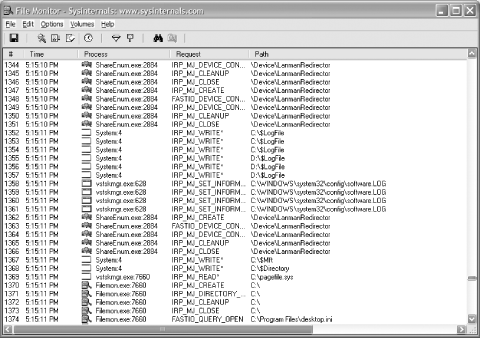
Ever hear your hard disks spinning or disk indicator light flashing, but you don’t know why? You may not appear to have any applications open or running, but something is still accessing the hard disks. The Sysinternals File Monitor utility lets you see what processes are reading or writing files. It has some robust filter and search capability as well, which is helpful considering the fact that File Monitor can capture thousands of operations in a matter of minutes. Figure 4-2 shows sample output from File Monitor.
The forfiles.exe utility is a handy tool that lets you search and iterate over a group of files and perform an action against them. For example, this command searches the d:\ drive for all files with a .zip extension and prints out the name of each file and its size:
> forfiles /p d:\ /s /m *.zip /c "cmd /c echo @file : @fsize"
Here is another example that opens everything that ends in
.txt with notepad. It performs
a check to make sure only files are opened, not directories
(@isdir= =FALSE):
> forfiles /m *.txt /c "cmd /c if @isdir= =FALSE notepad.exe @file"
For more information about the command-line options forfiles supports, run forfiles /? for the Windows Server 2003 version and
forfiles -h for the Windows 2000 version. The two
versions vary slightly.
' This code shows how to iterate over all the zip files on a system
' ------ SCRIPT CONFIGURATION ------
strComputer  = "."
strExtension = "zip"
' ------ END CONFIGURATION ---------
set colFiles = objWMI.ExecQuery("select * from Cim_DataFile " & _
                             " where extension = '" & strExtension & "'")
WScript.Echo "Files with a ." & strExtension & " extension:"
intCount = 0
for each objFile in colFiles
   WScript.Echo "   " & objFile.Name

   ' Do some action here

   intCount = intCount + 1
next
WScript.Echo "Total: " & intCountIn the left pane, browse to the folder you want to start or stop sharing.
Right-click on the folder and select Sharing and Security (or Sharing on Windows 2000).
To stop sharing the folder, select Do not share this folder.
To share the folder, select Share this folder. Enter the Share name, enter a description for the share in the Comment field, and specify the User limit.
Click OK to close the dialog box.
The following command creates a share called Perl Libs:
> net share "Perl Libs"=d:\perl\lib /unlimited /remark:"Core Perl modules"
The /unlimited option means
that an unlimited number of users can access the share
simultaneously. You can limit the number of simultaneous users by
using the /users:
<Number> option instead.
This command deletes a share:
> net share "Perl Libs" /delete
' This code creates a share.
' ------ SCRIPT CONFIGURATION ------
strComputer   = "."
strPath       = "d:\perl\lib"
strName       = "Perl Libs"
intType       = 0 ' share a disk drive resource
intMaxAllowed = 10
strDescr      = "Core Perl modules"
' ------ END CONFIGURATION ---------
set objWMI = GetObject("winmgmts:\\" & strComputer & "\root\cimv2")
set objShare = objWMI.Get("Win32_Share")
intRC = objShare.Create(strPath, strName, intType, intMaxAllowed, strDescr)
if intRC <> 0 then
   WScript.Echo "Error creating share: " & intRC
else
   WScript.Echo "Successfully created share"
end if

' This code deletes a share.
' ------ SCRIPT CONFIGURATION ------
strComputer   = "."
strName       = "Perl Libs"
' ------ END CONFIGURATION ---------
set objWMI = GetObject("winmgmts:\\" & strComputer & "\root\cimv2")
set objShare = objWMI.Get("Win32_Share.Name='" & strName & "'")
intRC = objShare.Delete
if intRC <> 0 then
   WScript.Echo "Error deleted share: " & intRC
else
   WScript.Echo "Successfully deleted share"
end ifAfter you create a share, you need to modify the access control list (ACL) to include the users and groups that can access the contents of the share (see Recipe 4.25 for more on this).
If you want to create a hidden share, simply append “$” to the end of the share name. The only difference in a hidden share is that it won’t be directly viewable when listing the shared folders on a server. Hiding shares is kind of like hiding files (Recipe 4.12); it is up to the application to display them or not. So hidden shares are not truly hidden, but they will not be visible to the casual user.
The following command displays administrative and nonadministrative shares:
> net share
To view the list of shares on a remote server, use the Sysinternals psexec.exe utility to run the net share command against the server:
> psexec \\<ServerName>-u<User>net share
For example:
> psexec \\srv01 -u administrator net share
You can also view all of the nonadministrative shares on a remote server using this command:
> net view \\<ServerName>' This code displays all of the shares on a system.
' ------ SCRIPT CONFIGURATION ------
strComputer = "."
' ------ END CONFIGURATION ---------
set objWMI = GetObject("winmgmts:\\" & strComputer & "\root\cimv2")
set colShares = objWMI.InstancesOf("Win32_Share")
for each objShare in colShares
WScript.Echo objShare.Name
WScript.Echo " Path: " & objShare.Path
WScript.Echo " Allow Max: " & objShare.AllowMaximum
WScript.Echo " Caption: " & objShare.Caption
WScript.Echo " Max Allowed: " & objShare.MaximumAllowed
WScript.Echo " Type: " & objShare.Type
WScript.Echo
nextThe Sysinternals Shareenum program is another tool that you can use for viewing shares. It lists the shared folders on all hosts in a particular domain. Depending on the number of hosts in the domain, it can take a while to complete. It is interesting to see the output and discover what types of shared folders users have created. You may even want to periodically check the security on these shared folders to ensure that users are following your documented policies for shared folder security.
There are two ways to restrict access to a share; you can set share permissions or NTFS permissions. I’m going to describe how to set share permissions, but see the Discussion section for more on NTFS permissions, the preferred method.
The generally accepted way to manage share permissions is to not actually manage permissions on the shares themselves, but on the underlying files and folders using NTFS permissions. With Windows 2000, this is pretty straightforward. By default, share and NTFS permissions are both set to allow Everyone Full Control. So you create a share and just modify the NTFS permissions to include the user or groups that should have access and remove the Everyone entry.
With Windows Server 2003, it isn’t as straightforward. In an effort to make things more secure, Microsoft changed the default share permissions when creating a new share to allow Everyone only Read access. That means that, regardless of whether the underlying NTFS permissions grant Write access to a group, members of that group won’t be able to write to the share until you also grant Change (or more appropriately, remove the Read restriction) on the share permissions. I said that this is the generally accepted way to manage permissions because you may find some people prefer to rely on share permissions. In my mind, using share permissions makes things a little more complicated, but to each his own.
You want to enable web sharing for a folder. This allows users from non-Windows-based PCs to view the contents of a share using the web.
In the left pane, browse to the folder you want to share.
Right-click on the folder and select Sharing and Security (or Sharing on Windows 2000).
Select the Web Sharing tab.
Select Share this folder.
A dialog box appears with the settings you can configure for the web share. Click OK when you are done.
Click OK to close the dialog box.
To use Web Sharing, you must have IIS installed and running. When you create a web share, you are doing nothing more than creating a virtual directory in IIS. See Recipe 12.5 for more on virtual directories.
The security for a web share is a little different from a regular share: you have to select the access permissions and application permissions you want to use. Here is a list of access permissions:
- Read
Allows web users to read files in the folder
- Write
Allows web users to write files in the folder
- Script source access
Allows web users to view the source code of scripts in the folder
- Directory browsing
Allows web users to browse the folder contents
And here are the application permissions:
- None
Does not allow the execution of scripts or programs
- Scripts
Allows the execution of scripts, but not programs
- Execute
Allows the execution of both scripts and programs
Keep in mind that NTFS and Web server permissions also apply to
web shares. If the user is accessing the share without authenticating,
the permissions will be based on the IUSR account IIS is running under
(normally IUSER_<computername>). If
the user authenticates, permissions will based on his or her
credentials.
Open the Active Directory Users and Computers (ADUC) snap-in.
In the left pane, browse to the OU in which you want to publish the share.
Right-click the OU and select New → Shared Folder (if you don’t see the New heading then you don’t have permission to create objects in the OU).
For Name, enter the name of the share as you want it displayed to users.
For UNC Path, enter the network path of the share (e.g., \\fs01\myshare).
Click OK.
' This code publishes a share in AD.
' ------ SCRIPT CONFIGURATION ------
strComputer = "ad-01"  ' name of a domain controller
strShareName = "Perl Libraries"
strSharePath = "\\fs01\perl-libs"
strShareDescr = "Core Perl libraries"

set objRootDSE = GetObject("LDAP://" & strComputer & "/RootDSE")
strParentDN = "/OU=SharedFolders," & objRootDSE.Get("defaultNamingContext")
' ------ END CONFIGURATION ---------
set objOU = GetObject("LDAP://" & strComputer & strParentDN)
set objVol = objOU.Create("volume", "cn=" & strShareName)
objVol.Put "uncName", strSharePath
objVol.Put "Description", strShareDescr
objVol.SetInfo
WScript.Echo "Successfully created object: " & objVol.NameAfter you’ve created a shared folder, your users may not be able to find it or even know about
it. One way to make it available is by publishing it to Active Directory. Shared folders
are represented by the volume object class in Active
Directory. The main pieces of information you need in order to create a volume object are the share name, the share UNC path, and a
share description.
Users can search shared folders in Active Directory using the Find Users, Contacts, and Groups dialog box. You can get to this box going to My Network Places and clicking Search Active Directory in the left pane, or by running the Active Directory Users and Computers snap-in, right-clicking the target domain in the left pane and selecting Find. After the box is displayed, select Shared Folders beside Find, enter your search criteria, and click Find Now.
The one major downside to publishing shares in Active Directory
is the maintenance overhead. Unlike printer publishing in Active
Directory, there is no automatic pruning or maintenance process that
will cleanup volume objects for
shares that no longer exist. Unless you create a process to update
Active Directory whenever a share is created, moved, or deleted,
Active Directory will eventually become out of date and ultimately be
an unreliable source of shared folder information.
Get Windows Server Cookbook now with the O’Reilly learning platform.
O’Reilly members experience books, live events, courses curated by job role, and more from O’Reilly and nearly 200 top publishers.

