Web applications sometimes need to perform operations that require significant processing time to complete. This entails a certain amount of waiting time for the user, who is often unaware of what’s actually happening. While such delays may be unavoidable, you can improve the user experience by providing an indicator that informs the user about the processing going on behind the scenes.
BusyBoxDotNet is a library of ASP.NET web controls capable of showing a customizable message box during time-consuming activities. BusyBoxDotNet makes it easy to show and hide the box when the operation starts and finishes, relieving the developer from the need to write JavaScript code to achieve such functionality.
There are a couple of conceptually different time-consuming operations: those happening on the server and those happening on the client. BusyBoxDotNet can manage both of them. The first category includes intensive server-side tasks such as report generation, queries to data stores, or complex computations. Time-consuming tasks on the client side involve pages that require some time to be rendered by the browser, such as pages containing grids of data or many external visual resources.
Tool | BusyBoxDotNet |
Version covered | 0.2.1 |
Home page | |
Power Tools page | |
Summary | An ASP.NET web-control library capable of showing a customizable message during time-consuming activities |
License type | LGPL |
Online resources | Quickstart guide, online and downloadable demo |
Supported Frameworks | .NET 1.x until 0.2.1; NET 2.0 since 0.2.1 |

Download BusyBoxDotNet by following the Downloads link on its home page. The distribution is a .zip file containing BusyBox’s assembly and the SharpZipLib file mentioned later in this article. Extract the files to a convenient spot, then add them to Visual Studio’s toolbox (as shown in the Appendix).
BusyBoxDotNet makes extensive use of client-side scripts. It can apply GZip compression when resources are sent to the client, resulting in significant bandwidth savings. BusyBoxDotNet depends on SharpZipLib (discussed in Chapter 4) to handle this compression.
On the client side, BusyBoxDotNet employs the Yahoo! User Interface (YUI) library to manipulate the HTML DOM, apply effects, and manage events. The YUI library is released under the BSD license and is available at http://developer.yahoo.com/yui/.
BusyBoxDotNet generates output dynamically using DOM manipulation at runtime and is unable to provide a preview in the designer. However, the controls do expose a number of properties than can be changed, either via the property grid, in the HTML source, or in the code-behind class.[1] BusyBoxDotNet works on most modern browsers and has been tested with Internet Explorer 6.0, Opera 8.54, Netscape 8.1, and Firefox 1.5. Opera presents some limits regarding the opacity of HTML elements, which reflect on the visual appearance of the control when rendered in this browser. BusyBoxDotNet also has difficulties displaying animated images in Internet Explorer 7 Beta 2.
BusyBoxDotNet is available in both source and binary forms as a .zip compressed archive. This section assumes you have downloaded the binary release or ended up with binaries after compiling the sources.
Tip
When compiling the source code, you’ll have to build BusyBoxDotNet in Release configuration in order to enable resource caching. Compiling in Debug mode for debugging purposes disables caching.
The primary control you will work with is the BusyBox control. Simply drag it to your web form; where you place it on the page is irrelevant since its behavior will be managed using its properties.
You should be prompted to register an HttpHandler in the web.config file when you drop the BusyBox control onto the design surface. BusyBoxDotNet needs the handler to extract the resources embedded in its assembly. In the event that this doesn’t happen, you’ll have to register it manually, following the procedure described below.
You must also set the web form’s document type to XHTML. Visual Studio 2005 does this by default, but the procedure for doing it manually is also detailed below.
If you aren’t using an integrated development environment, you’ll need to do some more work to embed the control into your web forms. This step-by-step walkthrough will guide you through the process:
If necessary, create a bin folder in the root directory of your web site and copy the BusyBoxDotNet.dll and ICSharpCode.SharpZipLib.dll files there.
Create a new web.config file (or use the existing one) and register the
HttpHandlerinside the<httpHandlers>subsection of the<system.web>section:<httpHandlers> <add path="BusyBoxDotNet.axd" verb="*" type="BusyBoxDotNet.ResourceHttpHandler, BusyBoxDotNet" /> </httpHandlers>Register the control’s prefix declaration inside your web form by adding this directive right below the
<%@ Page [...] %>directive:<%@ Register Assembly="BusyBoxDotNet" Namespace="BusyBoxDotNet" TagPrefix="busyboxdotnet" %>
Set the document type of the page to XHTML by adding the following directive right below the one you added in step 3:
<!DOCTYPE html PUBLIC "-//W3C//DTD XHTML 1.0 Transitional//EN"
"http://www.w3.org/TR/xhtml1/DTD/xhtml1-transitional.dtd">
Add a
BusyBoxcontrol to the page, using the following code snippet:<busyboxdotnet:BusyBox ID="BusyBox1" runat="server" />
Remember that where you place it is irrelevant. It won’t take up space on the rendered document, and its position won’t influence its behavior.
Once you’ve added an instance of the BusyBox control to the page, you can check whether it is working by simulating a long processing task.
First, add a Button server control to the page and create a handler for its server-side click event. In Visual Studio, all you need to do is double-click the button.
Then add the following line of code to the handler to simulate a time-consuming activity:
System.Threading.Thread.Sleep(3000);
This puts the currently executing thread to sleep for three seconds, thus simulating an operation that takes exactly this amount of time to execute on the server.
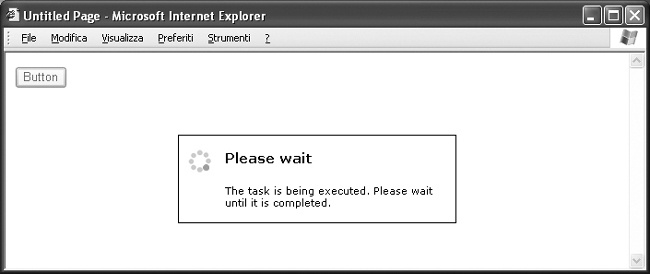
To test that everything has been set up correctly, open the web page in the browser and click the button. Figure 1-11 represents approximately what you should see for about three seconds after the click.
Once you have BusyBoxDotNet up and running on your page, you can start customizing the behavior of the control. The first thing to decide is when you want to show the BusyBox control. This is accomplished using the ShowBusyBox property, which exposes a set of values allowing a fine grade of personalization:
OnPostBackOnlyThe message box is shown whenever the page posts back.
OnLeavingPageThe message box is shown whenever another page is requested (that is, both on postbacks and on redirections).
OnLoadThe message box is shown when the page starts rendering in the browser and automatically hides when the page has finished loading (that is, when it and its embedded resources have been rendered completely).
CustomThe message box is never shown automatically; you need to trigger its events manually.
Recalling the earlier categorization of common situations when long processing tasks are likely to occur, we can assert that the first two available values for this property pertain to server-side tasks, while the OnLoad value is useful for client-side delays. The Custom value can be used for both.
Tip
The OnLoad value has nothing to do with the Load event of the Page class. When OnLoad is set, the Overlay property must be set to false, or an exception will be thrown. This is because the page is still loading, and the control can’t foresee what size the page will be to create an appropriate overlay.
In some circumstances, you’ll need finer control over the control’s behavior. The Custom value of the ShowBusyBox property can be used for this purpose. For example, suppose you have a page with some buttons on it, but only one of them triggers a long processing task on the server. If the default value of the ShowBusyBox property is set, the box will pop up when the user clicks any of the buttons on the page—but you want the control to appear only when the user clicks the button connected to the long processing task.
To accomplish this, you need to make use of the ShowFunctionCall property. This property returns the JavaScript code to run in order to show the box. Note that this is client-side code, so you need to assign it to one of the client-side events of a control.
For our example, after setting the ShowBusyBox property to the Custom value, you will need to subscribe to the client-side Click event of the long-running task button. You’ll need to pass the ShowFunctionCall return value as part of that subscription. Assuming that the ID of the Button control is Button1 and the ID of the BusyBox control is BusyBox1, you can write the following code in the Page_Load handler, as well as in any other Page event handler fired before the Render is executed:
Button1.OnClientClick = BusyBox1.ShowFunctionCall;
The OnClientClick property is an ASP.NET 2.0–only feature. Since BusyBoxDotNet is still available for ASP.NET 1.1 until the 0.2.1 release, here’s a way of doing the same thing in ASP.NET 1.1:
Button1.Attributes.Add("onclick", BusyBox1.ShowFunctionCall);By default, the control will show up centered on the page and will remain there even during page scrolling and resizing. The Position property controls this behavior. It can assume the following values:
CenterLeftTopRightTopLeftBottomRightBottomDock
While most of the PositionProperty values are self-descriptive, Dock needs more explanation. The first five values are relative to the page, while Dock is relative to the position of another control on the page. You’ll need to enter a reference to another control when setting the Dock value. Do this by passing the target control’s ID to the AnchorControl property. This way, the message box will pop up next to the indicated control. You can fine-tune this behavior by setting the DockPosition property, which allows you to choose where to show the box relative to the anchor control.
To give a brief overview of other customization options, let’s examine some other interesting properties exposed by the control.
The Layout property exposes an enumeration of values that let you choose what is displayed inside the message box. By default, a title, a message, and an animated image placed on the left side of the box are displayed (all of them customizable via their respective properties), but you can choose to show the image at the bottom of the box, display only the message and the image, or even present the image by itself.
FadeOnMouseOver accepts a Boolean value and lets you choose whether the opacity of the message box changes when the mouse goes over it. FadeOnMouseOverOpacity lets you set the value of that opacity.
ShowDelay and ShowTimeout can be useful in some situations. Imagine that you are working on a page where none of the operations the user can perform are particularly time-consuming. In this case, you won’t necessarily need to use a BusyBox control; it may even be annoying for users to see a message box flickering whenever they click a button.
But what if the server hosting your web site sometimes gets overloaded with requests and may take some time to reply? You won’t want to make your users wait without notifying them that something is going on. In this case, you can place the control on the page and set its ShowDelay property to a value such as 3000, which means that it will be shown three seconds after the event for popping it up has been triggered (ShowDelay values are in milliseconds). In other words, your users won’t see it unless the server takes more than three seconds to reply.
ShowTimeout, on the other hand, can be used to hide the box in case nothing happens during the number of milliseconds set as its value. This can be useful when generating documents that open up in new windows.
BusyBoxDotNet is an open source project hosted on SourceForge, so you can get support—as well as ask for new features and report bugs—via the project’s home page, where you will find links to the support options.
Get Windows Developer Power Tools now with the O’Reilly learning platform.
O’Reilly members experience books, live events, courses curated by job role, and more from O’Reilly and nearly 200 top publishers.

