Chapter 1. Using Windows 8.1
Windows 8.1 is very different from previous versions of Windows from Microsoft, primarily in that it has a new look that’s been redesigned to be easy to use with touch as well as with a mouse and keyboard. It’s been greatly simplified too, so for the first time it’s no longer necessary to understand how small and fiddly drop-down menus work, or to understand how to control programs using complicated desktop menus where you have to manage and juggle multiple programs on your screen at one time.
Now we have an update to Windows 8 in the form of Windows 8.1. It’s free, downloadable from the Windows Store, and contains many features and improvements.
Windows 8.1 can be operated by a keyboard and mouse without problems, though with a touchscreen computer or tablet you will benefit from the richest experience.
Everything has changed to make it not just easier to find and control documents, apps, and programs, but to make overall control of Windows and your settings simpler. At last, you don’t need to be a technical user to get the best out of using Windows.
When you use Windows 8.1 on your computer, laptop, or tablet for the first time, you’ll notice how different it looks and works. This new look makes it easier for you to see what’s going on in your online life at a glance: Live Tiles can show you information about your email, calendar, instant messaging, social networking, sports, news, and much more, all without ever leaving the new Start screen.
In this chapter, I’ll demonstrate what these new interface elements are and how to use them.
Top Tips from This Chapter
- You can open menus and options on the Start screen by swiping with your finger from any edge of the screen.
- Move your mouse to the corners of the screen to display options and menus.
- On your keyboard, you can hold down the Windows Key in the bottom left of the keyboard and press Z or C to open menus and options.
The Start Screen Versus the Desktop: What You Need to Know
I’ve already mentioned the new interface in Windows 8.1, the Start screen. The traditional Windows desktop still exists though, so you can still use software you’re used to in Windows 7.
Tip
Windows RT is slightly different from Windows 8.1 in that you cannot install Desktop programs. RT still comes with a desktop and pre-installed copies of Microsoft’s Office programs Word, Excel, PowerPoint, OneNote, and Outlook. Also, the desktop utilities like Paint, Notepad, and the Calculator still exist there. You cannot install more desktop software on a Windows RT computer though.
There is a new style of program in Windows 8.1, however, called an App. These apps (or applications) run full screen and are easier and friendlier to use than desktop programs. Windows 8.1 comes preinstalled with many apps for email, calendar, news, and so on, and you can download many more from the new Windows Store. You will see the Store tile on the Start screen.
Windows 8.1 apps come from the new Windows Store. This is an easy to find and easy to use way of getting the apps you want, a task that has been difficult in the past with desktop software that was scattered across hundreds of individual websites. I will show you how to use the Windows Store and install apps and programs in Chapter 4.
Starting Windows 8.1
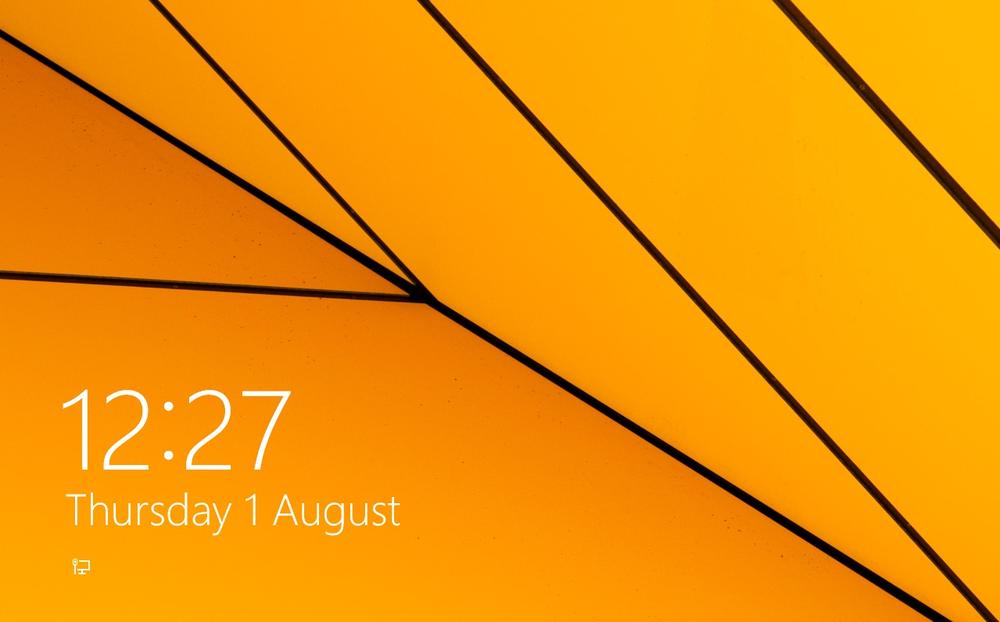
When Windows 8.1 starts, you will see the lock screen (Figure 1-1). This displays the time and date and can also show extra information, including how many emails you have and what your next calendar appointment is. You can also use this lock screen as a digital photo frame, and I’ll show you how to set this up in Chapter 3.
Tip
You open the lock screen by swiping upward on the screen with your finger if you have a touch display, or by pressing any key on the computer’s keyboard.
When you first started using your computer, you may have set a password for your user account. If you did, you will be asked for this before you can unlock the computer. You can also create a numerical (PIN) password for Windows 8.1 or use a picture password. I will show you how to do this in Chapter 13.
Tip
To switch between using a standard password, PIN, or picture if you have one set, click/touch sign-in-options at the sign-in screen when asked for your password.
Finding Your Way Around the Start Screen
The Start screen (Figure 1-2) in Windows 8.1 is based around square and rectangular colored blocks called Tiles. When clicked or tapped, each one starts an app. The app will then perform a specific task, such as sending and receiving email, viewing web pages, editing photographs, or playing a game. The Start screen pans left to right across your screen.
Tip
Swipe left and right with your finger to pan across the Start screen. If you are using a mouse, you will see a scroll bar at the bottom of the screen when you move the mouse. Click/Touch and drag this left and right to look around the Start screen. You can also use the scroll wheel (up and down) on your mouse to move left and right on the Start screen.
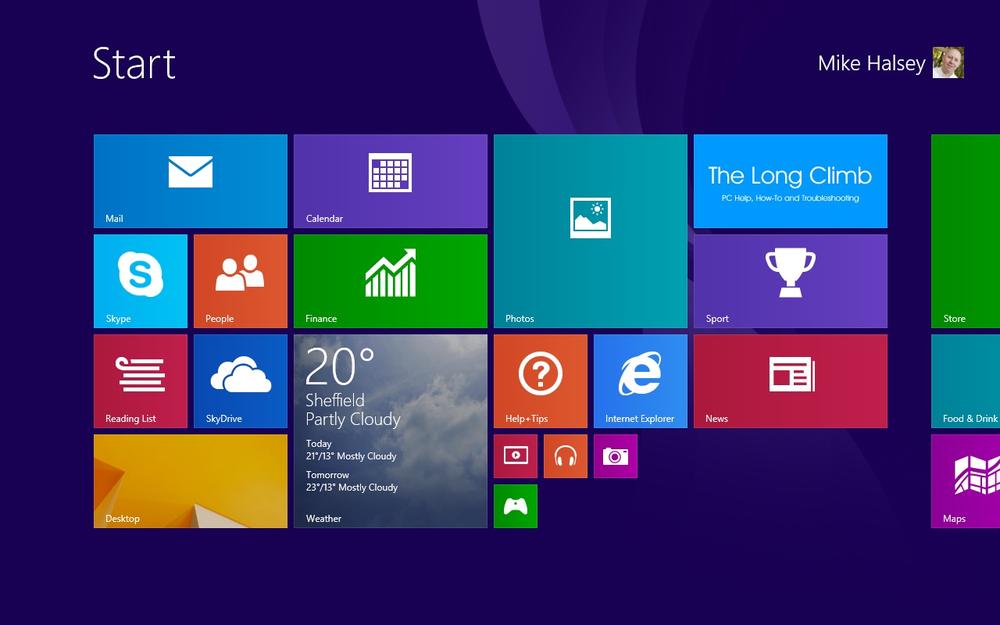
As you look around the Start screen, you will see that some Tiles change occasionally to display text or images. These are Live Tiles, which give you information from inside the app or show you what is new or changed, such as giving you a message.
These messages can include details of new emails or social network messages, informing you of the number of updates that are available for your apps in the Windows Store or giving you news headlines.
You can rearrange Tiles on the Start screen by right-clicking or touching and holding one of them. This puts you into customization mode, where you can drag tiles around and drop them into new locations, which can help you organize them to best suit you. I will show you how to organize the Start screen in Chapter 4.
Tip
When you drag a Tile between groups, you will see a colored vertical bar appear. If you drop the Tile onto this bar, you can create a new group. This can be useful to separate apps. For example, you can separate games, websites, and so on.
Using the Charms
The Start Button from previous versions of Windows (sometimes known as the Windows Orb) had the function of helping you find and run programs. In Windows 8.1, you can find the Start button in the new Charms menu (Figure 1-3). This pops out from the right side of the screen and contains icons for useful tasks in Windows 8.1.
You can open the Charms Menu by swiping in from the right of the screen with your finger or pressing WindowsKey+C on your keyboard (the WindowsKey is the key at the bottom left of your keyboard with the Windows logo on it). To open the Charms Menu with a mouse, move your mouse to the bottom right or the top right corner of the screen.

On the Charms Menu, you will find the following options:
- Search opens the search panel so you can find apps, documents, and Windows 8.1 Settings.
- Share allows you to share text, pictures, and more between Windows 8.1 apps and also save pages from apps and the Internet to read later.
- Start returns you to the Start screen; this is also available by pressing the Windows Key on your keyboard or the Windows button on your tablet computer.
- Devices allows you to print documents, web pages, and information from apps, use external display projectors, and other hardware devices.
- Settings displays the Windows Settings and controls as well as displaying controls for the currently running app.
Tip
You can also search for apps, settings, and files and even Internet content by typing directly at the Start screen. You do not need to open the Search panel.
Using the App Bar
If you have used an earlier version of Windows, you might know that pressing the right mouse button can bring up a menu of options associated with an icon or program. In Windows 8.1 apps and on the Start screen, this right-click now displays the App Bar.
The App Bar (Figure 1-4), which is also available by swiping up from the bottom of your screen with your finger or swiping down from the top, contains menu options that are available for that app.
To open the App Bar with your mouse, right-click in an app or on the Start screen. To open the App Bar from your keyboard, press WindowsKey+Z.
These options are equivalent to drop-down menus in Windows desktop programs and can perform many functions, each of which depends on the context of where you are and what you are doing.

Tip
To perform an action on a Tile on the Start screen, such as hiding it from the Start screen completely (I will show you how to organize apps and tiles on the Start screen in Chapter 4), you can right-click/touch on the Tile with your mouse, or touch and hold it with your finger, and the App Bar will appear with options for actions you can perform on that Tile. You can open the App Bar from your keyboard by pressing WindowsKey+Z in any app or from the Start screen.
If you want to open a menu in an app or on the Start screen, you will do this from the App Bar. This is where all the controls for apps can be found.
Finding All the Apps in Windows 8.1
Not all of the apps and software in Windows 8.1 will appear on the Start screen. For example, you may have chosen to hide a Tile to keep your Start screen tidy, or perhaps you don’t use it regularly. Also, newly installed apps and programs won’t appear on the Start screen, so if you want to pin them there you will need to do so from within the All Apps view.
You can see all of the apps that are installed in Windows 8.1, including Windows desktop programs. When you move your mouse around your screen, a small down arrow will appear near the bottom left corner. You can click this to open the All Apps view. If you are using touch, swipe upward on the Start screen to open the All Apps view.
Tip
You can return to the Start screen by swiping downward in the All Apps view with your finger, clicking the small up arrow near the bottom left of your screen, or pressing the Windows key.
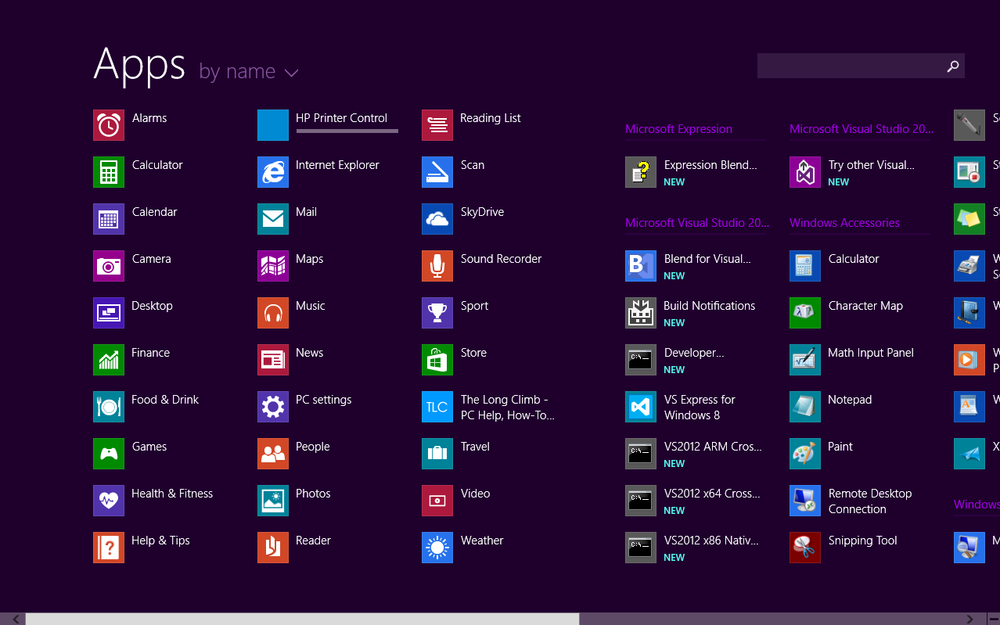
In the All Apps view (Figure 1-5), you will see every app and all of the desktop software that is installed on the computer. The apps that appear on the left of the screen, and the desktop software on the right, are organized into clearly labelled categories to make things easy to find. You can move left and right in the All Apps view as you would on the Start screen. You can change how your apps and programs are arranged in the All Apps view by clicking the by Name link in the top left of the screen.
Tip
If you want to pin an app or program back on the Start screen, right-click (touch and hold) it and select Pin to Start from the App Bar.
Switching Between Running Apps in Windows 8.1
You can press the Windows Key on your keyboard or the Start Charm at any time to return to the Start screen, but you can also switch between apps by dragging the previous app from the left of the screen with your finger. With a keyboard, you can use the WindowsKey+Tab keys to switch between running apps.
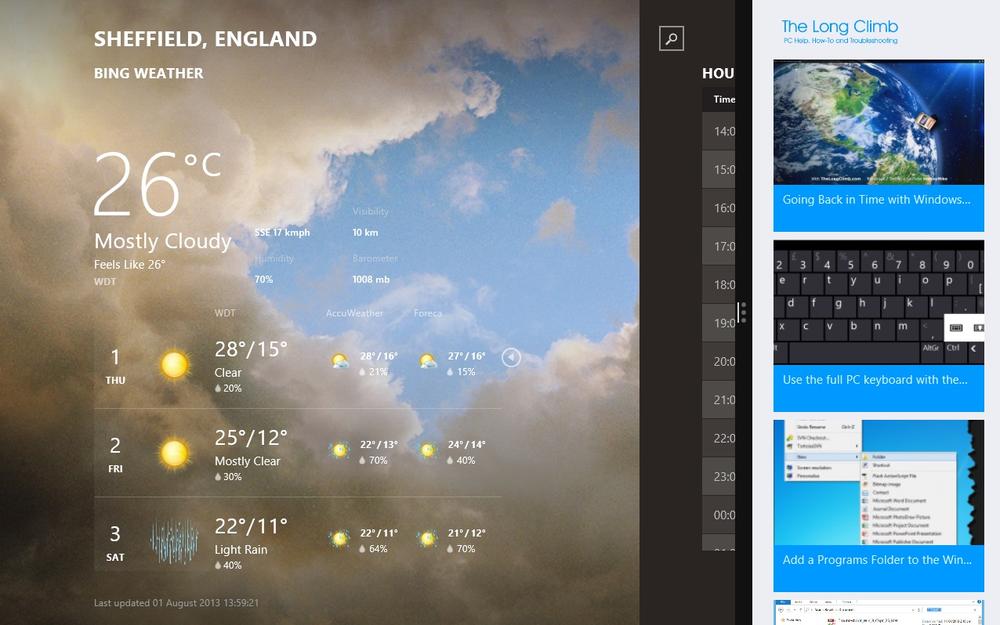
Docking Apps to the Left or Right of the Screen
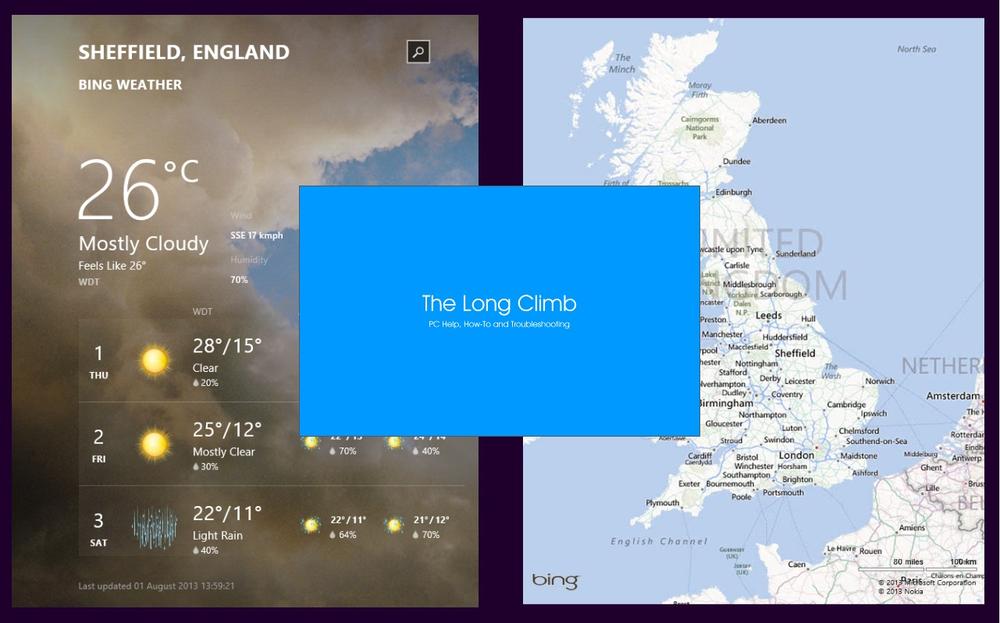
When you drag an app in from the left of the screen with your finger, you will see a vertical bar appear in the left quarter or right quarter of the screen, depending on where you are dragging it at that point. Dropping an app when you see this bar will dock it to the far left or the far right of the screen (Figure 1-6). You can also drag the currently displayed app downward from the top center of the screen to dock it to the left or right of the screen.
Tip
To close the currently running app, drag it downward from the top center of the screen with your mouse or finger, and throw it off the bottom of the screen.
If you then return to the Start screen by pressing the Windows Key, the next app you run will fill the remaining space, so you have two apps side by side. You can drag the vertical bar separating them left and right to switch the focus from one app to the other, or to move one app off the screen completely.
To dock apps side by side using a mouse (this also works with touch), drag the app from the top center of the screen toward the center of the screen. You will see the app change to a thumbnail image. You can now drag this thumbnail to the left or right of the screen and drop it when you see the vertical dock bar appear.
If you have a large enough screen (this just won’t work if you don’t), you can arrange up to four apps on screen. When you are running two apps side by side, if you launch a third app it will appear as a thumbnail between them (Figure 1-7). You can drag it left or right to replace the running app there or, if you hover between the running apps you will see a space open into which you can drop it.
Logging Out Of and Locking Windows 8.1
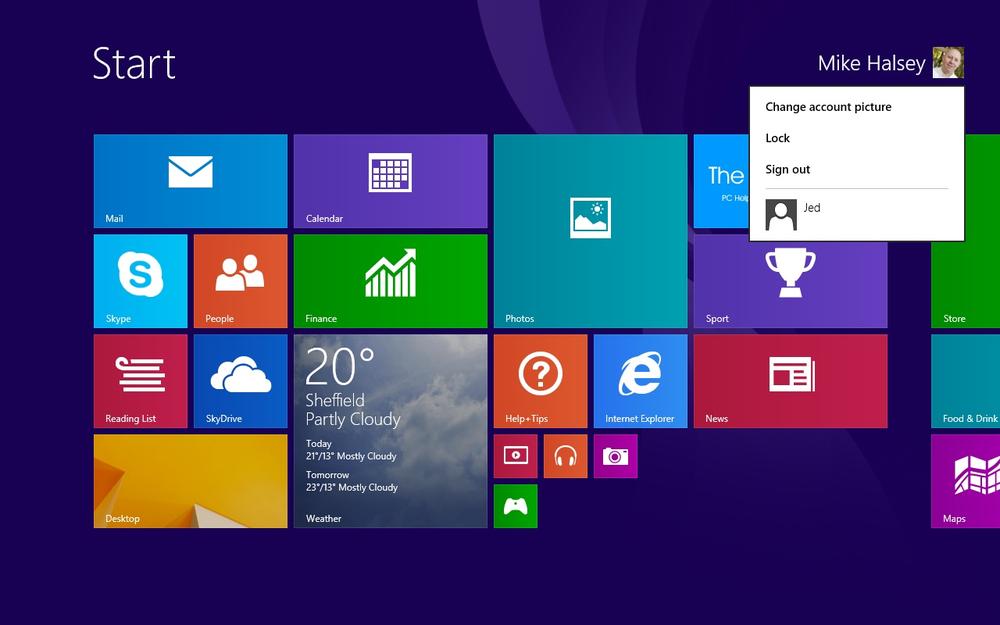
If several people use Windows 8.1 on your computer and you want to switch to a different user, you can do this by clicking or touching your user icon and name in the top right of the Start screen. This will bring up a menu with three options (Figure 1-8).
Tip
If you want to change your password, you can do this from the Accounts page in PC Settings. Click/Touch the Settings Charm and then click Change PC Settings to access the options.
- Change Account Picture will allow you to choose a new picture for your account from images that you have on your computer.
- Lock will lock the computer so that a password, PIN, or picture password is needed to sign in again. This is useful if you are leaving your computer unattended for a while.
- Sign-Out will sign out of your account so that others can use the computer.
Note
If you have multiple user accounts set up in Windows, perhaps for different members of your family (I will show you how to set these up in Chapter 11), these people will also appear in the user list when you click/touch your name in the top right of the Start screen. You can switch directly to another user by clicking their icon (you will not be logged out). This means that if you have any files or documents open that you have not saved, they might be lost if another user then shuts the computer down. They will be warned, however, by Windows 8.1 if another user is still logged in when they turn the computer off.
Using Touch Gestures in Windows 8.1
I have already shown you some of the touch gestures you can use in Windows 8.1, including touching a Tile to open it and touching and holding for a second to select it.
There are other gestures you can use, including two-finger pinch actions to zoom in and out (pinch inward to zoom out and pinch outward to zoom in).
To select an item and open App Bar options for it on the Start screen, touch it and hold it for a second. This is the same motion if you are using touch in desktop programs where you also touch and hold the item; this will simulate a mouse right-click.
Using Windows 8.1 with a Keyboard and Mouse
If you are using Windows 8 with a keyboard and mouse, there are several time-saving shortcuts that you can use instead of touch gestures.
- Right mouse click or press WindowsKey+Z to display the App Bar in apps and at the Start screen
- Press WindowsKey+C to open the Charms Menu
- Press WindowsKey+S to open the Search charm
- Press WindowsKey+Tab to switch between running apps
You can also move your mouse to the four corners of the screen; these are called hot corners, and each will display different options. The top and bottom right corners will open the App Bar, and the top and bottom left corners will allow you to switch between running apps and opening the Start screen.
Using the On-Screen Keyboard
When you are using Windows 8.1 on a touchscreen, the on-screen keyboard will appear whenever you tap in a place where you would enter text, such as the address bar in Internet Explorer or a form on a website. When it appears, you will see the keyboard at the bottom of your screen, but if you’re using your thumbs to type while holding your tablet in both hands, reaching the keys in the center of the keyboard can be tricky.
You can make the on-screen keyboard easier to use when you are holding your tablet in both hands by clicking the keyboard icon in the bottom right of the on-screen keyboard (Figure 1-9) to display different layout options, including:
- The standard on-screen keyboard
- A thumbs keyboard where the keys are moved to the far left and right of the screen
- Handwriting recognition, potentially useful if your tablet comes with a stylus
- Hiding the on-screen keyboard

Tip
You can select international characters on the on-screen keyboard by touching and holding a letter for one second. This will display accented letters that you can then touch to select.
Shutting Down and Restarting Windows 8.1
To restart or shut down Windows 8.1, follow these instructions.
- Open the Charms Menu
- Click/touch Settings
- In the panel that appears, click/touch Power
- In the menu that appears, click/touch Shut Down, Restart, or Sleep (Figure 1-10)
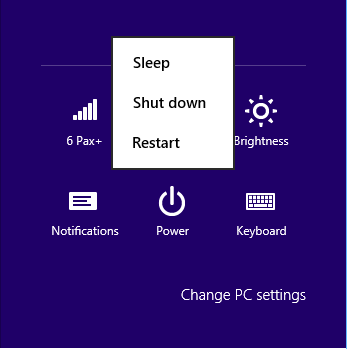
Sleep puts your computer into a low-power standby state. This makes it very quick to switch on again, but it does consume a small amount of power, which can drain the battery on a laptop or tablet computer.
Summary
Windows 8.1 certainly offers a very new way of working, but it is simple and intuitive to use. In this chapter, I have shown you how to navigate the interface, launch apps, display menus, and move items to rearrange them, including arranging apps on your screen.
In Chapter 2, we will look at the things you will actually be doing with your computer, and I will show you how to connect to the Internet and check your email.
Get Windows 8.1: Out of the Box, 2nd Edition now with the O’Reilly learning platform.
O’Reilly members experience books, live events, courses curated by job role, and more from O’Reilly and nearly 200 top publishers.

