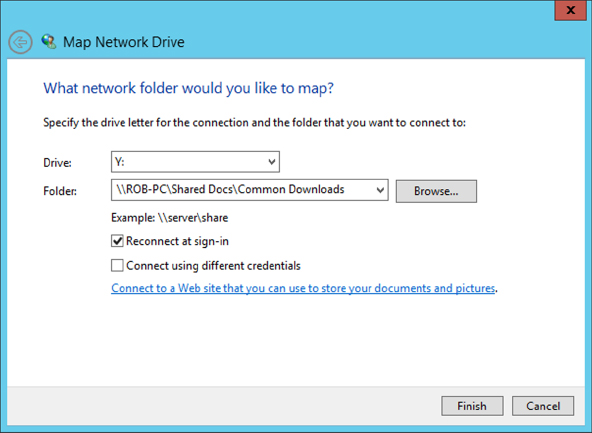
Mapping Drive Letters to Shared Folders
Some programs require that you assign a drive letter to remote resources. You can assign any unused drive letter to a resource. For example, if you already have drives A: through F: in use, you can assign drive letters G: through Z: to any shared resource. Use the following steps to map a drive letter to a shared folder:
FIGURE 51.5 Map Network Drive dialog box
The remote resource will open. You can close that folder and also close the Network folder. Because you’ve mapped a drive letter to the remote resource, it will appear in your Computer folder. In Figure ...
Get Windows 8 Bible now with the O’Reilly learning platform.
O’Reilly members experience books, live events, courses curated by job role, and more from O’Reilly and nearly 200 top publishers.

