Sharing a Printer
Printers in a local area network are usually connected to one of the computers in that network. To ensure that the printer is shared, so everybody in the network can use it, follow these steps:
Tip
With the right hardware, you can connect a printer directly to a LAN without going through a computer. With that type of arrangement, you need to make sure that the printer is turned on, connected to the network, and configured with network settings appropriate for your network.
1. Go to the computer to which the printer is connected by cable. If either is turned off, turn on the printer first and the computer second.
2. Open Devices And Printers from Control Panel.
3. Right-click the printer and choose Properties to open the Properties dialog box for the printer.
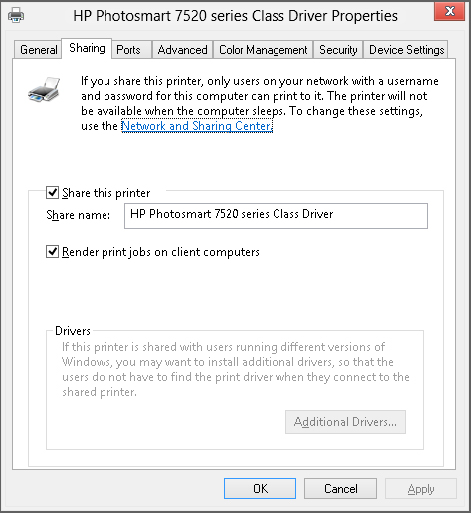
4. Click the Sharing tab; then select Share This Printer, type a name in the Share Name text box, and choose to render print jobs on the client, as in Figure 50.14.
FIGURE 50.14 Sharing a printer
Note
The Render Print Jobs On Client Computers option lets each user control print jobs from his or her own computer. In earlier versions of Windows, most print jobs had to be managed from the printer to which the computer was physically attached.
6. Click OK.
When you click the printer’s icon in Devices and Printers, the status bar indicates that the printer is shared. The printer should show ...
Get Windows 8 Bible now with the O’Reilly learning platform.
O’Reilly members experience books, live events, courses curated by job role, and more from O’Reilly and nearly 200 top publishers.

