Setup creates a default Startup menu when you install Windows 2000, and applications typically modify the Start menu when you install them. Over time the Start menu can get a little crowded and out of order. Some items on the Start menu can’t be changed, but fortunately, Windows 2000 makes it easy to modify the contents of the Programs menu and rearrange the order of items in it.
You can add new menus to the Start menu and add new items to existing menus using a couple of different methods. In the first method you use a wizard to add items:
Right-click the taskbar and choose Properties.
Click the Advanced tab then click Add.
The wizard prompts you for the item to add. Specify a folder, application executable, Internet URL, network share, or computer name, then click Next.
Specify the location on the Start menu for the new item and click Next.
Specify a name for the shortcut on the Start menu and click Finish.
You can also add menus and items manually simply by creating folders
and shortcuts in the appropriate folder. By default the Start menu
points to the contents of \ Documents and Settings\
user
\ Start
Menu (systemroot
\
Profiles\
user
\ Start
Menu
on Windows NT upgrades). You can add additional menus
to the Start menu by creating folders at any location under this
folder. Add items to these menus by creating shortcuts in the
folders.
A third method for adding items to the Start menu is to use drag and drop:
Locate in Explorer (or on the desktop) the item you want to add to the menu, then drag it on top of the Start menu.
Continue holding down the mouse button, then use the mouse to open the Start menu as you would normally, including opening cascading menus if necessary.
Place the cursor where you want to locate the new menu item and release the mouse button.
Occasionally you might want to remove items or entire menus from the Start menu. As when adding items, you have a couple of methods from which to choose. First, you can use the taskbar properties to remove items:
Right-click the taskbar and choose Properties.
Click the Advanced tab and click Remove.
Select the menu or menu item you want to remove and click Remove.
Remove other items as desired and click Close.
You also can remove items manually by browsing to the Start menu
folder at \ Documents and Settings\
user
\ Start
Menu
or systemroot
\
Profiles\
user
\ Start
Menu
. Delete the items you want to remove from the Start
menu.
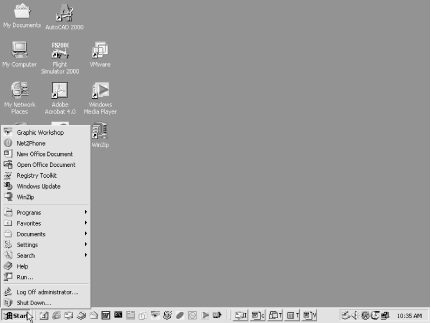
By default the Start menu shows the text “Windows 2000 Professional” or “Windows 2000 Server” and uses larger icons on the main Start menu than it does on subsequent menus such as the Programs menu. You can remove the Windows 2000 name and use smaller icons if you want to reduce the size of the Start menu (see Figure 4-1):
Right-click the taskbar and choose Properties.
On the General page select the option Show small icons in Start menu, then click OK.
Get Windows 2000 Quick Fixes now with the O’Reilly learning platform.
O’Reilly members experience books, live events, courses curated by job role, and more from O’Reilly and nearly 200 top publishers.

