Sharing Files on Windows NT/2000/XP
To create a file share on Windows NT/2000/XP, you first must log in to the system as any member of the Administrators, Power Users, or Server Operators groups. Right-click the icon of a folder you wish to share, and click Sharing . . . in the pop-up menu. The Sharing tab of the folder’s Properties dialog box will appear, as shown in Figure 5-4. Click the “Share this folder” radio button.
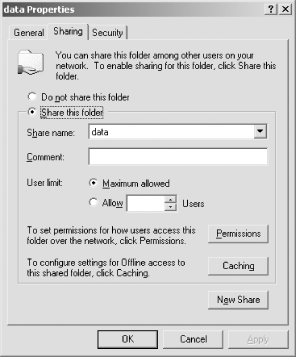
Figure 5-4. The Sharing tab of the folder’s Properties dialog on Windows 2000
Share name: will default to the name of the folder, and you can
change it if you want. One reason you might want to use a different
name for the share is to make the share not appear in browse lists
(as displayed by the Network Neighborhood, for example). This can be
done by using a share name ending in a dollar sign
($). You can also add a description of the share
in the Comment: text area. The description will appear to users of
network clients and can help them understand the contents of the
share.
By clicking the Permissions button, you can set permissions for the share on a user-by-user basis. This is equivalent to the user-level security of Windows 95/98/Me file sharing. On Windows NT/2000/XP, Microsoft recommends that share permissions be set to allow full access by everyone, with the permissions controlled on a file-by-file basis using filesystem access control lists (ACLs). ...
Get Using Samba, Second Edition now with the O’Reilly learning platform.
O’Reilly members experience books, live events, courses curated by job role, and more from O’Reilly and nearly 200 top publishers.

