Once you get your addresses appropriately configured, many will want to access their server from outside of their local networks. There are a few different strategies to provide external access. One is to configure access for anyone using the WAN IP address for your environment. The other is to configure access for any clients using a given iCloud account, which requires little to no further configuration. Given that the first is the most common (for now), letâs start there.
Each network service uses one or more TCP/IP ports to receive a connection from the outside world. The most common combination is port 80 being used for web connections. TCP/IP uses ports to direct traffic for a given IP address to the appropriate service.
Note
The popular site on OS X Server and system administration, afp548.com, owes its name to the fact that 548 is the port number used to access AFP, the default file sharing service for Mac OS X computers to talk to one another.
One of the coolest features of OS X Server is the ability to automatically configure an Apple AirPort, provided that the AirPort is being used as a router, to forward ports for services enabled on the server. Provided you are using an Apple AirPort as a router, you need only give the server the password to manage the router and it will do all the work for you.
The manual for every router on the market also explains how to configure port forwarding. Given the variety of routers on the market, further explanation of port forwards per device is best then left to said manuals.
Earlier in this chapter, we looked at configuring the server to be able to access other resources by name. When you are outside of the network, you likely donât want to have to remember some long string of numbers just to access the server. Therefore, most will want to configure some kind of a name to access their server. There are a couple of ways to go about doing so in a smaller environment. The first is statically, or configuring a domain that you own to point at a server while the second is using dynamic DNS, to update a third-party DNS service that is easily configured (although it may require an additional cost).
The first option is to configure DNS for a domain or name that you own. To do so, you must first have what is known as Start of Authority (SOA) for the domain. For larger environments, contacting a DNS administrator is typically required to perform such a DNS configuration. But in a smaller environment, if you own the domain name, you can do pretty much anything (within technical reason of course) that you like.
To look up the owner of a domain, we will again turn to the Network Utility, located in /Applications/Utilities. From Network Utility, click on the Whois button and enter the domain name (e.g., krypted.com) into the âEnter a domain address to look up its âwhoisâ informationâ field.
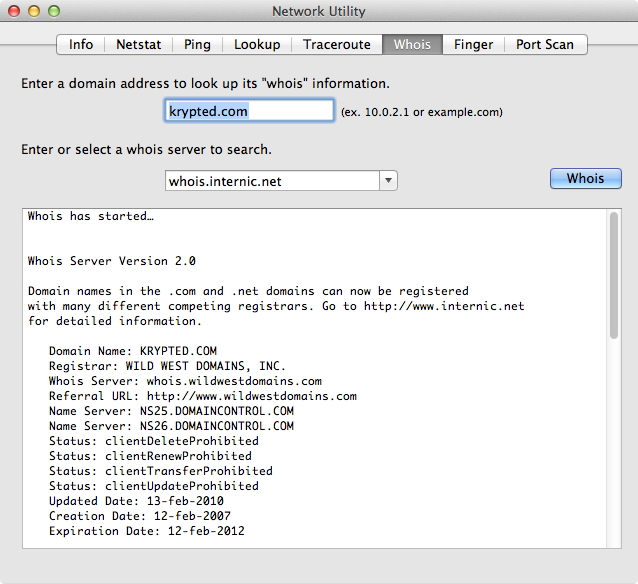
The address of the DNS servers and the name of the registrar is displayed in the output, as you can see in Figure 1-8. The registrar is where the domain was purchased and therefore who controls settings for the domain. Most registrars (all that I am aware of at least) provide a web control panel to configure DNS servers, and if you are using their DNS servers, also provide the ability to control DNS without the use of third-party DNS servers. If you log into your account with the registrar, then you should be able to configure a name for access into your network.
Note
This type of configuration will work for most services, with the exception of mail. For more on configuring DNS for mail services, see Chapter 9, where configuring mail servers is configured.
Dynamic DNS is a third-party option provided by a number of companies. Dynamic DNS updates a DNS entry every time your server reboots. This is often used by people who donât have a domain name, or in environments where a static IP address cannot be obtained. The dynamic DNS servers are updated each time the server or router gets a new IP address.
Dynamic DNS is a great little tool for some environments. For larger production environments, it can represent another moving part that can break, but for smaller environments, where mission critical access is not required for the services installed on the server, dynamic DNS is perfectly acceptable.
The dynamic DNS service uses an agent running on your network to update the IP address it has on file for your environment. Many routers support using dynamic DNS. Most dynamic DNS services also have clients for Mac OS X. One such is DynDNS, which has a free client available at http://dyn.com/dns/dyndns-free. The first step to setting up dynamic DNS using such a service is to create an account with the company that provides the service. Doing so is different for each service, so we wonât look at the specifics in doing so.
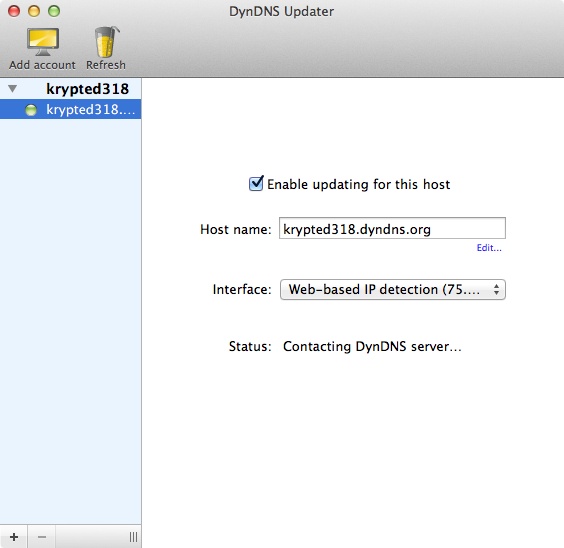
Once the account is created, most services will have an application that runs on the client computers to update the dynamic DNS service. DynDNS, one of the more popular services, has a client called DynDNS Updater (Figure 1-9). Open the Updater application and log in with the username and password that was created at the site. Once authenticated, click on the âSiteâ in the DynDNS Updater sidebar. Then, check the âEnable updating for this hostâ box and provide the hostname defined in the DynDNS web portal in the âHost nameâ field. Finally, choose the network interface that you wish the site to use (e.g., if you have multiple network interfaces).
Once the settings are configured as needed, check that the IP address updates on the website when the address changes. If it does, then you are able to access your servers by name using the DynDNS name selected for the hostname.
As mentioned earlier, a network can be accessible using iCloud. iCloud requires your router be configured to allow UPnP networking. Most routers ship with this option enabled by default, as it is needed for most gaming consoles and other productive uses of time. Provided that UPnP is enabled, iCloud establishes a tunnel between your two computers through Apple, given that both are constantly in touch with the Apple servers.
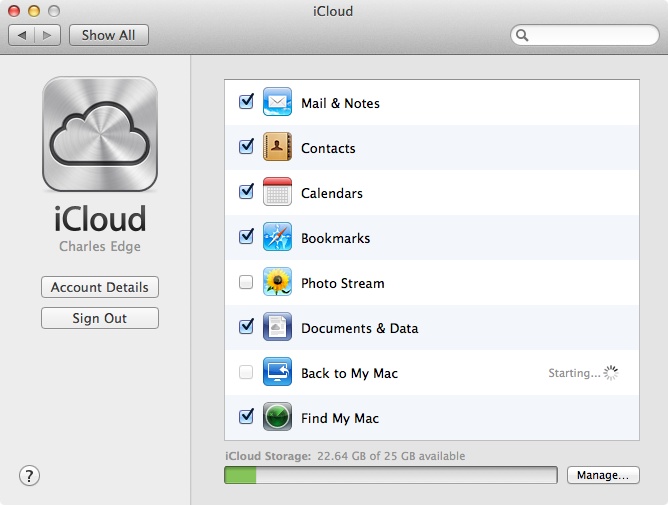
Configuring computers to be accessible via iCloud isnât necessarily about providing web services to anyone in the world. Itâs more about configuring your computers to be able to access each other (and only each other) for sharing files, accessing the desktops of one another, and sharing contacts, calendars, and bookmarks. If this is what you want, then open the iCloud System Preference pane from System Preferences. Here, enter your iCloud information or click on the Create Account button to set up a new iCloud account for free.
When an account is associated with iCloud, a number of checkboxes will appear, as can be seen in Figure 1-10. Locate the option for Back to My Mac and check the box to enable the service.
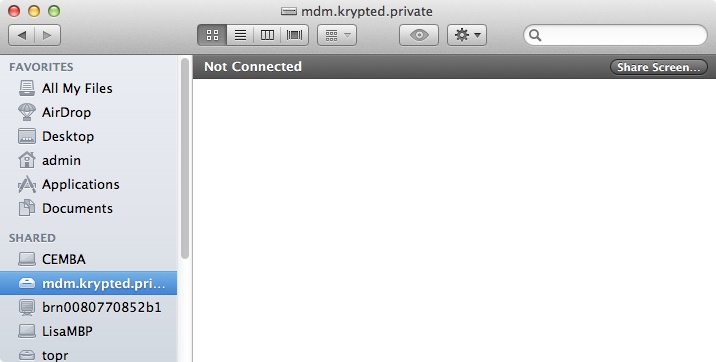
Once checked, all computers using the same iCloud account will have access to one another via the Finderâs Sidebar. To access the system, open a Finder screen and you will see them listed in the list of shared devices, as seen in Figure 1-11.
Get Using Mac OS X Lion Server now with the O’Reilly learning platform.
O’Reilly members experience books, live events, courses curated by job role, and more from O’Reilly and nearly 200 top publishers.

