15.3 PROJECT 15.3 – Picture Show
15.3.1 Project Description
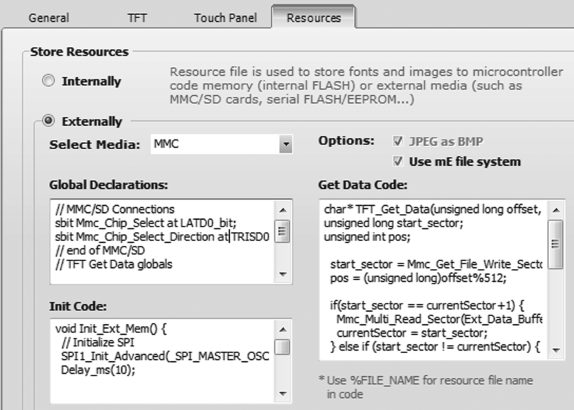
This project describes the design of a slide show where a number of images (four in this project) are stored on a mikroSD card and are displayed on the TFT screen with a delay between each display. The MikroMMB board is used in the design, as in the previous project. The project is named ‘PICTURE_SHOW’. The project configuration steps are as in the previous project. In addition, the Resources window in Settings should be configured as below (see Figure 15.14), to define the interface between the mikroSD card and the MikroMMB board (you may find that this window is already configured when the external resource is clicked):
Figure 15.14 Resources window
Get Using LEDs, LCDs and GLCDs in Microcontroller Projects now with the O’Reilly learning platform.
O’Reilly members experience books, live events, courses curated by job role, and more from O’Reilly and nearly 200 top publishers.

