Web Installer
Weâre in the final steps of the process and minutes away from your very own Joomla website. Navigate to your websiteâs URL: http://www.<yourdomain>.com.
You should be greeted with the Joomla Web Installer screen like the one shown in Figure A-6.

Figure A-6. Joomla Web Installer: Language
The first step is to choose your language and click Next.
The next step is a pre-installation checklist as shown in Figure A-7 to make sure you have what you need to run Joomla. Assuming that everything in the Actual is in green, you can click Next to go to the next page. If you do make any changes, you can click the Check Again button at the top of the page to refresh the screen.
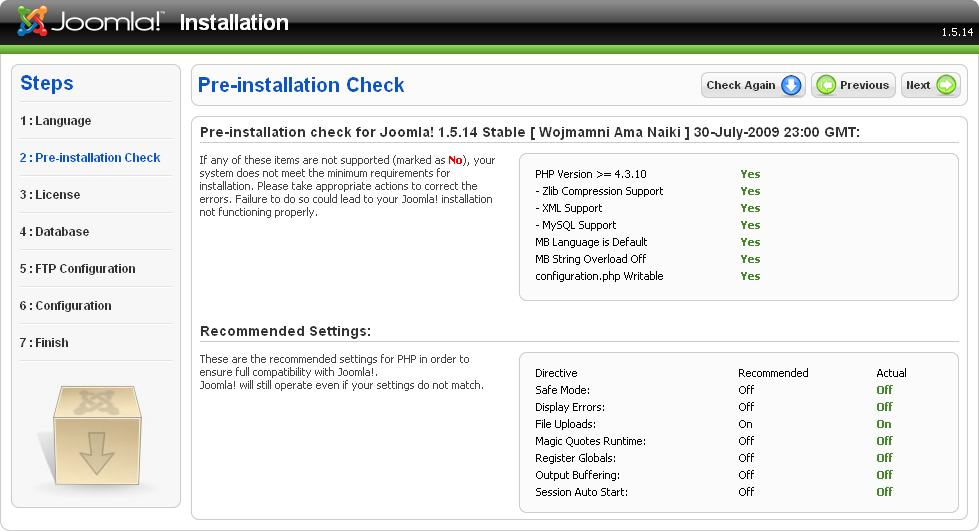
Figure A-7. Joomla Web Installer: Pre-installation Check
Now we come to the License page seen in Figure A-8. Joomla and many other open source projects use the GNU General Public License. For this reason, you must agree to that license in order to use Joomla. When youâre finished reading, click Next.
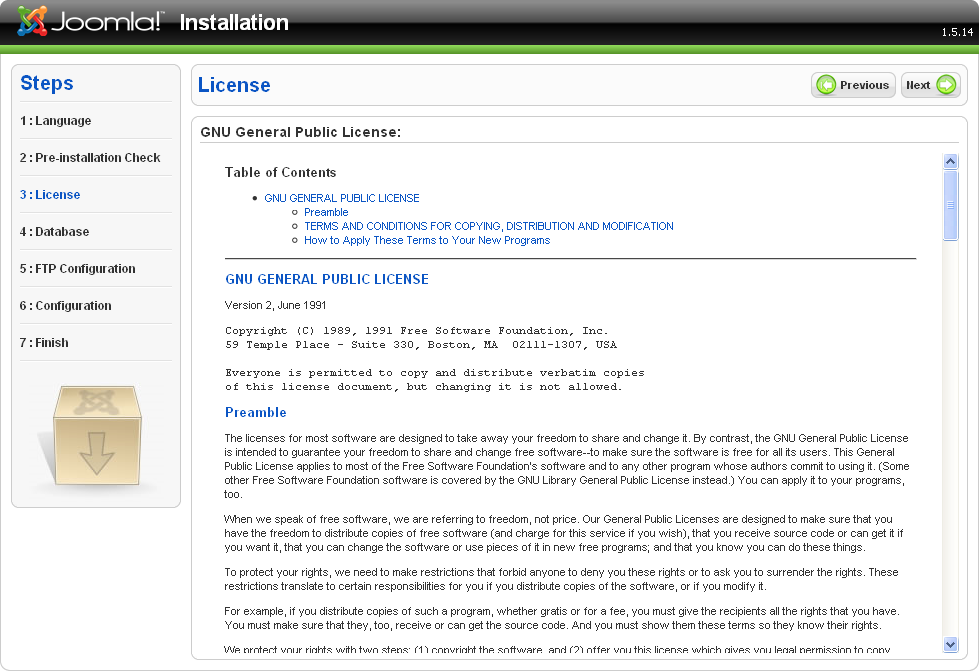
Figure A-8. Joomla Web Installer: License
Now is when things might get a little more complicated. Figure A-9 shows the Database Configuration screen.
Figure A-9. Joomla Web Installer: Database Configuration ...
Get Using Joomla now with the O’Reilly learning platform.
O’Reilly members experience books, live events, courses curated by job role, and more from O’Reilly and nearly 200 top publishers.

