Chapter 10
The LayOut Interface
This chapter explains the intricacies of the LayOut interface and introduces all of the settings, toolbars, and features you’ll need to use LayOut. Use it now as a roadmap, while you tour LayOut and become familiar with the interface. Even after you’ve mastered the concepts explained here, you’ll be able to use it as a helpful resource to answer any questions you have about individual menus, settings, and dialogs.
Getting Started
To open LayOut, click the icon on your desktop. The Getting Started window will appear, allowing you to access new templates, recent files, and recovered presentations.
New Tab
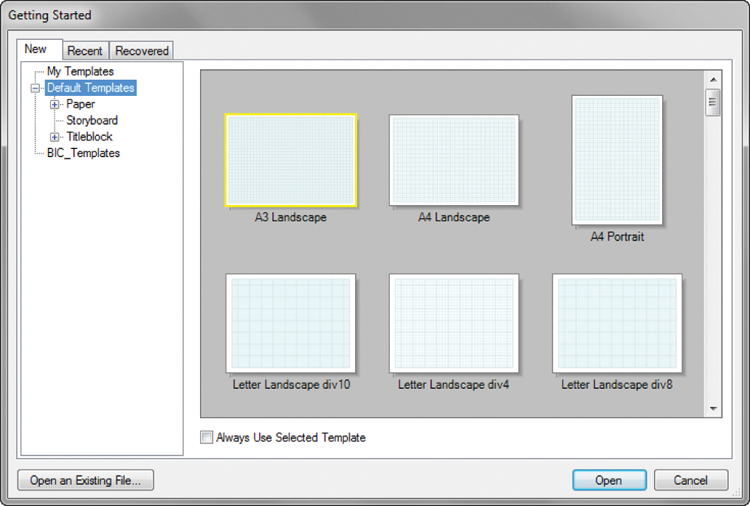
Initially, you will be taken to the New tab by default (Figure 10-1). Preloaded templates that you can use to create new presentations will appear in the right pane. From the Default Templates library, select either a title block or a plain piece of paper. To select a default template (a template you will always start with), check the Always Use Selected Template box. Typically, you won’t need to use this feature because you will need different sizes of paper and title blocks for each presentation you create.
Figure 10-1: The New tab in the Getting Started window
Recent Tab
The Recent tab displays all of the documents you have worked on in the not-so-distant past. When you use this tab, be careful because it is similar to My Recent Documents. Even ...
Get The SketchUp Workflow for Architecture: Modeling Buildings, Visualizing Design, and Creating Construction Documents with SketchUp Pro and LayOut now with the O’Reilly learning platform.
O’Reilly members experience books, live events, courses curated by job role, and more from O’Reilly and nearly 200 top publishers.

