Protecting Images
If you've shot a once-in-a-lifetime, keeper image that you absolutely don't want to lose, then you might consider protecting the image. This locks the file on the card so that it can't be deleted. If you're on a long trip and won't have the time or opportunity to clear off your media cards, protecting images provides a way of guaranteeing that an image won't be deleted by most normal erase options.
To protect images, follow these steps:
In the Playback menu, choose Protect Images.
Navigate to the image you want to protect and press Set. A key icon will appear on the image.
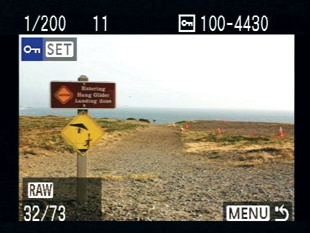
Figure 3-15. For those images that you really can't afford to lose, you can protect an image from most delete operations.
Navigate to the next image you want to protect and press the Set button again.
To stop protecting images, press the Menu button.
A protected image cannot be deleted using the Delete button or using the Erase All Images command. However, formatting the card will erase protected images. Now, if you choose Erase All Images, only unprotected images will be deleted. Your protected images will remain untouched.
In addition to keeping you from accidentally deleting images, protecting images provides an easy way to bulk delete some of the images on your card.
For example, say you stick a card in your camera and shoot a dozen or so images before you realize you hadn't erased the card first. ...
Get The Canon EOS Digital Rebel XS/1000D Companion now with the O’Reilly learning platform.
O’Reilly members experience books, live events, courses curated by job role, and more from O’Reilly and nearly 200 top publishers.

