Scanners
If you own a scanner, chances are good that you won’t be needing whatever special scanning software came with it. Instead, Mac OS X gives you two programs that can operate any standard scanner: Image Capture and Preview. In fact, the available controls are identical in both programs.
To scan in Image Capture, turn on your scanner and click its name in the left-side list. Put your photos or documents into the scanner.
Now you have a couple of decisions to make:
Separate and straighten? If you turn on “Detect separate items” in the Scan Size menu, Mac OS X will perform a nifty little stunt indeed: It will check to see if you’ve put multiple items onto the scanner glass, like several small photos. (It looks for rectangular images surrounded by empty white space, so if the photos are overlapping, this feature won’t work.)
If it finds multiple items, Image Capture automatically straightens them, compensating for haphazard placement on the glass, and then saves them as individual files.
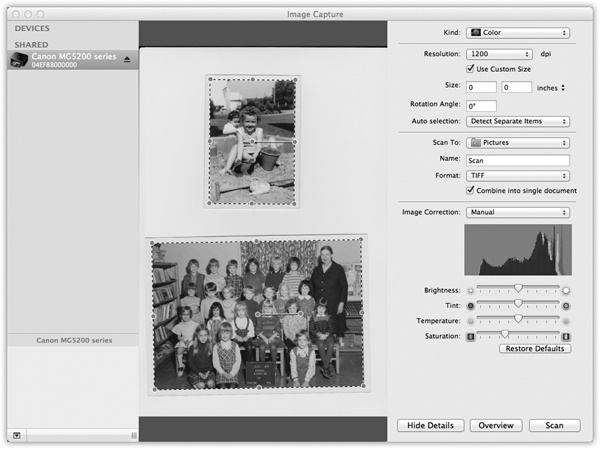
Figure 9-18. When you use the Show Details button, you get a new panel on the right, where you can specify all the tweaky details for the scan you’re about to make: resolution, size, and so on. See how the two photos have individual dotted lines around them? That’s because Detect Separate Items is turned on. These will be scanned into two separate files.
Where to file. Use the “Scan to” pop-up menu to ...
Get Switching to the Mac: The Missing Manual, Lion Edition now with the O’Reilly learning platform.
O’Reilly members experience books, live events, courses curated by job role, and more from O’Reilly and nearly 200 top publishers.

