290
|
Chapter 8, Rendering
#56 Create a Magnifying Glass Component
HACK
With a grab rectangle calculated, call Robot.createScreenCapture( ) to grab
those pixels and return them as a
BufferedImage. Unless your zoom factor is
1.0
, this image will be larger or smaller than the
DetachedMagnifyingGlass
component, so you need to use
getScaledInstance( )
to scale it to your com-
ponent size. In terms of a scaling behavior, the code uses the
SCALE_FAST
constant because the moving mouse will be calling for many repaints, and
thus many grabs and scales, every second. Finally, with your properly sized
image in memory, you paint to the
Graphics to get the grabbed data into
your component.
One TODO item I haven’t shown here, but that might pro-
vide a performance boost, would be to
flush( ) the various
temporary images after you’ve called
drawImage( ).
To ensure the AWT LayoutManagers respect the size that’s set for the compo-
nent, have
getPreferredSize( ), getMinimumSize( ), and getMaximumSize( ) all
return the size that was originally sent to the constructor, since the size of
the magnifier component is critical in computing what to grab from the
source component.
The last bit of code in this class is a
MouseMotionListner, which is used to
track the mouse’s location. You need to do this so you’ll always have an up-
to-date point when the
paint( ) method is called. You’ll only get events
when the cursor is over the source component, and it’s easy enough to cache
the point in the
MouseEvent, but there’s a catch: that point is relevant to the
coordinate system of the source component, not the screen, so unless the
component is at the upper-left corner of the screen, you will be grabbing the
wrong pixels in
paint( ). The fix is to translate the point from the source
component’s coordinate system to the screen’s coordinate system. Do this
by getting the component’s onscreen location with
getLocationOnScreen( ),
and then translate the
Point with MouseEvent.translate( ).
Testing the Magnifier Out
To take DetachedMagnifyingGlass out for a spin, Example 8-2 shows a
TestDetachedMagnifyingGlass class, which opens an image in a JFrame and
sets a
DetachedMagnifyingGlass next to it.
Example 8-2. Testing the MagnifyingGlassComponent
public class TestDetachedMagnifyingGlass extends Object {
public TestDetachedMagnifyingGlass(File f) {
// image frame
ImageIcon i = new ImageIcon (f.getPath( ));
JLabel l = new JLabel (i);
Create a Magnifying Glass Component #56
Chapter 8, Rendering
|
291
HACK
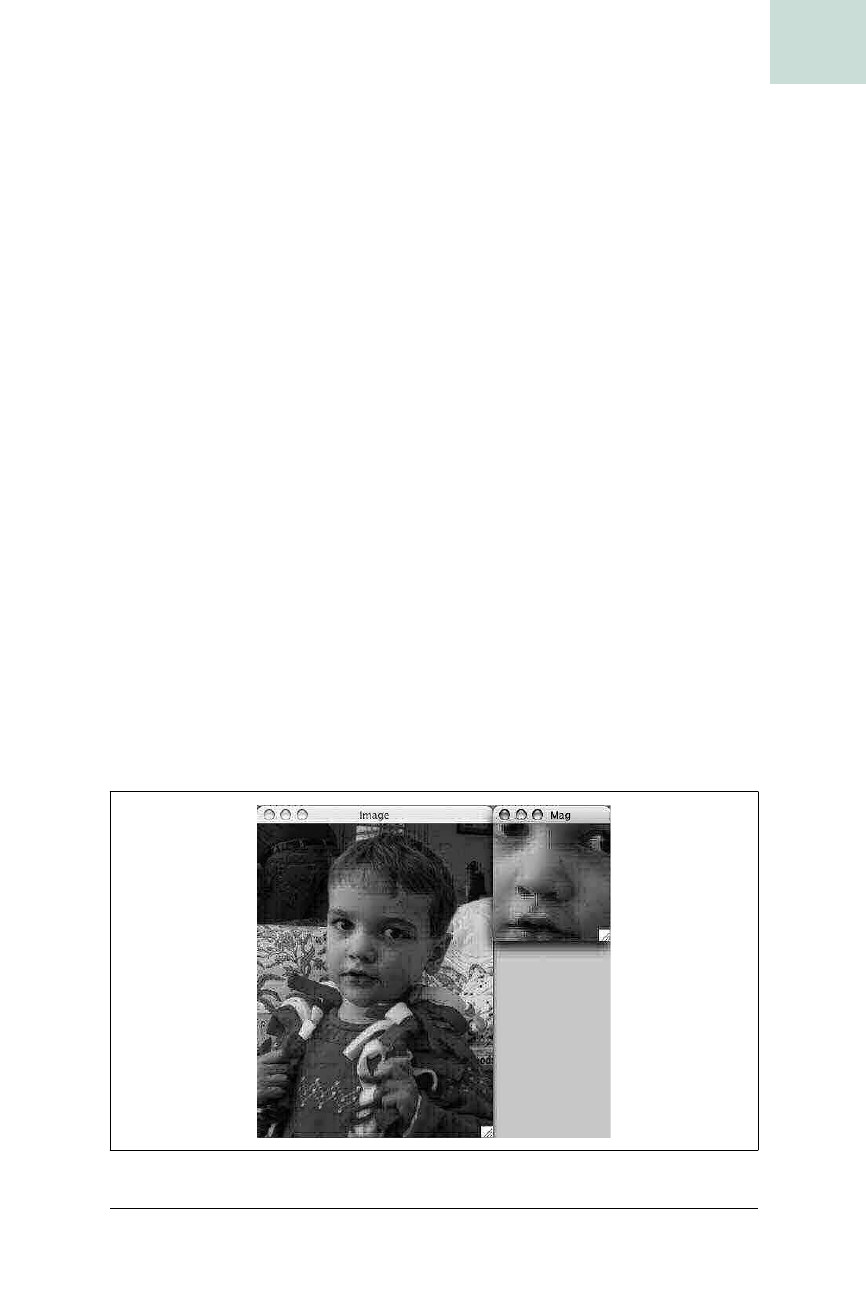
This class simply brings up a JFileChooser to pick an image file, which it
loads into an
ImageIcon and then into a JLabel. It then creates a
DetachedMagnifyingGlass from the JLabel, with a size of 150 × 150 and a
magnification factor of 2.0, and moves it to the immediate right of the
source component.
Figure 8-1 shows what the test looks like when run.
JFrame imgFrame = new JFrame ("Image");
imgFrame.getContentPane( ).add(l);
imgFrame.pack( );
imgFrame.setVisible(true);
// magnifying glass frame
JFrame magFrame = new JFrame ("Mag");
DetachedMagnifyingGlass mag =
new DetachedMagnifyingGlass (l, new Dimension (150, 150), 2.0);
magFrame.getContentPane( ).add (mag);
magFrame.pack( );
magFrame.setLocation (new Point (
imgFrame.getLocation().x + imgFrame.getWidth( ),
imgFrame.getLocation( ).y));
magFrame.setVisible(true);
}
public static void main (String[] args) {
JFileChooser chooser = new JFileChooser( );
chooser.showOpenDialog(null);
File f = chooser.getSelectedFile( );
new TestDetachedMagnifyingGlass (f);
}
}
Figure 8-1. Use of the DetachedMagnifyingGlass
Example 8-2. Testing the MagnifyingGlassComponent (continued)
Get Swing Hacks now with the O’Reilly learning platform.
O’Reilly members experience books, live events, courses curated by job role, and more from O’Reilly and nearly 200 top publishers.

