Creating a time range input
Let us change our input field into a time range field.
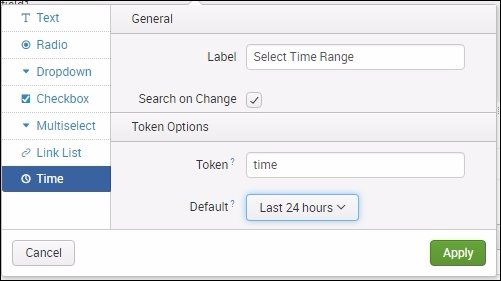
- Click on Add Input.
- On the list to the left, select Time.
- In the General section, type Select Time Range in the Label space.
- Click on the Search on Change checkbox.
- Set the Default time range to Last 24 Hours.
- Use the following screenshot as a guide.
- Click Apply when done:
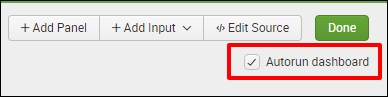
- Before you save the dashboard changes, click the Autorun dashboard checkbox, as seen in the following screenshot:
You can now try to change the time range using the time input, but nothing will happen. This ...
Get Splunk: Enterprise Operational Intelligence Delivered now with the O’Reilly learning platform.
O’Reilly members experience books, live events, courses curated by job role, and more from O’Reilly and nearly 200 top publishers.

