440 Solving Operational Business Intelligence with InfoSphere Warehouse Advanced Edition
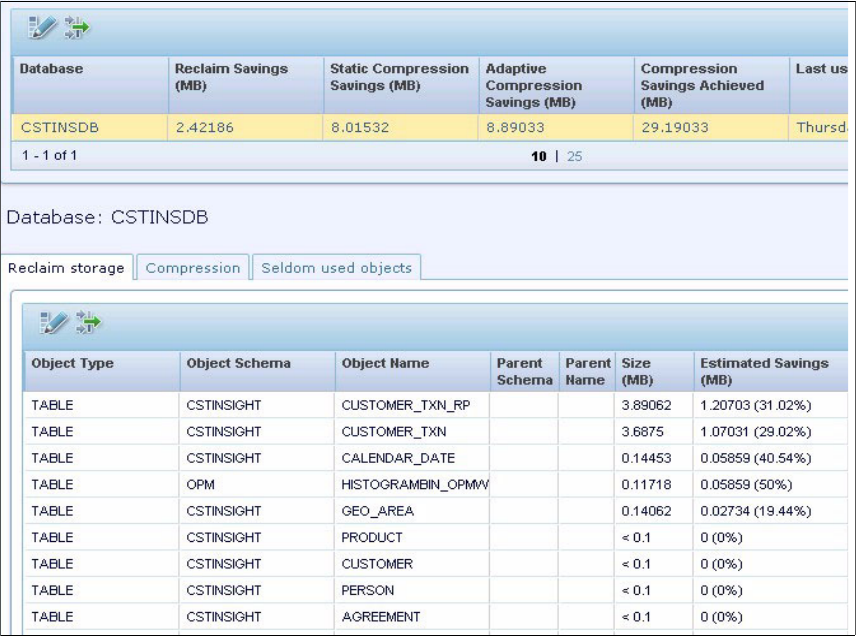
Figure 12-28 Storage optimization opportunities
In our example we created one job with the three tasks (reclaim storage,
compression opportunities, and seldom-used objects). You also can create three
jobs, having each one perform one of the tasks.
12.6.2 Automate multi-temperature storage migration with Optim
Configuration Manager
DB2 10.1 introduced the storage group concept. Each storage group represents
a tier of storage in the data warehouse. You can logically group paths on storage
system with similar attributes by using the storage group feature. By associating
the automatic storage table spaces with a storage group, DBAs can place data
that is accessed more frequently into faster storage. Data that is accessed less
often is still available on slower storage.
Chapter 12. InfoSphere Warehouse resilience with Optim Configuration Manager 441
Implementing storage groups can include the following benefits:
Storing data based on the priority of accessibility
Reducing the total cost of ownership
Improving performance for target workloads
Meeting business criteria for performance and reliability requirements
You can define the storage groups for the various classes of storage devices by
using IBM Data Studio, Design Studio, or by issuing DDL statements. We
discuss the storage group feature in detail in Chapter 9, “Managing data lifecyle
with InfoSphere Warehouse” on page 335.
In this section, we demonstrate how to use Optim Configuration Manager to
automate the migration process.
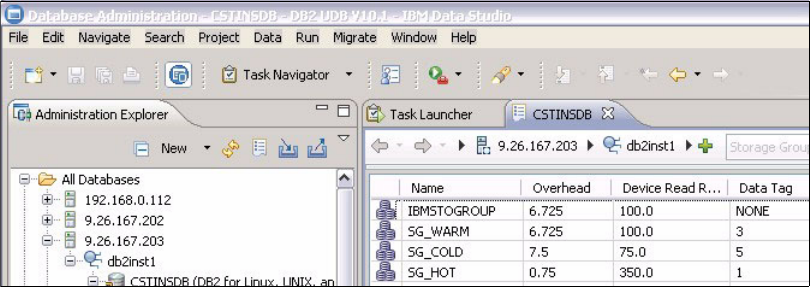
Figure 12-29 shows an example storage groups view from IBM Data Studio.
Figure 12-29 Definition of storage groups
To automate storage migration, you define and schedule a job in Optim
Configuration Manager by following these steps:
1. Log on to the Optim Configuration Manager web interface.
442 Solving Operational Business Intelligence with InfoSphere Warehouse Advanced Edition
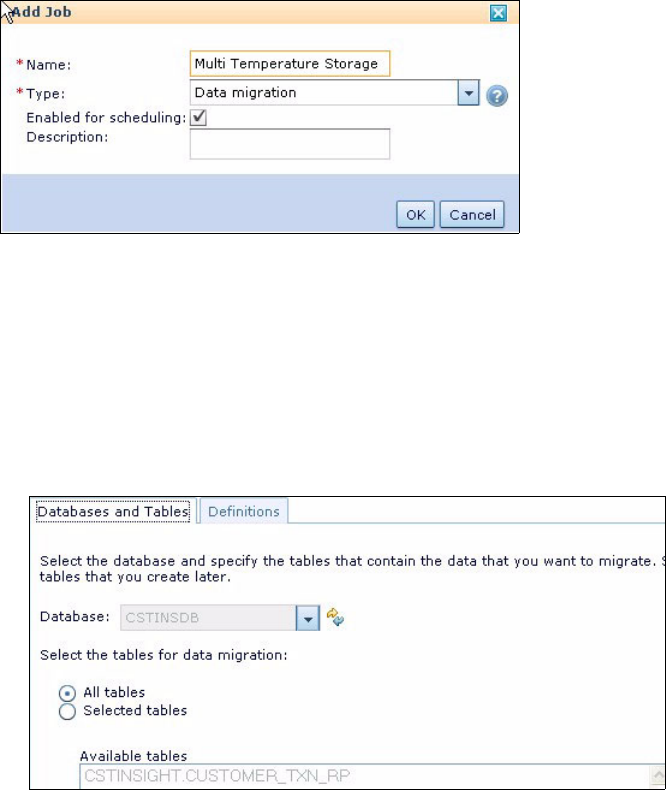
2. Add a data migration job.
Click Open Setup Job Manager. Click Add and give a name to the job.
Select Data migration as the job type; see Figure 13-12. Click OK.
Figure 12-30 Add a data migration job
3. Select the database or tables to monitor.
In the components configuration panel, select the Data Migration tab to
define the properties of the migration job.
The Data Migration tab has two other tabs:
– Database and Tables - this tab enables you to define an entire database
or tables that you want to monitor, as shown in Figure 12-31.
Figure 12-31 Select database or tables to migrate
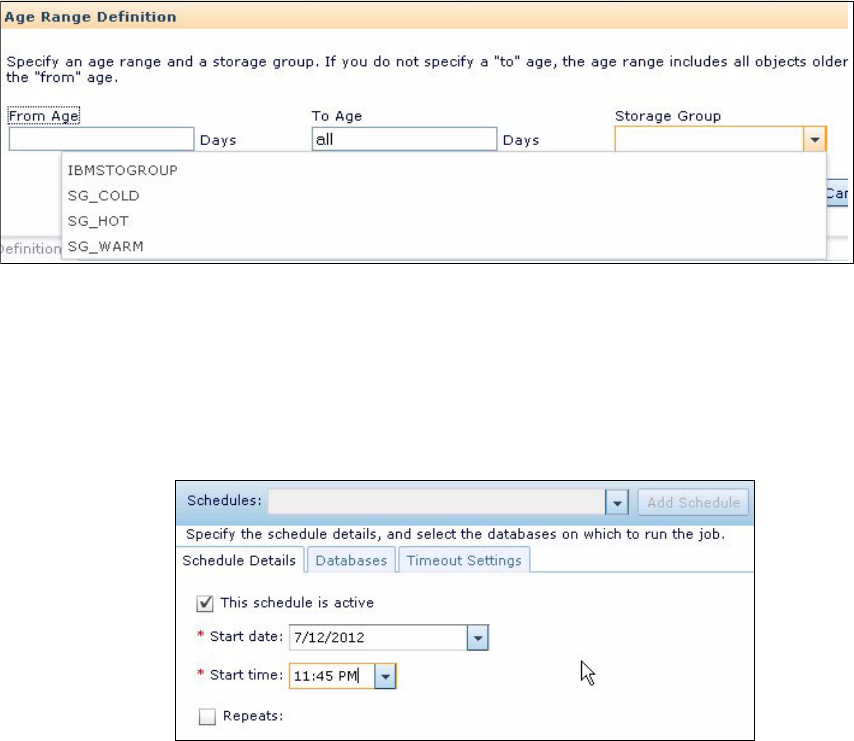
– Definition tab - this table enables you to define the range of your storage
groups. Also, you specify the storage group to which you want to move the
table spaces that contain data within the age range; see Figure 12-32 on
page 443.
Chapter 12. InfoSphere Warehouse resilience with Optim Configuration Manager 443
Figure 12-32 Define the range for storage group
4. Set the data migration job schedule.
In the component configuration, select the Schedule tab. This tab enables
you to define the job frequency, the databases on which to run the job, and
action to take if the script execution duration exceeds a timeout period.
Figure 12-33 shows the Schedule tab.
Figure 12-33 Schedule for data migration job
Be aware that a data migration job can take hours to finish. Therefore, select
a day and time to perform the migration when you do not have mission-critical
applications or users connected.
5. Apply, save, and run the job.
After running the job, you can check the job execution log to see whether
there is any data migration activity. While still in the Job Manager panel,
select the History tab. You can view the status detail (indicating whether the
job failed, succeeded, or is still running), or select a job and open the log file
to see detailed information.
Get Solving Operational Business Intelligence with InfoSphere Warehouse Advanced Edition now with the O’Reilly learning platform.
O’Reilly members experience books, live events, courses curated by job role, and more from O’Reilly and nearly 200 top publishers.

