Another way to expand the capabilities of Visual Studio LightSwitch is through the use of Silverlight Controls. The only downside here is that youâll need a full version of Visual Studio Professional with SP1installed in order to take advantage of this feature. Microsoft does offer several ways to try out Visual Studio without actually purchasing the product, including a 30-day trial version (http://www.microsoft.com/visualstudio/en-us/try).
That being said, Iâm going to show you how to build an app that uses a Silverlight Chart control to show task completion in a bar graph.
For this sample, youâll need to download and install the Silverlight 4.0 toolkit. Youâll find it on the Microsoft Code project site (http://silverlight.codeplex.com). The basis of this example will be a LightSwitch project attached to the demo SharePoint site and the Tasks list. Weâll also need a parameterized query to return all tasks by username.
Adding a Silverlight control to a LightSwitch project is not hard. First, youâll need to add a new Silverlight class library solution to the project using the New Project item on the File Menu. We want to add this to our current solution, so change the âSolution:â item to âAdd to solutionâ (see Figure 4-14).

Now we need to switch the solution explorer to display all project items by file (see Figure 4-15).
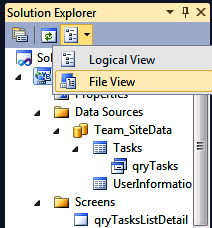
This makes it easy to see the actual files that make up the project.
We need to delete the Class1.vb file, as we wonât be
needing it for this project. Next, right-click on Silverlight Class and
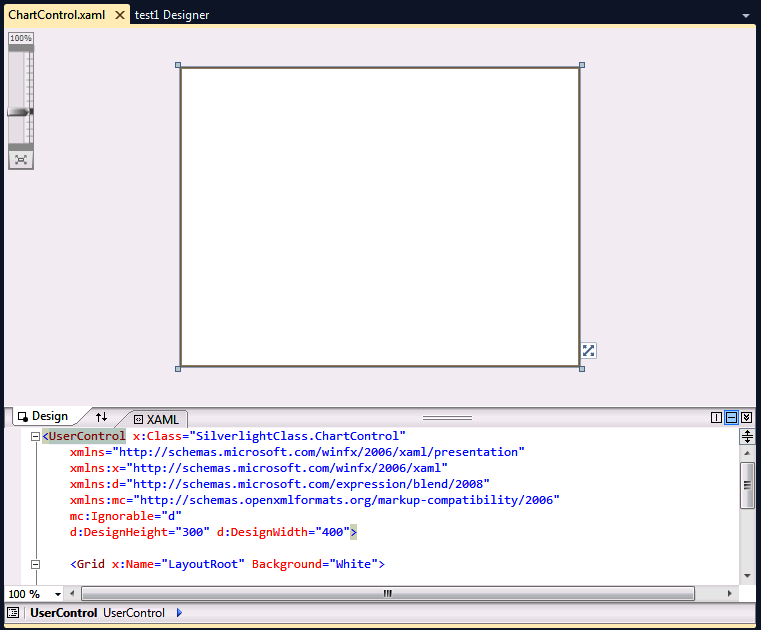
choose Add â New Item. From the New Item dialog, choose Silverlight User
Control and name it ChartControl.xaml. At this
point, you should see a design surface similar to the one shown in Figure 4-16.
Note
If you donât see the Toolbox on your screen, you can use the key combination Control-Alt-X to bring it forward.
Now you must drag a Silverlight Chart control onto the design surface. Resize it to fill the entire box. At this point, you have a Silverlight User Control available to be used in your LightSwitch application. There are a few things we need to add to the XAML to connect to the screen data. The XAML code needed to accomplish the next step is not documented anywhere on the Microsoft LightSwitch site, but it is available if you do a little searching in the LightSwitch support forums.
Itâs necessary to make a connection between the Silverlight screen and the data returned by the LightSwitch query. Figure 4-17 shows what the XAML file looks like after adding the additional XAML code.
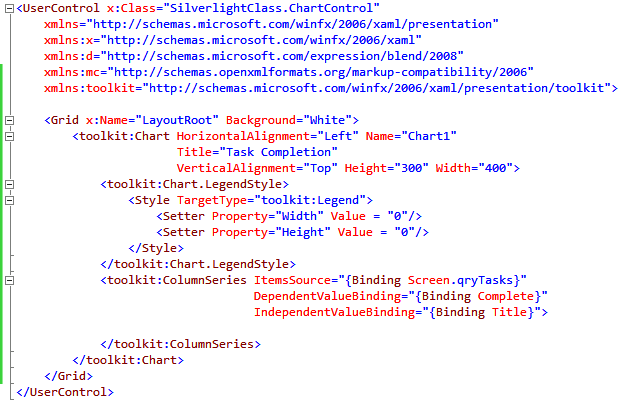
Binding to data on a LightSwitch screen happens in the
ItemsSource tag. In essence, weâre going to bind to the
qryTasks entity on the LightSwitch Screen. For the
DependentValue of the chart, or the legend across the
side, we will use the Complete field from qryTasks. The
IndependentValue, or legend across the bottom, will
link to the task Title field. The only other change to the XAML file is
the section under the Chart.LegendStyle tag. This is an
option to turn off the chart legend that would otherwise show by default.
Go ahead and build the project here to make the Silverlight class
available to LightSwitch.
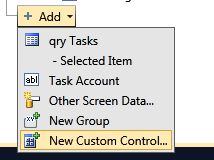
At this point, weâre ready to add the user control to our LightSwitch screen. All that has to be done now is to click Add label at the bottom of the Screen Designer (shown in Figure 4-18). When you choose User Control, you should see a dialog with a list of available controls. First, we need to add a reference to our Silverlight Class using the Add Reference button. You should see it on the Projects tab.
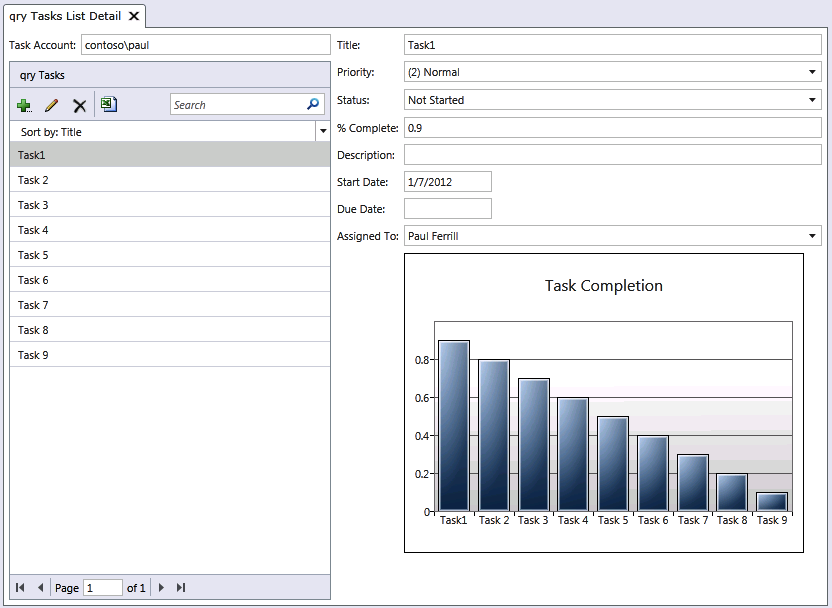
Once thatâs done, you should be able to change any of the screen characteristics of the control such as height/width. Figure 4-19 shows what our final application looks like.
Visual Studio LightSwitch provides lots of capabilities out of the box. The good news is you can expand on those with a little bit of coding and the use of other resources, such as extensions. With the addition of Silverlight, you can build user interfaces with virtually unlimited functionality. Hopefully, these examples have prompted a few ideas of your own to help you get started on your next application.
Get SharePoint Apps with LightSwitch now with the O’Reilly learning platform.
O’Reilly members experience books, live events, courses curated by job role, and more from O’Reilly and nearly 200 top publishers.

