Let's create a storage account for document upload by performing the following steps:
- To create a Blob storage account, in the Azure portal, navigate to New (plus icon) -> Storage -> Storage Account as shown in the following screenshot:
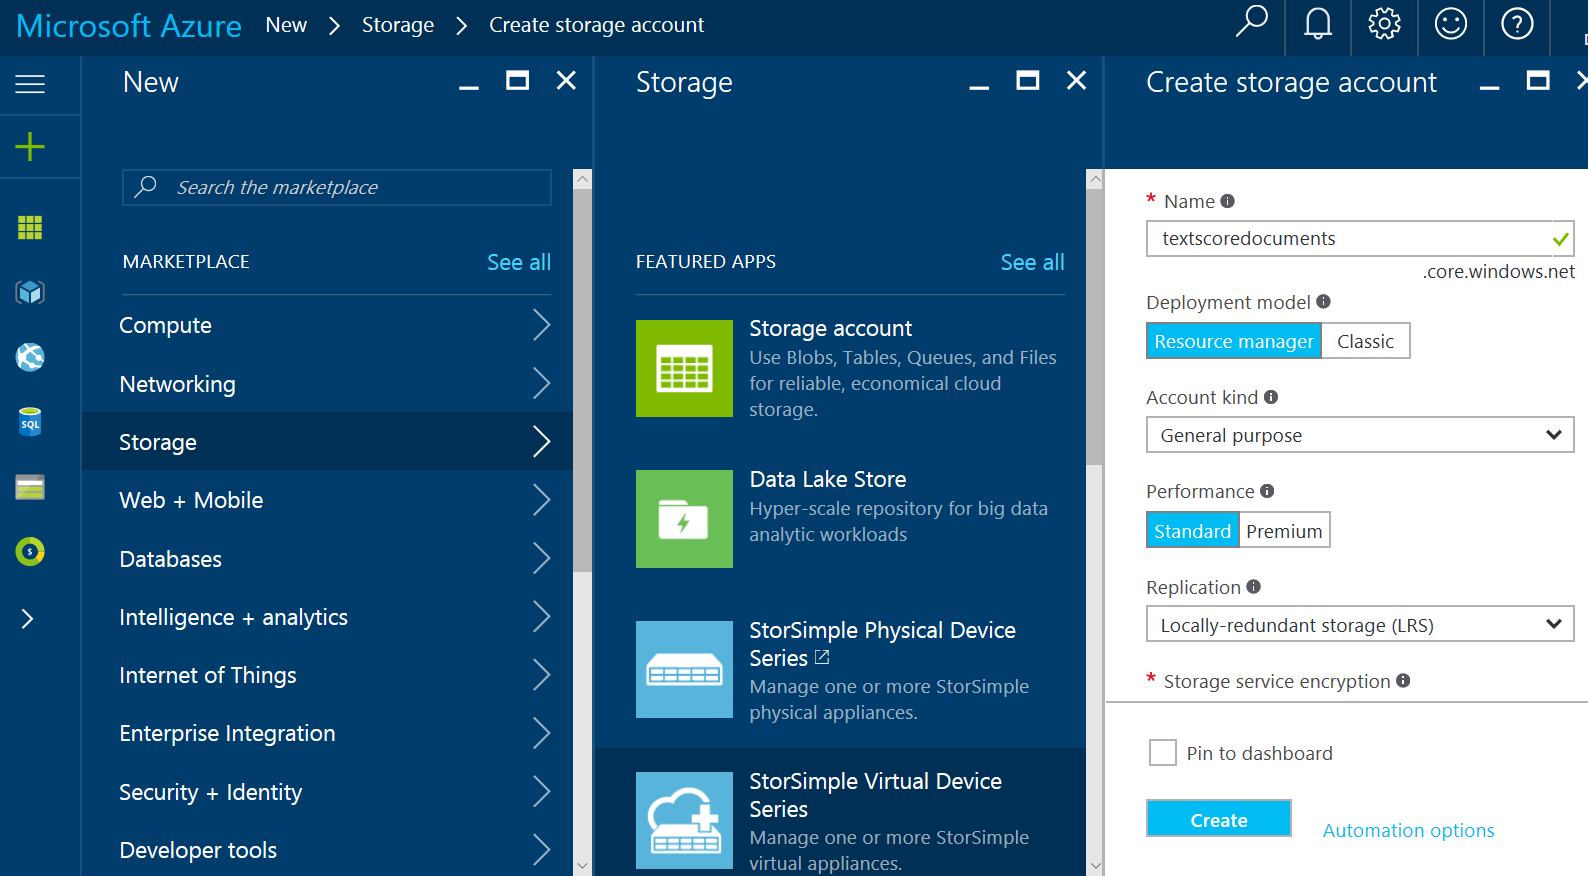
- In the new blade, fill in the following required settings:
- Name: Type in the storage account name. In this example, we will name the account textscoredocuments. The name allows only for lowercase letters and numbers, must be between 3 and 24 characters in length, and unique within the core.windows.net Azure storage domain.
- Deployment model: Choose the Resource ...

