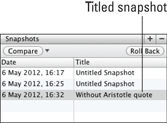
Figure 19-3: A titled snapshot.
Creating Titled Snapshots
If you’re just taking snapshots at regular intervals for peace of mind, you might not want to title them, but if you’re making major revisions, a title can help you sort through your versions quickly.
Consider using something meaningful to help you understand which version of your document the snapshot represents. For example, if you’re changing the opening scene of your manuscript from a bar fight to a wedding, you might name the snapshot of the old version Bar Fight Version.
In the titled snapshot shown in Figure 19-3, the title makes it clear that the earlier version doesn’t include the quote that I added after taking the snapshot.
You can title snapshots in two ways:
![]() Take the snapshot, as outlined in the section “Creating a Snapshot,” earlier in this chapter, and then double-click the title in the Snapshots pane and type a new name.
Take the snapshot, as outlined in the section “Creating a Snapshot,” earlier in this chapter, and then double-click the title in the Snapshots pane and type a new name.
![]() Name the snapshot when you take it.
Name the snapshot when you take it.
To name the snapshot when you take it, follow these steps:
1. Select the desired item(s) in the Binder, Corkboard, or Outliner.
2. Choose Documents⇒Snapshots⇒Take Titled Snapshots of Selected Documents.
When a single file is selected in Windows, or ...
Get Scrivener For Dummies now with the O’Reilly learning platform.
O’Reilly members experience books, live events, courses curated by job role, and more from O’Reilly and nearly 200 top publishers.

