Figure 4-8: The icon changes color to match the new value.
Assigning Label and Status Values
After you set up your Label and Status fields exactly the way you want them (as discussed in the preceding sections), you can assign values to your documents and folders.
Assigning a value from the Inspector
You can choose the Label or Status value that you want to assign to an item in the General pane of the Inspector by following these steps:
1. Select the item in the Binder to which you want to apply the Label (or Status) value.
2. In the Inspector, click to open the Label (or Status) drop-down list.
The list of value options appears.
3. Click the value in the list that you want to apply to the selected item.
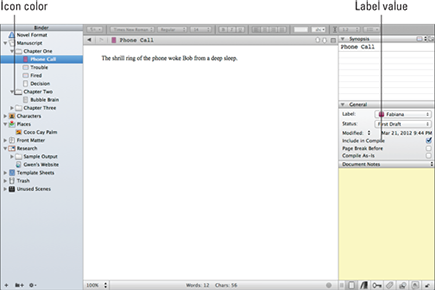
If you use Label colors in the Binder or icons (which I describe how to do in the section “Using Label Colors to Distinguish Items,” later in this chapter), the color changes to match the new value, as shown in Figure 4-8. The new value also appears in the Inspector.
Assigning a value with the contextual menu
You can also change the Label (or Status) value of a Binder item by using the contextual menu. Follow these steps:
1. Right-click the item(s) in the Binder to which you want to assign a Label (or Status) value.
The contextual menu appears, as seen in Figure 4-9.
2. Select Label (or Status).
A submenu opens, listing the values.
3. Select the desired value from ...
Get Scrivener For Dummies now with the O’Reilly learning platform.
O’Reilly members experience books, live events, courses curated by job role, and more from O’Reilly and nearly 200 top publishers.

