Chapter VIII. Expanding Dynamic Range in Photoshop
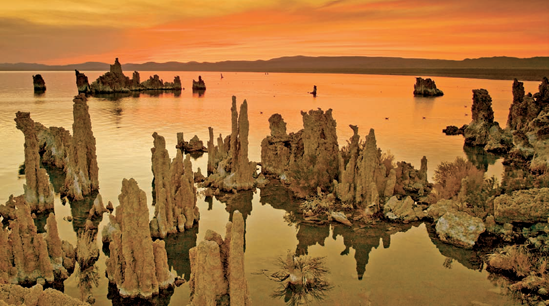
Look ma! No HDR program or HDR plug-in! That's right, HDR fans. This image was created in Photoshop with basic adjustments that were applied with adjustment layers.
Sure, the dynamic range of the image was expanded. But compared to some of the other images in this book, the dynamic range of the actual scene was not very wide. Still, to achieve a realistic image, the dynamic range had to be expanded.
On the following pages is an overview of the Photoshop process I used to create the image.
Keep in mind that if the dynamic range of your scene is within three f/stops, you can manage it in Photoshop. If it's greater than that, you really should use Photomatix.
I took this image at sunrise at South Tufa on Mono Lake in California.
Adjustment Layers are the Law
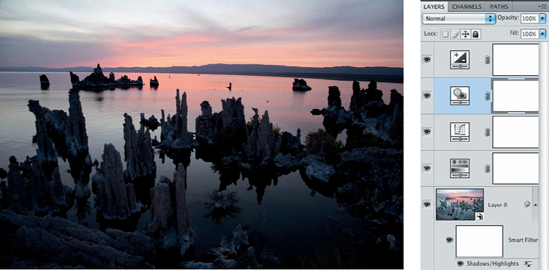
Here is my original digital image. The light at sunrise was nice, but not for a straight photograph.
Before digital photography, if I had loaded my camera with slide film, I would not have taken this picture. At the time this was captured, I was able to envision the end-result, knowing the capabilities of Photoshop. I took the shot ... and man o' man, am I sure glad I did!
Also on this page is a screen grab of the Layers panel. It shows all of the adjustment layers and layer masks that I created ...
Get Rick Sammon's HDR Photography Secrets for digital photographers now with the O’Reilly learning platform.
O’Reilly members experience books, live events, courses curated by job role, and more from O’Reilly and nearly 200 top publishers.

