Rediscover the Lynx, Game Gear, and Neo Geo Pocket Color.
Classic portables are an interesting footnote in gaming history. Not only do they let you play some of the best console games of the era in condensed form (sometimes with added levels), they offer up plenty of unique software that made them worth owning. Emulating these systems is relatively painless, requiring very little computing power and even less set up. Even better, public domain ROMs, including both games and tech demos, are available from websites like http://www.pdroms.de. At the time of this writing, 12 homebrew ROMs are available for the Lynx, 7 for the Game Gear, and 48 for the Neo Geo Pocket.
Originally called the Handy, the Lynx was actually created by two Amiga designers, Dave Needle and R.J. Mical. It was 1987 when the first prototype was floating around at Epyx, but it wasn’t until the 1990s that Atari, looking to capitalize on the portable market created by Game Boy, bought the system and released it.
The Lynx was ahead of its time, containing far more power under the hood than not only the competition, but some of the home consoles too. It even let players use the console horizontally as well as vertically. Its rather high price (just under $200) and low battery life doomed it to failure even with the ability to link up (or “Lynx up,” according to the marketing material) with up to eight players. That doesn’t mean quality software isn’t to be found, and the appropriately named Handy is a great emulator to run pretty much everything. It’s also the only one available for PC or Mac.
You can download Handy from the official site at http://homepage.ntlworld.com/dystopia/. The latest version is 0.90, and it was released back in 2002. Once you download the file, you also need to find a file called lynxboot.img. (Try doing a Google search for the filename.) Note that you cannot run any games without it, since it is a copy of the system BIOS. By not offering this BIOS for download, the developers of Handy avoid coming under legal fire. This BIOS image file is protected by copyright.
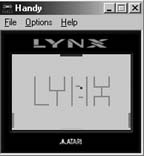
Once you’ve found it, you need to place it into the same folder you have the Handy.exe executable. It will automatically recognize the file the next time you start the emulator. If the system BIOS file is zipped, you’ll need to extract it or it will not work. However, you should not unzip any game ROM files that you download, since they must be in zipped format for the latest Handy to recognize them. Run the file Handy.exe to start playing, and it will automatically bring up a menu allowing you to select a ROM file. Click on one of the zipped files to start your game (see Figure 4-42).
Handy fully supports joysticks and should have no trouble recognizing them if your operating system supports the joystick you’re using. There are a few interesting options available to the Handy user, unique to it because of the Lynx console. First is of course the ability to mimic the console being flipped vertically. Simply click on Options to access a drop down menu and select “rotate screen” in the direction you need it to go.
The Lynx has some very pixilated graphics and Handy has a somewhat reasonable solution. You can play a game in Eagle mode, which smoothes out the graphics but also requires a bit more PC power. You can also simulate the real Lynx screen by selecting interlace mode. It’s actually pretty accurate, but without the occasionally annoying blur that you got with the real thing. If you like backgrounds, the latest revision even allows you to play the console “inside” the real console. Just choose Select Background Type and pick from Lynx, Lynx II (the smaller, slimmer model released late into the console’s life), or the basic screen border.
There’s very little difference between the Mac and PC versions of Handy. They offer the same functionality and ROM selection. You need the same lynxboot.img to get started. Loading a ROM is exactly the same as well. The Mac version does require a little more horsepower than the PC version, and there are some speed problems with certain games that have never been fixed (this version has not been updated since 2001). In this case, the PC version is probably the better choice.
Sega released their portable in 1991 to counter Nintendo’s Game Boy. Not only did Sega’s console have a color screen, it could play all the games from the company’s home system, the Sega Master System, via an adapter called the Master Gear Converter. It also let gamers turn it into a portable TV with a TV Tuner.
Unfortunately, even with a string of innovative TV advertisements, the system was doomed against the mega-popular Game Boy. A company called Majesco (now specializing in high-quality software for home consoles as well as all-in-one retro game joysticks [Hack #15] ) actually picked up the rights to the portable around 1995 and re-released it at a bargain price with a few pieces of software.
Unlike the Lynx, there are many options for Game Gear emulation. The vast majority emulate both the Master System and Game Gear, since the consoles are so similar. The two best are BrSMS (http://snespad.emulationworld.com/sms.html) and the excellent Meka (http://www.smspower.org/meka/). BrSMS is great for those with slow machines, as it requires little power to get going. However, Meka (MekaW in Windows) seemingly supports everything, is easy to use with a sharp GUI, and even supports Colecovision ROMs as an added bonus. Thus, we’ll focus on MekaW.
To get the most out of everything, MekaW is the way to go. It’s so much easier to use thanks to the GUI. There should be some documentation included, like the compat.txt file, which provides complete documentation on what games will work and which games have problems. That will save you time from downloading ROMs that don’t work.
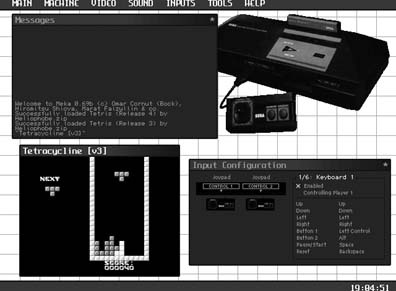
MekaW will recognize both unzipped and zipped ROMs. Upon double-clicking the icon, MekaW brings up a rather self-explanatory menu screen, shown in Figure 4-43. (For a little fun before you even start playing, click “Mario is not a fat plumber” in the main drop-down menu under Options.) This is the same menu that you’ll be loading ROMs from. Once you have selected to load the game, another menu should appear on your right to let you select your games. Once loaded, the game will begin playing in the small screen on the lower left.
If it’s too small for you, head up to the Video toolbar and select “full screen.” Other options here let you play the game interlaced (under Blitters), in a window so you can minimize the emulator if necessary, and, rather strangely, eliminate the sprites or backgrounds from the game you’re playing by using the “layer” option. The toolbar option Machine contains mostly things that should switch automatically, such as NTSC and PAL controls. If you want to do it manually, that option exists for you.
Sound offers the ability to actually capture audio with the “dump” option. Simply click start and stop to capture the audio. The file will appear in the same folder as your ROMs. Inputs is not something you’ll need to deal with when using this emulator for Game Gear games except for the rapid-fire option. The rest exists to mimic Master System accessories like the awkward Sports Pad.
The Mac user will need to download SMS Plus at http://www.bannister.org/software/sms.htm. If your OS is a little older, you’ll probably want to try MasterGear, which can be found at http://www.zophar.net. SMS Plus is the more updated of the two and falls more in line with other Mac emulators. To get the most out of it, you need to download the Emulator Enhancer from here: http://www.bannister.org/software/ee.htm. It offers features like fullscreen gameplay, USB support, etc. This is a shareware piece, so there will be pop-up windows encouraging you to purchase the full software. However, the current version lets you continue using it as long as you want with no penalty. Once downloaded, it works for any supported emulators, something that makes emulation on the Mac quite easy.
To get Emulation Enhancer working, you need it in your home directory, under Library/Application Support. That’s where the main file needs to be for the emulator to recognize it. Stick it anywhere else, and you’ll be out of luck. Once it’s installed, you can head into the Options menu when the emulator is loaded and see that a plethora of new options are now accessible.
SNK is probably best known for their Neo Geo home console, which cost upwards of $600 when it was first released and played perfect versions of the company’s popular arcade games. Nowhere near as popular, but appreciated by its fans, is the Neo Geo Pocket (NGP) portable console. The NGP, plus a Color version that was released later, got scaled-down translations of many popular Neo Geo fighting games. Very few American retailers carried it, and it died soon after the release of the Game Boy Advance.
Many of the NGP emulators do not feature sound. NGPocket (http://www.zophar.net/ngpocket.html) is a decent emulator, but requires a registration fee of $5 to get sound and joystick support. But there’s little reason to pay for that when NeoPop is free. You can find the latest version at their web site, http://www.emuxhaven.net/~neopop/. It has full support for sound, joysticks, and debugging if you wish. It does run a little slow on older hardware, so you might want to have at least a Pentium 3 to run at full speed.
As usual, you’ll need to download and unzip the file. It should create its own ROM folder, which, of course, is where the ROMs should go. If you want them someplace else, you can open the emulator, go into the Options menu, and click on Paths. You can also select where you want save states and battery saves to go (some games have internal batteries to save progress; that’s what will go into this folder automatically if you save in-game).
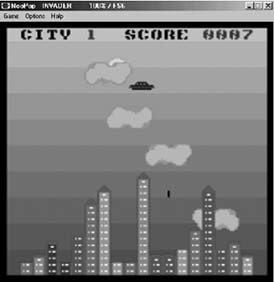
Loading a game is easy, much like everything else associated with this emulator. Either hit F1 or select Game from the toolbar. That should bring up a window directly to your ROMs folder. Select the game you want (zipped or unzipped, your choice) and it should start without a problem (see Figure 4-44). The Readme.txt file that was extracted when you unzipped the package should contain any information on games that don’t work.
Probably the best feature of this emulator is the ability to link up with other players. It’s fairly simple to do. Simply type your IP address (if you plan on hosting the game) into the appropriately labeled box after selecting Link-Up from the drop-down menu and then put your friend’s into Remote IP (see Figure 4-45). Your friend should click Listen In to make sure the connection is there (and to make sure you’ve typed the addresses correctly). If it is, load up your 2-player compatible ROM and you’re set!
Mac users have only one choice here: NeoPocott 0.4.6 (http://www.bannister.org/software/neopocott.htm) for Mac OS 10.2+. It runs exactly like the Game Gear emulator mentioned above. Note that NeoPocott, unlike many emulators, does not feature support for zipped ROMs, so be sure to click Open when you download the file, then extract the ROM to the NeoPocott directory. Also, there is no Internet play as featured in NeoPop. If you have older hardware, you might want to check out an older version of the emulator, which will run a little faster. It is available at http://www.arcadeathome.com/ngpc.phtml.
—Matt Paprocki
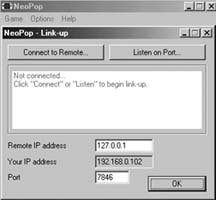
Figure 4-45. NeoPop lets you link up via the magic of the Internet to play NeoGeo Pocket games versus a buddy
Get Retro Gaming Hacks now with the O’Reilly learning platform.
O’Reilly members experience books, live events, courses curated by job role, and more from O’Reilly and nearly 200 top publishers.

