Design Your Own Forms
If the built-in forms don’t meet your needs or if your task is more complex than the preceding data-entry sample, you can use the Visual Basic Forms Designer to create your own custom forms in Excel.
To create a custom dialog box using the Forms Designer:
Start the Visual Basic Editor and choose Insert → User Form. Visual Basic displays a new form and the Control Toolbox.
Drag controls from the Toolbox onto the form as shown in Figure 20-7.
Set the properties in the Properties window (Figure 20-8) as you position the controls on the form. Table 20-3 lists the controls and property settings used for the Stock History sample.
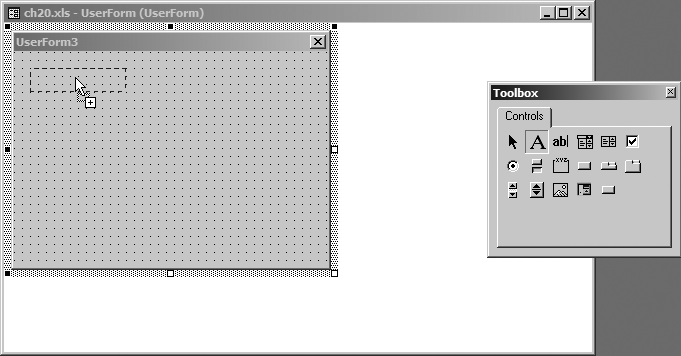
Figure 20-7. Drag controls from the Toolbox onto the user form
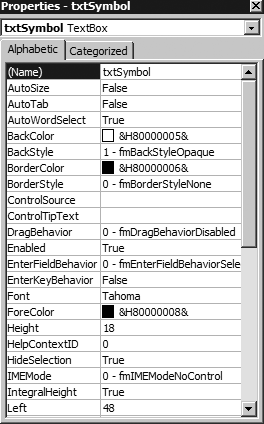
Figure 20-8. Set the controls’ properties as you place them on the form
Table 20-3. Controls and property settings for the Stock History form
|
Control |
Property |
Set to |
|---|---|---|
|
User form |
Name |
frmStockHistory |
|
Caption |
Stock History | |
|
Label |
Caption |
Symbol |
|
Label |
Caption |
#Days |
|
Label |
Caption |
Preview |
|
TextBox |
Name |
txtSymbol |
|
Caption |
^IXIC | |
|
ControlTipText |
Stock symbol or index | |
|
TextBox |
Name |
txtDays |
|
Caption |
100 | |
|
ControlTipText |
Value from 1 to 300 | |
|
SpinButton |
Name |
spnDays |
|
Delay |
20 | |
|
Max |
300 | |
|
Min |
1 | |
|
Value |
100 | |
|
Image |
Name |
imgChart |
|
Height |
150 | |
|
Width |
180 | |
|
CommandButton ... |
Get Programming Excel with VBA and .NET now with the O’Reilly learning platform.
O’Reilly members experience books, live events, courses curated by job role, and more from O’Reilly and nearly 200 top publishers.

