Filtering Based on Security
In Chapter 11, we covered the creation of login accounts and roles. In the next example, we’ll use that information combined with the navigation tools covered to make aspects of the navigation aids visible and accessible to users in specific roles.
To get started, you will create a new web site called SecureNavigation with an IIS virtual directory. When the New Web Site dialog box appears, click Browse next to the location. The Choose Location dialog box appears. On the left are four buttons; click Local IIS and select the default web site. Then click the New Web Application icon in the upper-right corner of the dialog box, as shown in Figure 12-26.
A new web site will appear under Default Web Site; name it SecureNavigation, as shown in Figure 12-27.
Clicking Open will return you to the New Web Site dialog box with the location set to HTTP and the site name http://localhost/SecureNavigation. Click OK.
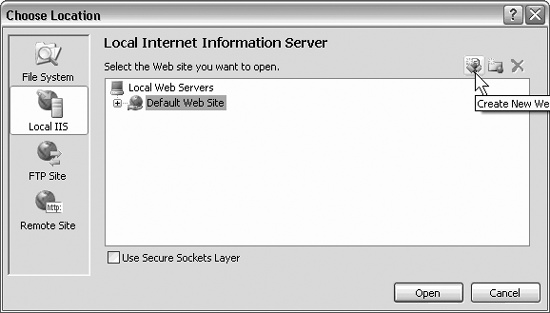
Figure 12-26. Choose Location: Local IIS
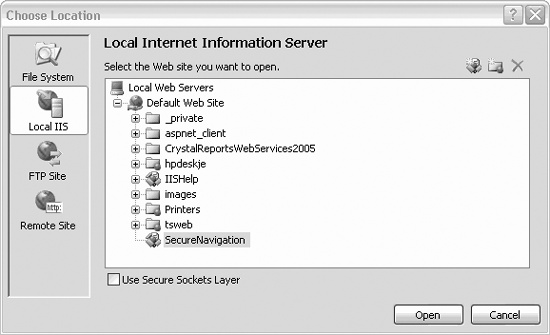
Figure 12-27. Creating new web site
Enable Membership
Select the menu choice Website → ASP.NET Configuration. This opens the Web Site Administration Tool. Click the Security tab. Under Users, click the link “Select authentication type,” choose From the Internet and then click Done. This will set the authentication type to Forms. ...
Get Programming ASP.NET, 3rd Edition now with the O’Reilly learning platform.
O’Reilly members experience books, live events, courses curated by job role, and more from O’Reilly and nearly 200 top publishers.

