CREATE A USER CONTROL
Continuing with the same XAML_Hello Expression Blend project and SWE_Hello Compact 7 subproject from the previous section, the exercise in this section adds a storyboard to the project to animate the Button control.
Work through the following steps to create a storyboard to animate the Button control:
1. Launch Express Blend 3, and open the XAML_Hello SWE application project created earlier in this chapter.
2. From the Objects and Timeline tab, click the + icon on the top-right corner, as shown in Figure 22-15, to bring up the Create Storyboard Resource screen, as shown in Figure 22-16.

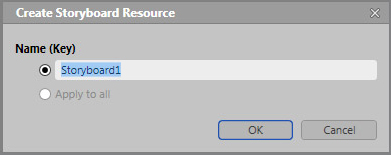
3. Use the default name, Storyboard1, and click OK and bring up the Objects and Timeline tab.
With an active storyboard, the Objects and Timeline tab displays the animation timeline for the storyboard, as shown in Figure 22-17.
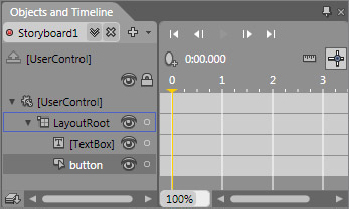
The animation timeline is shown in the second increment, where you can associate a UI element’s display to a different timeline. For example, you can make the button animate left to right by associating the button control’s position moved by 50 pixels to the left at the 1-second timeline, moved right by 50 ...
Get Professional Windows® Embedded Compact 7 now with the O’Reilly learning platform.
O’Reilly members experience books, live events, courses curated by job role, and more from O’Reilly and nearly 200 top publishers.

