11.3. Work Item Administration
So far in this chapter, you have examined the guts of a work item, and have a basic understanding of how you can create your own work item, and add it to Team Foundation Server. Now it's time to move on to how you actually interact with the work item tracking system daily. You do this using Team Explorer, and specifically the Work Items folder located in your Team Project. From here you can do anything you need to concerning the work item tracking system: create a new work item, open an existing work item, retrieve lists of work items, and build custom views of work items, just to name a few.
As usual, you can modify all these options, and make them work for you as you need them to.
11.3.1. Creating A Work Item
Creating a new work item is easy. Simply right-click the Work Items folder, Select Add Work Item, and then the work item type you want to create. For example, to create a new task work item, select Task. This opens the task for you to fill out as shown in Figure 11-5.
Figure 11.5. Figure 11-5
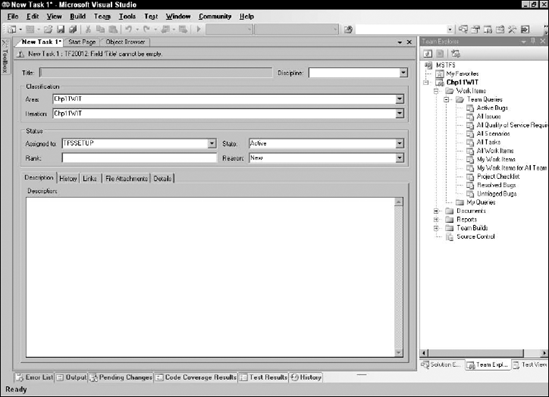
Notice how certain fields are filled in for you automatically, like the Assigned To, State, and Reason fields. Enter a title and save the work item. When you save the work item, it will be assigned an ID. Remember this ID, as you will come back to it later.
If you do not fill in all the required fields, you will not be able to save the work item.
Get Professional Team Foundation Server now with the O’Reilly learning platform.
O’Reilly members experience books, live events, courses curated by job role, and more from O’Reilly and nearly 200 top publishers.

