3.2. CodeIgniter at a Glance
Now that you have CodeIgniter downloaded and unzipped, take a minute to look at the file structure. The more familiar you are with it, the better off you'll be as you start to code. Figure 3-3 illustrates the initial folder structure you'll see. Take a quick look at it now.
Figure 3.3. Figure 3-3
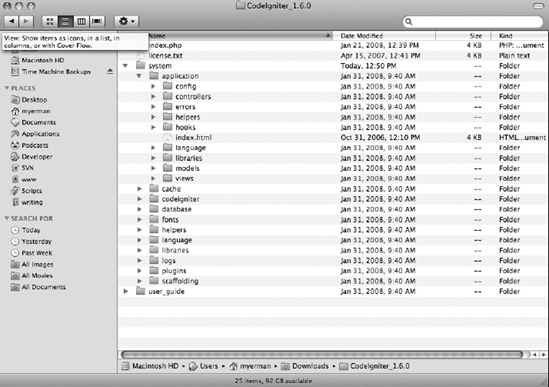
As received, the CodeIgniter root directory contains two files and two folders. The two files are index.php (which you want to keep there no matter what) and a license.txt file, containing CodeIgniter's license agreement. The two directories are user_guide/ (containing a version of the online documentation at www.codeigniter.com) and system/.
A quick note before you delve too much further into that all-important system/ folder: Approximately 100 percent of your web projects will require the use of custom CSS, JavaScript, and image files and folders. The best way to handle all of these assets is to create folders for them at the project root, as siblings to the system/ folder. This is as good a time as any to create your css/, js/, and images/ folders, so do that now. To make those folders accessible to CodeIgniter, you will also need to create a small .htaccess file in the root folder of your web site.
Here's what that .htaccess file would look like. It basically contains instructions that allows certain files and folders to be viewable on the web site:
Get Professional CodeIgniter® now with the O’Reilly learning platform.
O’Reilly members experience books, live events, courses curated by job role, and more from O’Reilly and nearly 200 top publishers.

