Warping Type
With Elements, you can warp the shape of your type in all sorts of fun ways. You can make it wave like a flag, bulge out, twist like a fish, arc up or down, and lots more. These complex effects are really easy, too, and you can still edit the type once you've applied the effects. Figure 13-6 shows just a few examples of what you can do. If you add a Layer style (explained later), warps are even more effective.
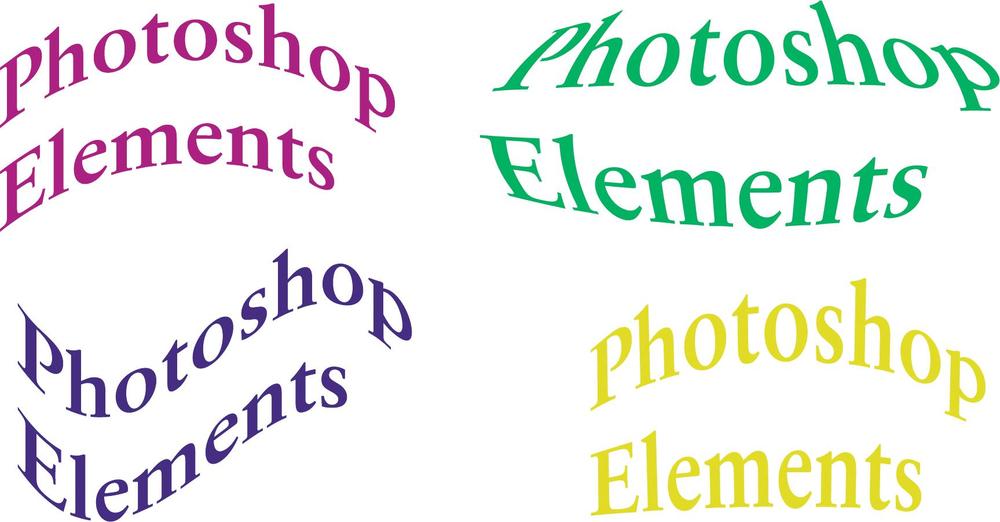
Figure 13-6. Elements gives you oodles of ways to warp your type. Here are just a few of the basic warps, applied using their standard settings. Clockwise from the upper left: Arch, Inflate, Arc Upper, and Flag. You can tweak these effects endlessly using the sliders in the Warp dialog box.
To warp your type, follow these steps:
Enter the text you want.
Use the Move tool (page 119) to reposition your text if necessary.
Select the text you want to warp.
Make sure the Text layer is the active layer or you won't be able to select what you typed.
Click the Create Warped Text button in the Options bar.
It's the T with a curved line under it. The Warp Text dialog box, shown in Figure 13-7, appears.
Tell Elements how to warp your text.
Select a warp style from the pull-down list. Next, make any changes you want to the sliders or the horizontal/vertical orientation of the warp. Tweaking these settings can radically alter the effect. Push the sliders around to experiment. ...
Get Photoshop Elements 3: The Missing Manual now with the O’Reilly learning platform.
O’Reilly members experience books, live events, courses curated by job role, and more from O’Reilly and nearly 200 top publishers.

