Recipe 6.2. Sabattier and solarization effect
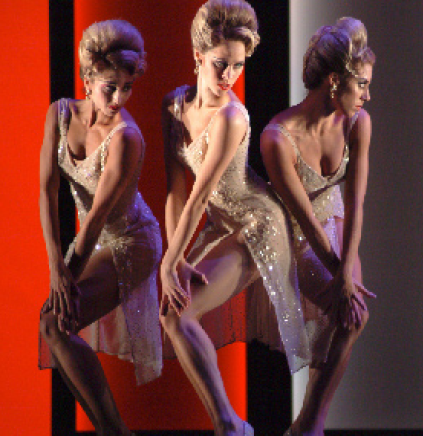
In the world of digital imaging, it's easy to lose sight of the fact that special effects existed long before the advent of computers and Photoshop. In the days of the traditional darkroom, there were many ways of manipulating the look and atmosphere of an image, and one of the most famous—the Sabattier effect—can still yield wonderfully magnetic and arresting images today when we recreate the effect in Photoshop.
Traditionally, the effect was achieved by exposing a partially developed print to light, where the normal tones and colors are reversed. In the darkroom, this was a hit-and-miss affair, but in Photoshop we have much more control.
The technique revolves primarily around the Curves command, where we can target specific tonal ranges.
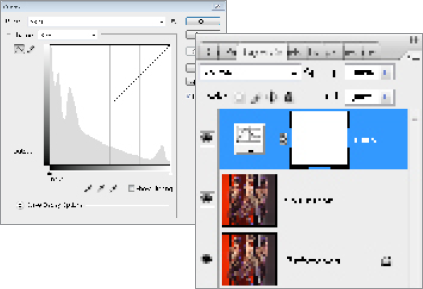
1 Open the start image and duplicate the Background layer, naming the duplicate "Solarization." We'll use Curves to create the Sabattie effect, but via an adjustment layer for more flexibility. So, go to Layer > New Adjustment Layer > Curves. Click OK to the first dialog and the Curves dialog will be displayed. From the Channels option, select RGB.
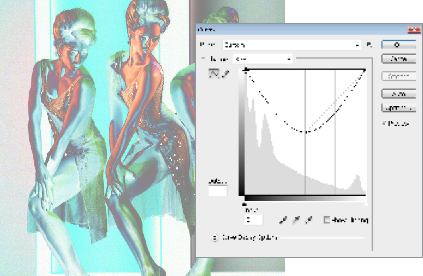
2 Start by clicking a point along the curve ...
Get Photoshop CS3 Photo Effects Cookbook now with the O’Reilly learning platform.
O’Reilly members experience books, live events, courses curated by job role, and more from O’Reilly and nearly 200 top publishers.

