Recipe 5.4. Adding rainbows
Of all weather phenomena, rainbows are the most beautiful and colorful, and carry the mythical promise of pots of gold. Unfortunately, capturing a rainbow with a camera requires a huge amount of luck—it's another classic example of the right-time, right-place school of photography. Luckily, with Photoshop, it's not difficult to add a rainbow to an image after the fact.
In this example, we'll use the Gradient tool, which includes a ready-made rainbow gradient. To get more realistic results, we'll use the rainbow gradient in conjunction with a black-to-transparent gradient.
So, no more chasing rainbows—it's Photoshop to the rescue!
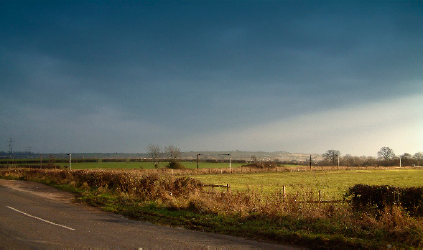
1 The ideal candidate for a rainbow effect is an image that has a dark, dramatic sky, contrasted with shafts of sunlight.
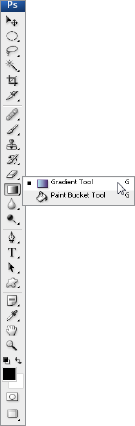
2 Begin by adding a new layer to the image (Ctrl/Cmd+Shift+N), and call it "Rainbow" This will help us position the finished rainbow. Now choose the Gradient tool from the Toolbar. Click in the Gradient Picker in the Options bar.
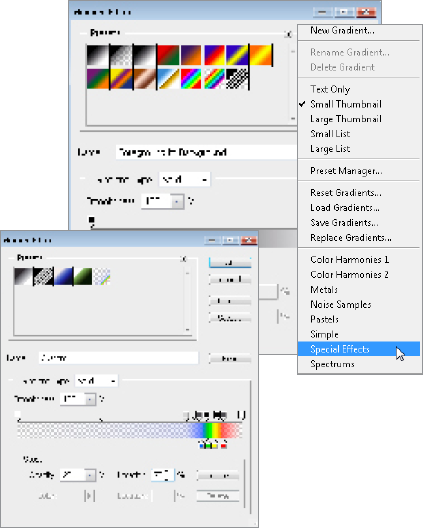
3 Click the small, right-pointing arrow in the top right of the Gradient ...
Get Photoshop CS3 Photo Effects Cookbook now with the O’Reilly learning platform.
O’Reilly members experience books, live events, courses curated by job role, and more from O’Reilly and nearly 200 top publishers.

