Editing Video
Very few, if any, video clips begin and end at the perfect moments. That’s why it’s important to know how to trim or split clips in Photoshop, both of which are incredibly easy to do (and nondestructive to boot!). In this section, you’ll learn how to do just that as well as add transitions, text, other images, and as audio. Read on!
Changing Clip Length
Fortunately, Photoshop makes it easy to trim a clip—just drag its endpoints left or rightward in the Timeline panel. As you shorten one clip in a video track, the others slide over to keep the track seamless, as shown in Figure 21-3.
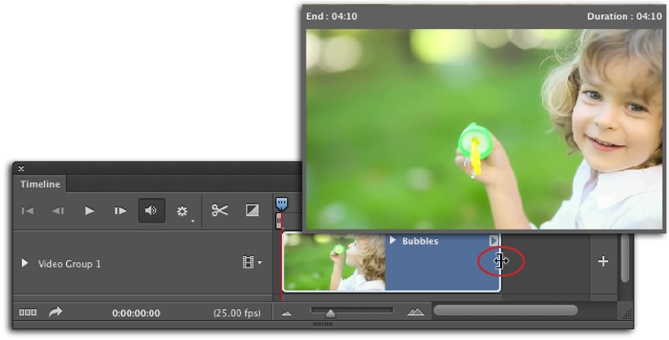
Figure 21-3. Point your cursor at the start or end point of a clip and it turns into a bracket with a double-sided arrow (circled). The direction of the bracket indicates which clip will be affected (here, the bracket faces left). Click and drag the bracket left or right and Photoshop opens the preview window shown here, which shows exactly which frame you’re trimming the video down to. Handy, eh?
You can also adjust the length of a clip by clicking the triangle in the clip’s upper-right corner clip in the Timeline panel. When you do, Photoshop opens a panel containing Video and Audio buttons (circled in Figure 21-4, top). Either way, trimming clips is a nondestructive process; if you decide to undo your trimming, just drag the clip’s endpoint to the left or right (happily, Photoshop won’t let ...
Get Photoshop CC: The Missing Manual now with the O’Reilly learning platform.
O’Reilly members experience books, live events, courses curated by job role, and more from O’Reilly and nearly 200 top publishers.

