Customizing Brushes
Once you get comfortable with the Brush tool, you can experiment with changing the way it behaves. Maybe you’d like to adjust the spacing between brush marks in a single stroke, have the brush apply a texture, or whatever. The Brush panel (Figure 13-24) gives you an amazing amount of control over brushes. To open it, choose Window→Brush.
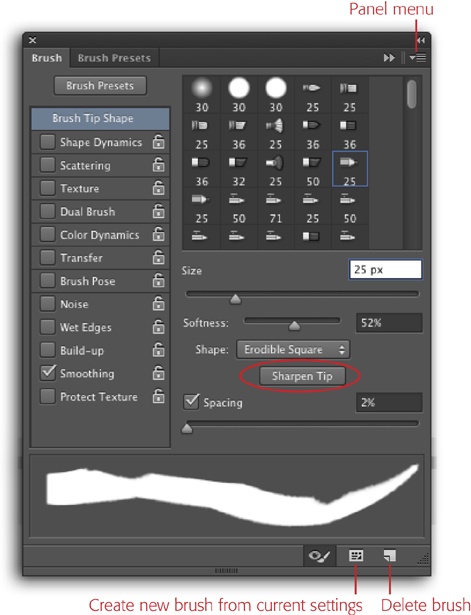
Figure 13-24. The Brush panel gives you a gaggle of options for changing the way brushes behave. By mastering these controls, you can create some super-cool brushes that make your brushstrokes look real (not too perfect). Start by choosing one of the brush tips in the upper-right part of the panel (the number beneath each tip represents its default size in pixels). If you don’t see any brush tips, click the Brush Tip Shape category on the panel’s left side. And if the panel’s settings are all grayed out, simply switch to a tool that uses a brush cursor, like the Brush tool (obviously) or even the Eraser tool. Here, one of Photoshop’s Erodible brush tips is active. All of these tips wear down as you use ’em just like real chalk or graphite (pencil lead), though you can use the Softness slider shown here to control how fast the tip melts away (a setting of 100 percent prevents the tip from wearing down at all). To restore the tip to its original shape after using it, click the Sharpen Tip button (circled). To gain easier access to ...
Get Photoshop CC: The Missing Manual now with the O’Reilly learning platform.
O’Reilly members experience books, live events, courses curated by job role, and more from O’Reilly and nearly 200 top publishers.

