Enabling DMA mode transfers with Windows 9X
To determine if your system board and ATA interface support DMA, right-click the My Computer icon and choose Properties to display the System Properties dialog. Display the Device Manager and expand the Hard disk controllers item. You do not have DMA-capable hardware if you see only one or two entries that read Standard IDE/ESDI Hard Disk Controller. If the first entry is Intel 82371SB PCI Bus Master IDE Controller or similar, the system board and interface provide DMA support. The critical words are PCI Bus Master. The exact model number is less important.
Windows 98 and Windows 95B automatically load DMA-capable drivers if they detect DMA hardware. To install DMA support for the initial Windows 95 release, download and execute the file http://support.microsoft.com/download/support/mslfiles/remideup.exe and follow the prompts.
After you restart the system, enable DMA transfers by right-clicking My Computer and choosing Properties to display the System Properties dialog. Display the Device Manager page and expand the Disk drives item. Double-click the drive in question to display its Properties sheet and display the Settings page, shown in Figure 14-3.
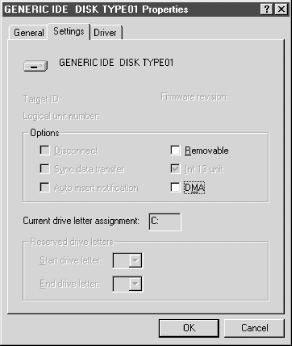
Figure 14-3. In Windows 9X, marking the DMA checkbox on the Settings page of the disk Properties dialog to enable DMA transfers
If a DMA-capable driver has been loaded, a DMA checkbox appears ...
Get PC Hardware in a Nutshell, 3rd Edition now with the O’Reilly learning platform.
O’Reilly members experience books, live events, courses curated by job role, and more from O’Reilly and nearly 200 top publishers.

