Installing and Removing a DIMM or RIMM
- To install a DIMM or RIMM
Locate a free socket and pivot the ejector arms on each side of the socket as far as possible toward the horizontal. The contact edge of the DIMM module is keyed with notches that correspond to protuberances in the DIMM socket. Align the notches and slide the DIMM straight down into the socket. Position your thumbs on top of the DIMM at each end and press down firmly, as shown in Figure 5-6.
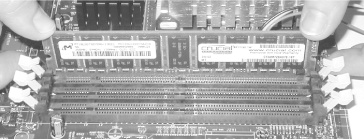
Figure 5-6. Aligning the memory module and pressing straight down until it seats
The DIMM slides (sometimes snaps) into the socket, which automatically pivots the ejector arms toward the vertical. If the ejector arms are not fully vertical, press them toward the DIMM until they lock into the vertical position, as shown in Figure 5-7. Note that some DIMM sockets have minor physical variations. If the DIMM does not fit easily into the socket, do not force it. Contact the vendor who supplied the DIMM for a replacement.
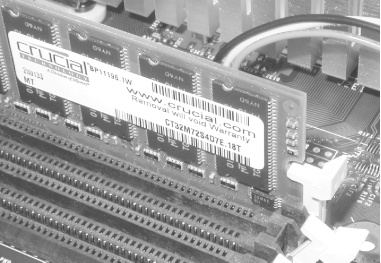
Figure 5-7. The ejector arms pivoting back to the vertical when the memory module is fully seated
Warning
If you are installing Rambus RIMMs, also install a CRIMM in each unused memory slot. Rambus systems malfunction unless all memory slots are occupied, either by a RIMM or a CRIMM. Most Rambus motherboards have enough CRIMMs ...
Get PC Hardware in a Nutshell, 3rd Edition now with the O’Reilly learning platform.
O’Reilly members experience books, live events, courses curated by job role, and more from O’Reilly and nearly 200 top publishers.

