Step 5: Prepare Drives for Installation
Several steps may be required before installing some drives, including setting configuration jumpers, installing mounting hardware, and installing supplemental cooling. Some of those steps are difficult or impossible to perform after the drive is installed in the system, so plan ahead. If you are installing several drives, make a written plan of how each drive needs to be configured to ensure that there are no conflicts. As you configure each drive, check what you’re doing against the list and mark off each drive as you finish it.
Tip
Many people find it helpful to label each drive with its function and settings, e.g., ID-0, ID-1, and so on for SCSI drives, and Primary Master, Primary Slave, Secondary Master, and Secondary Slave for ATA/ATAPI drives. If you later upgrade the system, visible labels eliminate the need to remove drives to examine their settings.
In turn, remove each drive from its packaging and set jumpers as necessary to configure it (Figure 28-23). Leave unused jumper blocks connected to only one pin, which has the same effect as removing the jumper block entirely, but leaves that block conveniently available for future use.
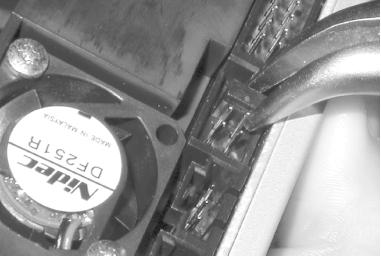
Figure 28-23. Using needle-nose pliers to set the drive select jumper on the rear panel of the Plextor PlexWriter to Master
- IDE/ATAPI drives
For each drive, set the jumper to designate the drive as Master, ...
Get PC Hardware in a Nutshell, Second Edition now with the O’Reilly learning platform.
O’Reilly members experience books, live events, courses curated by job role, and more from O’Reilly and nearly 200 top publishers.

