Chapter 12. J2EE Connector Architecture scenario 419
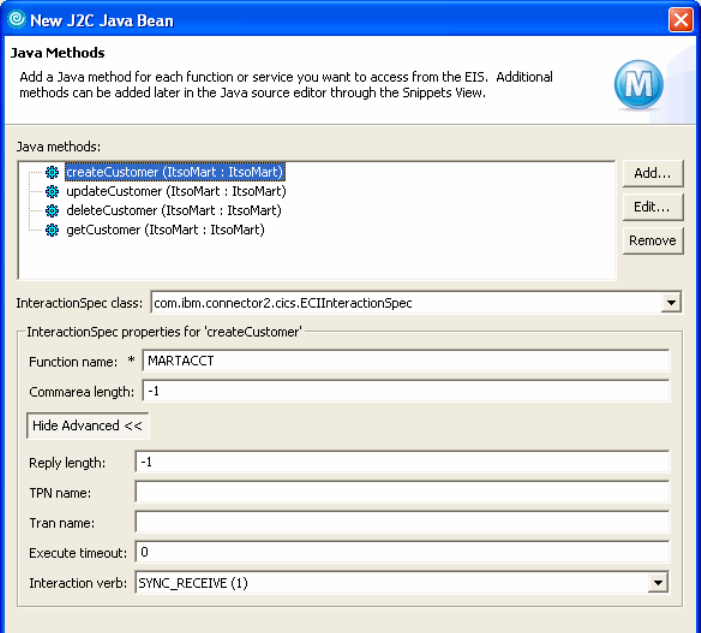
Figure 12-17 Java Methods created for our application
Repeat the following process four times to add these methods:
– createCustomer
– deleteCustomer
– updateCustomer
– getCustomer
a. Click Add.
b. Enter the method name and click Next.
c. Specify the input type by browsing to and selecting the data binding class.
In each case for our sample we select MartAccounts.
d. Check the Use input type for output box.
e. Click Finish.
420 Patterns: Implementing Self-Service in an SOA Environment
f. This will bring you back to the original screen where you can specify
values related to the use of the method. For our sample, each method
uses the following settings:
• interactionSpec class:
com.ibm.connector2.cics.ECIInteractionSpec
• Function name: MARTACCT
• Commarea length : -1
Click Next.
7. The next screen contains deployment information. Leave the settings as they
are and click Finish.
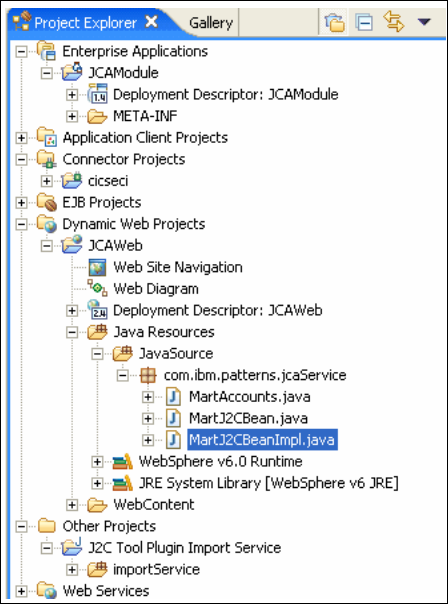
You can see the new Java bean in the Project Explorer view (Figure 12-18).
Figure 12-18 Project Explorer showing J2C Java bean
Step 3: Deploy the J2C Java bean as a Web service
This step deploys the J2C Java bean as a Web service.
Chapter 12. J2EE Connector Architecture scenario 421
1. On tool menu select File → New → Other → J2C (Figure 12-10 on
page 411).
2. Expand J2C and select Web page, Web Service, or EJB from J2C Java
Bean. Click Next,
3. In the next window provide the J2C bean Impl file name we created in the
previous step:
/JCAWeb/JavaSource/com/ibm/patterns/jcaService/MartJ2CBeanImpl.java
Click Next.
4. Select Web Service as the deployment option.
5. Click Advanced and select Configure resource Adapter Deployment. Click
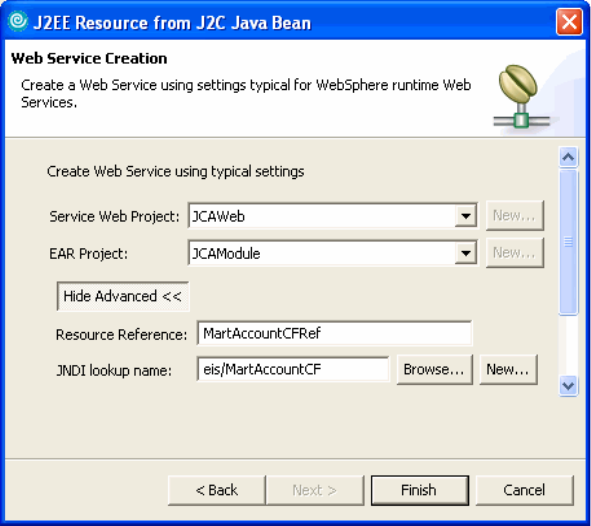
Next. See Figure 12-19.
Figure 12-19 Web Service Creation
– Provide the Web project name (JCAWeb) and EAR project name
(JCAModule).
– Click Advanced to view or modify the resource reference and JNDI lookup
names. We will take the defaults.
422 Patterns: Implementing Self-Service in an SOA Environment
Click Next.
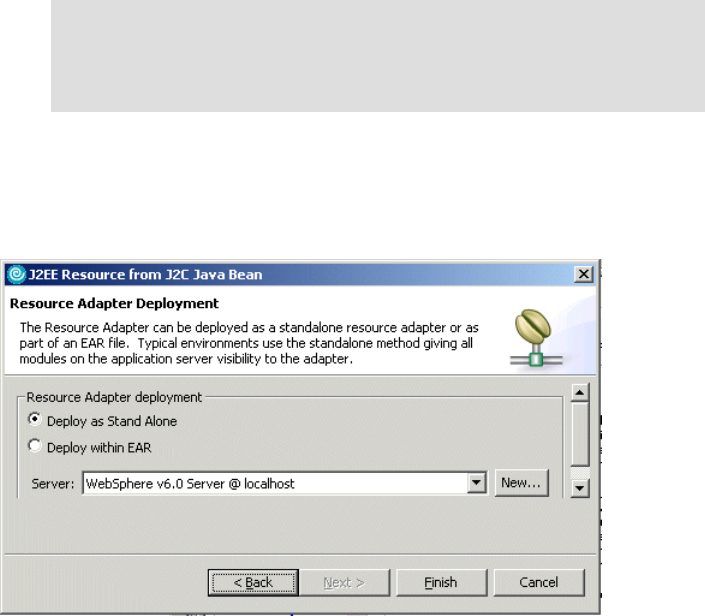
6. In the next screen (Figure 12-20) you can select the server to deploy to for
testing and the deployment option.
Figure 12-20 Resource adapter deployment options
–Select Deploy as Stand Alone.
– We only have one unit test environment server defined so that server is
selected by default.
7. Click Finish.
At the completion of this step, the J2C Java bean will be deployed as a Web
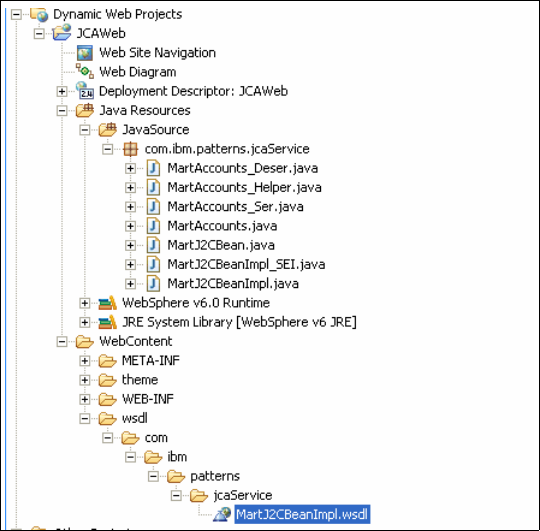
service on the selected application server. The wizard will generate
MartJ2CBeanImpl.wsdl in the WebContent /wsdl folder. In addition, the following
files are generated:
MartJ2CBeanImpl_SEI.java
MartJ2CBean.java
MartAccounts_Ser.java
MartAccounts_Helper.java
MartAccounts_Deser.java
All these files are in Project Explorer shown in Figure 12-21 on page 423.
Note: The resource reference name will update the Impl code,
replacing the JNDI name with this name. It also create a resource
reference in the deployment descriptor and will add the JNDI lookup
name as the JNDI name to this reference name.
Chapter 12. J2EE Connector Architecture scenario 423
Figure 12-21 Generated files for the Web service
You can browse the WSDL file by double-clicking on the file in the Project
Explorer view. Rational Software Architect provides an editor especially suited
to working with WSDL files.
Figure 12-22 on page 424 shows the relationship between service, bindings and
port types defined in the WSDL for the service.
Get Patterns: Implementing Self-Service in an SOA Environment now with the O’Reilly learning platform.
O’Reilly members experience books, live events, courses curated by job role, and more from O’Reilly and nearly 200 top publishers.

