PRC-Tools
This tutorial shows you how to use PRC-Tools to create a simple Palm OS application. It is the second of two possible tutorials that you can read through. The PRC-Tools development environment has a great price (it’s free) and it’s well loved by many a C programmer. Just like CodeWarrior, we have made sure that you can use it in conjunction with the source code and examples in the rest of the book easily (all the code has been compiled within both environments).
Here is what this PRC-Tools tutorial describes:
What PRC-Tools includes (which tools you install and use).
How to install PRC-Tools (this includes instructions first for Windows and then for Unix). This is by far the most complicated portion of this tutorial.
How to use a sample project (OReilly Starter)—a useful starting point.
How to create a new project.
How to make a PRC file.
What PRC-Tools Includes
The most important elements are:
- GNU Compiler Collection (GCC)
This compiles C/C++ code to Motorola 68K. It also functions as a linker.
- Build-PRC
This builds a PRC file from the code and the resources.
- GDB
This is a source-level debugger.
This next section of the tutorial deals with installing PRC-Tools on Windows. Use it, or skip ahead to the Unix section (Section 4.3.3) if you use that platform. After we cover installation for both platforms, we will deal with creating a project.
Installing on Windows
The official distribution location for PRC-Tools is http://prc-tools.sourceforge.net. Our instructions are for installing PRC-Tools 2.1, pre-3, the latest version at the time this book was written. Installing PRC-Tools on Windows requires several steps, which we’ve outlined in the following sections.
Installing Cygwin shell and utilities
Cygwin is a Unix-like shell and set of commands that runs on Windows. The PRC-Tools relies on Cygwin in order to run.
To get Cygwin, go to http://sources.redhat.com/cygwin/ and download setup.exe.
Create a directory for setup.exe (perhaps C:\CygwinInstall). This will also be a local packages directory, in which the many different packages that make up Cygwin will be downloaded.
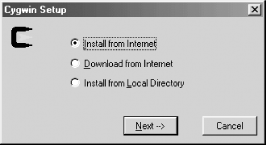
Run setup.exe. When it asks the type of install, choose Install from Internet (see Figure 4-16). Go to the next dialog box.
When it asks the local package directory, leave it at the default setting (see Figure 4-17). This is the same directory containing setup.exe. Go to the next panel.
When it asks for the root directory, leave it at the default, or choose a different destination (see Figure 4-18). Also, specify DOS as the Default Text File Type. Go to the next dialog box.
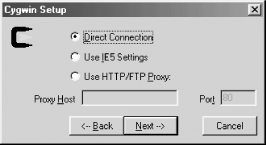
When it asks about your connection, you’ll need to choose appropriate values, depending on whether you’re behind a firewall (see Figure 4-19). Go to the next dialog box.
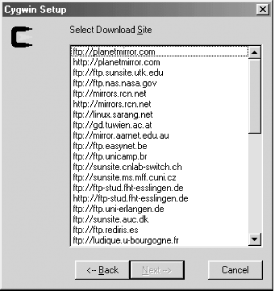
When it asks for a download site, choose a close site (see Figure 4-20). Go to the next panel.
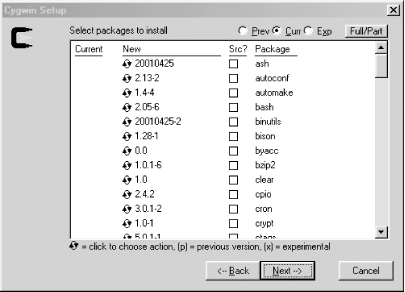
Now it is installation time. When the installer asks which packages to install (see Figure 4-21) your best bet is to just leave it alone. If you’d like a somewhat reduced install (85 MB), however, you can install just the following files:
ash
ctags
gawk
m4
pcre
vim
autoconf
cygrunsrv
gcc
make
regex
w32api
automake
cygwin
gdb
man
sed
which
bash
dejagnu
gperf
mingw
sh-utils
zlib
binutils
diff
grep
mt
tar
bison
expect
groff
ncurses
tcltk
bzip2
file
gzip
opengl
termcap
clear
fileutils
inetutils
openssh
texinfo
cpio
findutils
less
openssl
textutils
crypt
flex
login
patch
time
You can probably get by with even fewer packages, but we haven’t tested it with a smaller set. To choose not to install a package, click on the version number until it changes to Skip. Go to the next panel.
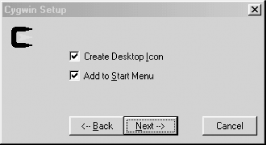
The Setup application will chug away and install everything you’ve chosen. When it’s complete, a dialog box will appear asking whether you’d like to create a desktop icon and/or add it to the Start menu (see Figure 4-22). At the very least, choose to add it to the Start menu.


Installing PRC-Tools
Now that Cygwin itself is installed, you have to install PRC-Tools. There are several steps to this process once again.
Create a temporary directory, called C:\PRCToolsInstall, and into it download http://prdownloads.sourceforge.net/prc-tools/prc-tools-2.0.92-cygwin.tar.gz.
Run Cygwin’s setup.exe one more time (see Figure 4-16).
Instead of specifying Install from Internet, choose Install from Local Directory.
When prompted to choose a local packages directory, select the directory into which you just downloaded the file (see Figure 4-17).
When prompted for the root directory (see Figure 4-18), specify the same thing you chose when you installed Cygwin.
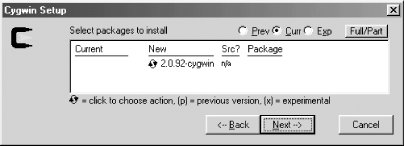
When prompted for the packages to install, choose the PRC-Tools package (see Figure 4-23). You may see one garbage item with no package name; it’s OK to choose that.
Once it’s installed, you’ll get the choice to add an icon or menu item (see Figure 4-22). It’s best to choose neither.
Launch Cygwin and fix the two missing symbol links by issuing the following commands :
cd /usr/m68k-palmos/lib
ln -s libmf.a libm.a
cd /usr/m68k-palmos/include
ln -s mathf.h math.h
Installing the 4.0 SDK
Now that Cygwin and PRC-Tools are installed, you need to install the 4.0 SDK. Here are those steps:
Download the 4.0 SDK from Palm’s web site, http://www.palmos.com/dev/tech/tools/sdk40.html.
Uncompress the SDK and run the resulting Palm OS SDK 4.0 Installer.
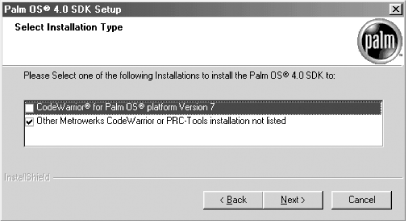
When asked what type of installation, choose “Other Metrowerks CodeWarrior or PRC-Tools installation not listed” (see Figure 4-24).
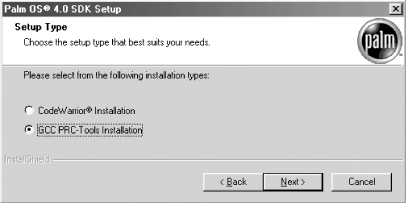
When asked the setup type, choose GCC PRC-Tools Installation (see Figure 4-25).
The SDK will include the minimum files necessary to compile projects (headers, libraries, and updated tools). You’ll also want to have the example files and documentation. Download and decompress them into convenient locations. You will find these example files at http://www.palmos.com/dev/tech/tools/sdk40.html.
The PRC-Tools expect to find the SDK in a mountpoint called /PalmDev. Execute the following command from within Cygwin to establish the mountpoint:
mount -f "C:\PalmDev" /PalmDev
Installing PilRC
The last piece to install is PilRC. It is fairly easy, requiring only a couple of steps.
Install PilRC. The current version is 2.8. Download pilrc_w32.zip from http://www.ardiri.com/index.cfm?redir=palm&cat=pilrc.
Uncompress it and move pilrc-2.8 to C:\pilrc2.8.
Copy pilrc.exe to C:\cygwin\usr\bin.
The next section of the tutorial deals with installing PRC-Tools on Unix. If you are using Windows then you can skip ahead to instructions for installing a sample project, found in Section 4.4.
Installing on Unix
The official distribution location for PRC-Tools is http://prc-tools.sourceforge.net. Our instructions are for installing PRC-Tools 2.1, pre-3, the latest version at the time this was written.
Here are the instructions for installation.
Installing PRC-Tools
The PRC-Tools is the development environment itself.
If you are running on an x86 box with Redhat Package Manager (RPM), download the following:
http://prdownloads.sourceforge.net/prc-tools/prc-tools-2.0.92-1.i386.rpm and install it with:
rpm -i prc-tools-2.0.92-1.i386.rpm
Otherwise, you’ll need to do a build from the source. Download, uncompress, and build from:
| http://prdownloads.sourceforge.net/prc-tools/prc-tools-2.0.92.tar.gz |
Installing the 4.0 SDK
The SDK contains the headers and libraries needed for Palm OS development.
Download the 4.0 SDK from http://www.palmos.com/dev/tech/tools/sdk40.html.
Put it in a temporary location. The SDK is a compressed tar file.
Uncompress the tar file with:
tar -zxf sdk40.tar.gz
Install the 4.0 SDK rpm file with:
rpm -i palmos-sdk-4.0-1.noarch.rpm
This 4.0 SDK is now installed as /opt/palmdev/sdk-4.0. If you’d like to make that the default (used if no SDK is specified), execute:
cd /opt/palmdev
ln -s sdk-4.0 sdk
Installing PilRC
PilRC is the resource compiler, the last piece needed for development.
Install PilRC. The current version is 2.8. Download pilrc_src.tgz from:
http://www.ardiri.com/palm/download.cfm?file=pilrc_src.tgz Download it to /usr/local/src (or some other desired location).
Uncompress it with:
tar -zxf pilrc_src.tgz
The line endings for the files are DOS-style. This can cause problems for compilers. Fix it by changing the files to Unix-style line endings with this script:
cd pilrc-2.8
for fnam in *.*
do
  tr -d '\r' < $fnam > /tmp/foo
  cat /tmp/foo > $fnam
done
There’s a problem with a declaration of
strdupin pilrc.c. Comment out its declaration://char *strdup(const char *s);
Now, you’re ready to build and make:
./configure
make pilrc
Install by copying to /usr/local/bin (or some directory of your choice):
cp pilrc /usr/local/bin
Get Palm OS Programming, 2nd Edition now with the O’Reilly learning platform.
O’Reilly members experience books, live events, courses curated by job role, and more from O’Reilly and nearly 200 top publishers.

