Name
Journal Options
Synopsis
Journal
displays the alert dialog shown in
Figure 11-1 the first time you run it. Selecting Yes
here activates Journal’s automatic
tracking feature and subsequently leads you to the
configuration dialog shown in Figure 11-2.
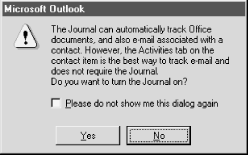
Figure 11-1. Initial alert for tracking option
Selecting No leaves automatic tracking disabled, bypasses the Journal Options dialog, and places you in the default view for Journal (Timeline, By Type). Like many similar dialog boxes, you see this over and over again, until you disable it or select Yes.
Note
To implement Journal’s automatic tracking, you must: (a) turn it on, and (b) configure what you want to track. Simply turning automatic tracking on does nothing. You need to tell Outlook what to track and for whom.
If you disable automatic tracking initially, and later want to enable it, choose Tools → Options → Preferences → Journal Options. The configuration dialog displayed is identical to that shown in Figure 11-2, and all the same “on/off " tracking options (described later in this chapter) apply.
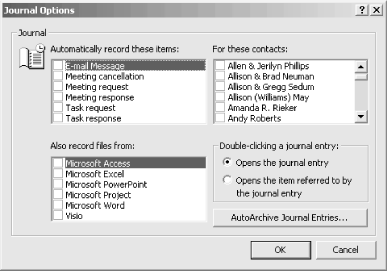
Figure 11-2. The Journal Options dialog
Journal options available to you are:
- Automatically record these items
Select from a list of Outlook items to track as Journal entries. All options here revolve around three forms of messaging: regular ...
Get Outlook 2000 in a Nutshell now with the O’Reilly learning platform.
O’Reilly members experience books, live events, courses curated by job role, and more from O’Reilly and nearly 200 top publishers.

