
242 office x for macintosh: the missing manual
Creating a Table of Contents
Word’s Table of Contents (TOC) feature shines in its versatility. Once you’ve built a
table of contents in Word, you can use it to navigate your document (just as you
might with the Document Map); you can custom format it to get just the look you
want; you can save yourself the task of updating page numbers if you add or delete
text from your document (which can be a major pain); and you can use it as a Web
site map (because in Online view, a Word Table of Contents is automatically
hyperlinked).
TOC the Easiest Way: Using Built-in Headings
If you have a well-organized document, and you’ve used Word’s outliner or one of
its built-in heading styles (Heading 1, Heading 2, and so on) to introduce each new
topic, Word’s Table of Contents feature was made for you. Go directly to step 1
below.
If you wrote your document without headings, on the other hand, insert them be-
fore creating the table. (Use Word’s built-in heading styles, as illustrated on page
143.) Be descriptive when you design the headings; instead of just “Chapter 10” or
“Advanced Techniques,” use “Chapter 10: Underwater Architecture” or “Advanced
Card-Counting.”
When you’re ready to smack a table of contents on the first page of your master-
work, proceed as follows:
1. Click where you want the TOC to begin.
To put the TOC on the first page, click at the very beginning of the document.
(You can also insert it after a title page or introduction.)
2. Choose Insert→Index and Tables→Table of Contents tab.
You should now be staring at the Index and Tables dialog box shown in Figure
6-21.
3. Choose a style in the Formats box, as described in Figure 6-21.
If none of the format styles thrills you, choose “From template” and see “TOC
the Harder Way: Using Other Styles” on page 244.
4. Decide how many levels you want to show, using the “Show levels” control.
For example, you may want your table of contents to show only chapter titles; in
that case, choose 1 in the “Show levels” box. If you’ve divided your document
into many levels of detail, each with its own heading level, you may want to show
only the first two or three levels to keep the table from getting too long. (The
table of contents in this book, for example, shows chapter titles and the first-level
subject headings.)
Creating a
Table of Contents
chapter 6: advanced word processing 243
5. Format the page numbers.
Most printed tables of contents include page numbers, of course, but if you’re
preparing a document for the Web where page numbering is irrelevant, then
turn off “Show page numbers.”
If you elect to use page numbering, you can also indicate whether you want them
to be right-aligned (as in the Preview window in Figure 6-21) and what style of
Tab leader you want (the dots, spaces, or lines that connect each title with its page
number). The Preview window in Figure 6-21 shows a dotted line, but the “Tab
leader” menu offers several other choices.
6. Click OK.
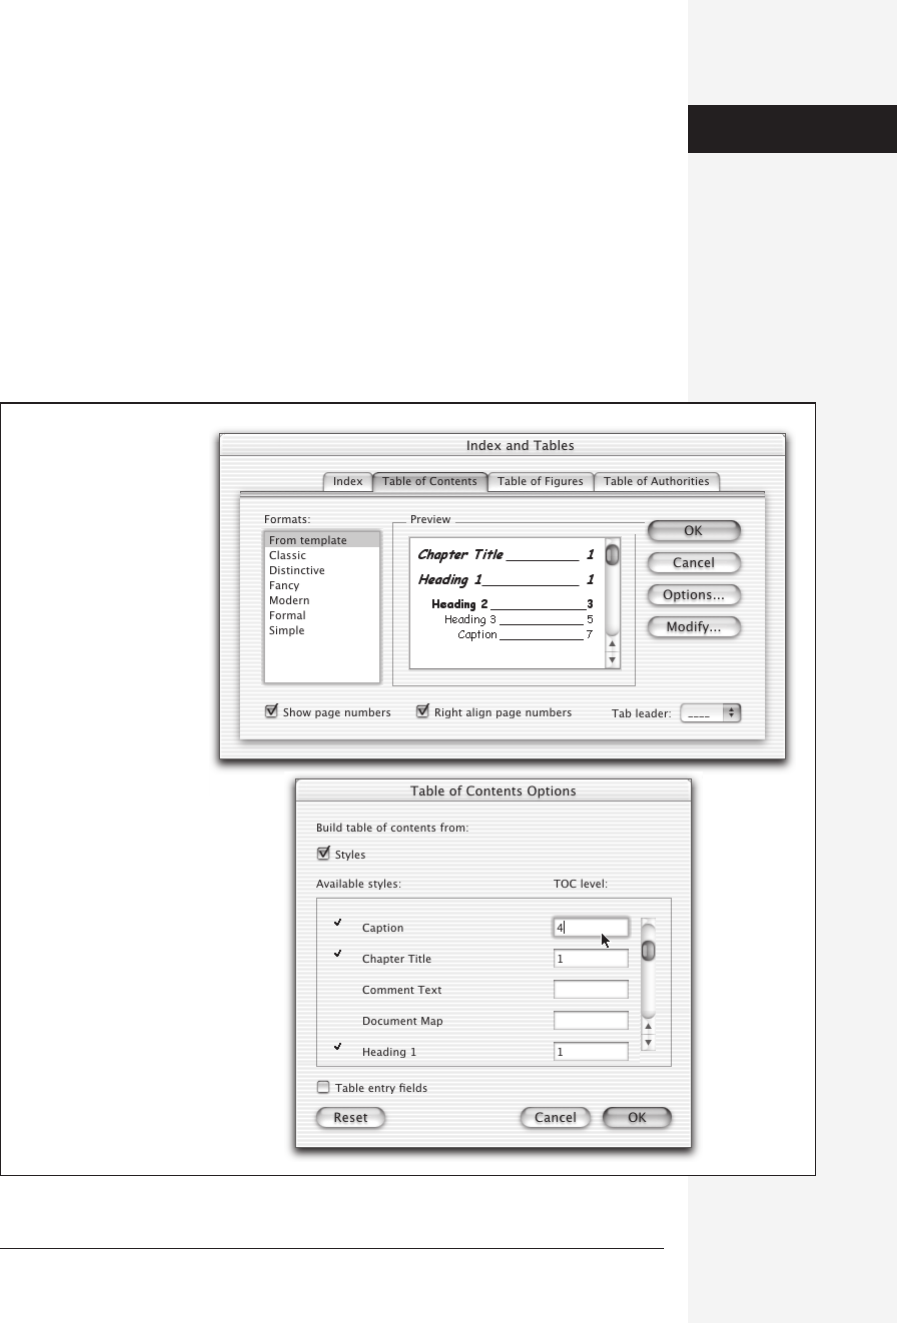
Figure 6-21:
Top: The “From template”
format uses the styles in
the current document
template and results in a
consistent appearance
with the rest of your
document. (See page 141
for more on styles.) Click
on each one and look in
the Preview window;
choose the one that
makes the best
impression.
Bottom: The Options
dialog box lets you build
your table of contents
from styles you’ve used in
your document other
than Heading 1, Heading
2, and so on. Here, the
Caption style is being
added to the list so that
captioned pictures will
appear in the table of
contents.
Creating a
Table of Contents
Get Office X for Macintosh: The Missing Manual now with the O’Reilly learning platform.
O’Reilly members experience books, live events, courses curated by job role, and more from O’Reilly and nearly 200 top publishers.

