
chapter 17: customizing office 625
chapter
17
M
icrosoft desperately wants the approval of Mac fans; its programmers seem
willing to do almost anything to make Office X a hit. For example, its
software design seems to subscribe to the theory, “If you don’t like some-
thing, change it yourself.”
Very few elements of the way you work with Office are set in stone. Word, Excel, and
PowerPoint each let you redesign the toolbars and even rework the menus. In Word
and (for the first time) Excel, you can also choose different keyboard equivalents for
commands. (Only Entourage is off-the-rack software. You can’t work it over in the
same ways.)
Even if you’re a novice, customization is worth exploring. There will almost cer-
tainly come a day when you wish you could choose an easier keystroke for some
function than the one Microsoft chose. With this chapter as your guide, you can.
Customizing Your Toolbars
One way to customize your toolbars is to drag them around the screen and change
their shapes to fit your whims (and your monitor shape). To move a toolbar, just
drag it, using its skinny title bar (next to the close button) as a handle.
You’ll soon discover that toolbars are “magnetic.” That is, they like to snap against
the sides of the monitor, other toolbars, the Formatting Palette, or to the Office
Assistant’s window—just about anything except an actual document window.
Customizing Offic e
626 office x for macintosh: the missing manual
Tip: This snappiness is designed to help you keep your screen tidy, but if you want to stifle your toolbars’
social tendencies, press Shift as you drag them.
You can also reshape your toolbar by resizing it as if it were a window: just drag the
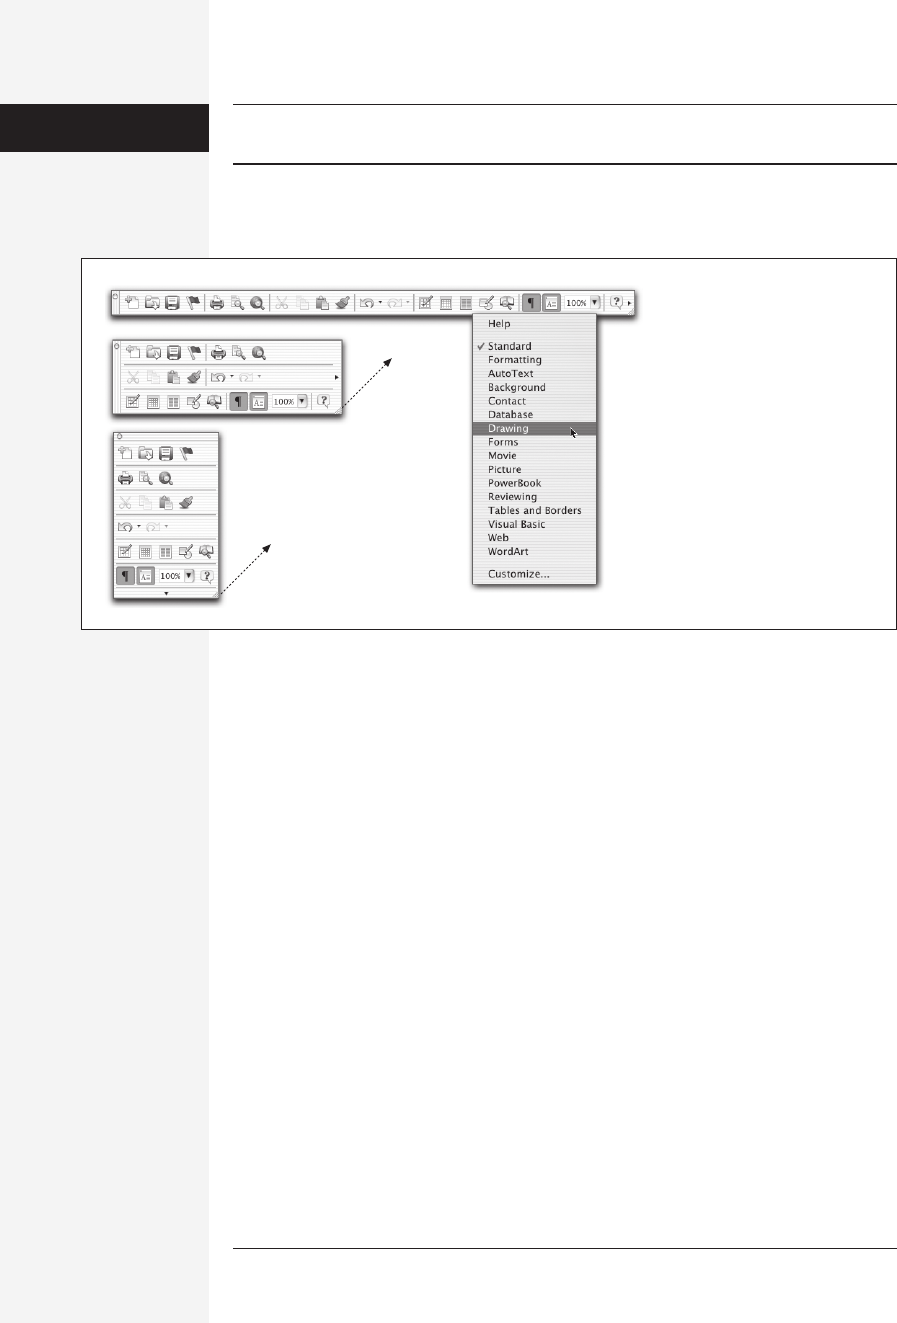
diagonally striped area in the lower-right corner, as shown in Figure 17-1.
Showing Other Toolbars
Excel, PowerPoint, and Word each come with a toolbar or two that pop up when the
program opens, but that’s just the beginning. In fact, Word has 24 toolbars,
PowerPoint has 17, and Excel has 23, each dedicated to a certain purpose (such as
graphics work, Web design, or reviewing comments). Some toolbars appear auto-
matically when you use a related command or open a corresponding editing area.
Others you can summon or dismiss as you need them.
You can go about opening and closing toolbars in any of three ways:
• Control-click the More Buttons toolbar icon (usually at the far right or bottom
edge of an open toolbar or palette), or Control-click an empty area on any open
toolbar or palette. As shown in Figure 17-1, you get a pop-up menu of what
Microsoft considers to be the most useful toolbars. Choose the name of the one
you’d like to open or close.
• Choose from the View→Toolbars submenu. Here again, you see over a dozen of
the most important toolbars.
• Choose Tools→Customize, and then click the Toolbars tab. Now you see a list of
all of the toolbars, even the obscure ones. Click a checkbox to make the corre-
sponding toolbar appear or disappear instantly. (Because you don’t even have to
close the dialog box between experiments, this is the fastest way to have a quick
look at all the available toolbars.) Click OK to close the dialog box.
Customizing
Your Toolbars
Figure 17-1:
Bottom, middle: The toolbar
turns into an outline as you
drag its reshaping corner. As
you drag diagonally, it goes
from a vertical toolbar to
various incarnations of a
rectangle, and finally to a
horizontal toolbar—or the other
way around.
Top: If you Control-click any
empty gray space in a toolbar,
you get a pop-up menu listing
all toolbars. Choose a toolbar
name to make it appear or
disappear.
Get Office X for Macintosh: The Missing Manual now with the O’Reilly learning platform.
O’Reilly members experience books, live events, courses curated by job role, and more from O’Reilly and nearly 200 top publishers.

