
578 office x for macintosh: the missing manual
To do so, launch PowerPoint and choose File→Open to bring up the Open dialog
box. Select All Outlines in the Show pop-up menu, and then select the Word docu-
ment that you want to import.
After you click Open, the Office Assistant asks you if you want to open the outline in
Word or in PowerPoint; choose PowerPoint. PowerPoint now converts your outline
into the basis for a slide show; each top-level heading becomes the title of a new
slide, and subheadings become bullet points on each slide.
Tip: You can perform this trick from inside Word, too. With the outline open in Word X, choose File→Send
To→Microsoft PowerPoint. PowerPoint opens (if it’s not already open) and converts the outline into a
presentation automatically, saving you several steps.
Step 3: Building the Show
It’s much better to show blank white slides containing an effective message than
fancy graphics that don’t say anything. That’s why it’s an excellent idea to begin your
presentation planning with the Outline pane.
Once the outline’s in good shape, it’s time to start thinking about the cosmetics;
how your slides look. PowerPoint’s tools make it easy to adapt your design (or
Microsoft’s design) for all the slides simultaneously.
Caution: Choose File→Page Setup and set the Size options before you design your slides. A radical
change to these options later in the game may result in cutoff graphics or unintended distortions, as
though your slides were being projected through a fun-house mirror.
Using Masters
A master item is a background element that appears on every slide—a logo or a
background, for example. When you add, delete, move, or replace a master item,
you see the change reflected in all of your slides that use that master item. For ex-
ample, if you want to change the background color of all of your slides, just change
the background on their slide master; PowerPoint updates all the slides instantly.
In fact, PowerPoint offers four different categories of master items: slides, titles, hand-
outs, and notes. Here’s how they work.
Slide master
The slide master—or, as most people would call it, the master slide—is a special
slide whose background, font size and style, bullet style, and footer (whatever ap-
pears at the bottom of every slide) determine the look of these elements on every
slide it controls.
Step 2:
Writing the Outline
chapter 15: basic powerpoint 579
Editing the slide master
To look at and change the slide master, choose View→Master→Slide Master. Now
you’re face-to-face with the slide master itself (see Figure 15-6), which comes with
these master items:
• Title Area. This usually contains some dummy text, a placeholder for the real text
that will appear in your slides. The title area is surrounded by a dashed line.
• Object Area. The settings you make in this area determine how the body of your
slides—text, charts, pictures, and media clips—will look and where they will sit.
• Date Area, Footer Area, and Number Area. These boxes at the bottom of the
slide master show where the date and time, slide number, and miscellaneous footer
text will appear on each slide. (These same boxes appear in the preview in
File→Page Setup→Header/Footer→Slide tab.)
Note: In View→Master→Slide Master mode, the placeholder text (such as “Click to edit Master title
style”) is irrelevant. Don’t bother editing it; doing so has no effect on your actual slides.
By changing the font size, style, color, and placement of these items, you can change
where PowerPoint puts those elements on your slides. For example, if you want all
of your slides’ titles to be in 24-point Gill Sans Ultra Bold, just click once inside the
placeholder text to select the box; then use the Formatting Palette to change the font
to 24-point Gill Sans Ultra Bold. Now, any existing slides that have titles (and any
new slides you make) will display the title in 24-point Gill Sans Ultra Bold.
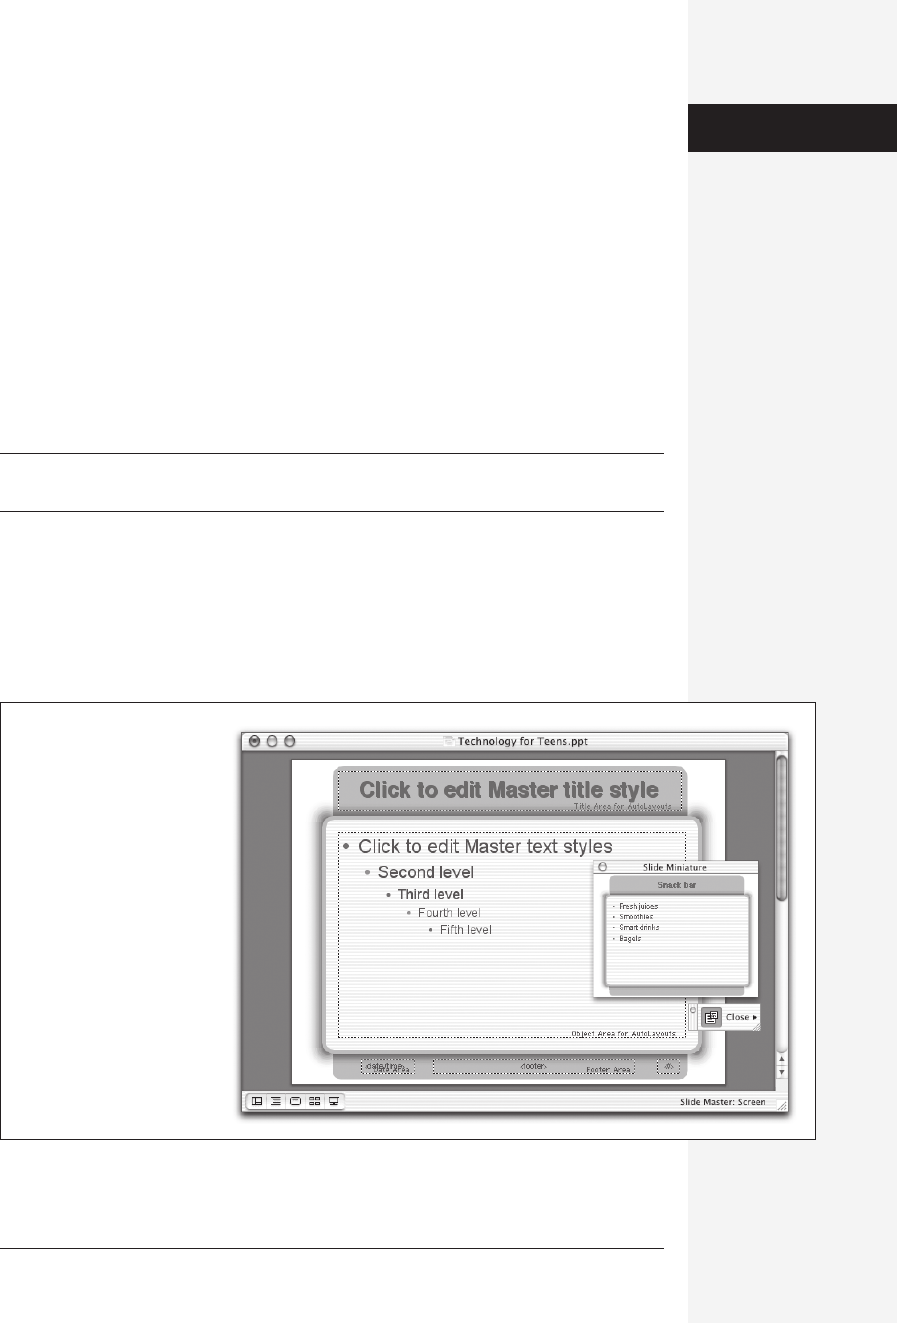
Figure 15-6:
The slide master generates
certain elements that will be
reflected in every slide in the
presentation—except for title
slides, which have their own
title master. Slide Master view
also has a small toolbar of its
own with two buttons: Slide
Miniature (produces a
miniature image of an actual
slide in the presentation,
which lets you see how your
changes to the master slide
affect it) and Close (takes
you back to whatever slide
you were viewing).
Step 3:
Building the Show
Get Office X for Macintosh: The Missing Manual now with the O’Reilly learning platform.
O’Reilly members experience books, live events, courses curated by job role, and more from O’Reilly and nearly 200 top publishers.

