Having a computer stocked with Microsoft Office comes close to being a civic duty for todayâs corporate citizensânot to mention the rest of humanity. Thatâs always been great news for Microsoft, which counts Word, Excel, PowerPoint, and Access as a big reason why its cash hoard is bigger than, say, your countryâs treasury.
For years, Microsoft has come pretty close to taking this near monopoly for granted, knowing that, lemming-like, office workers everywhere would dutifully upgrade to the latest version of these programs. After all, when it comes to creating documents, spreadsheets, presentations, and databases, no one ever got fired for choosing Microsoft, right?
Now, with the introduction of Office 2007, our friends in Redmond are finally returning the favor. The 2007 versions of these programs have all been given a thoroughâand thoroughly user-friendlyâmakeover. The changes may take some gettting used to, but, hey, thatâs why youâve got this book.
Note
This book is written with Microsoftâs latest and greatest release in mind: Office 2007, which is for Windows only. The most recent Mac version of Office is covered in Office 2004 for Macintosh: The Missing Manual.
Ever since Microsoft Office conquered the world (way back in the 1990s), programs like Word, Excel, PowerPoint, and Access havenât changed a lot. Although a genuinely useful new feature appeared once in a while, Microsoft spent most of its time wedging in odd gimmicks like a talking paper clip.
Office 2007 breaks this pattern and introduces some of the most dramatic changes since Office 95. The most obvious difference is the thoroughly revamped user interface (the windows, toolbars, menus, and keyboard shortcuts you use to interact with Office applications). After spending far too long trying to simplify the haphazard, toolbar-choked interfaces in most Office programs, Microsoft finally worked up the courage to redesign it all from scratch. The result is a radically redesigned look and feel that actually makes sense. The centerpiece of this redesign is the super-toolbar called the ribbon.
The ribbon is the best thing to hit the Office scene in years. Everything youâll ever want to do in any of the Office programs is packed into the ribbon. The contents of the ribbon depend on which program youâre in, but the central premiseâa command center for every action youâd want to performâremains consistent.
You can think of the ribbon as a big, fat, nonmovable toolbar. It may look as though itâs taking up an enormous amount of room on your screen (see Figure I-1), but it doesnât take up any more space than the old menu bar plus a couple of toolbars. Furthermore, the ribbon always appears in the same place and it never gets any bigger. And because you canât customize the ribbon or reposition it the way you could toolbars in Office 2003, you canât accidentally lose the ribbon.
Tip
Office 2007âs new ribbon is one of those features thatâs easier to understand when you see it in action. You can see a screencast (onscreen demonstration) of Wordâs ribbon on the âMissing CDâ page for this book at www.missingmanuals.com.
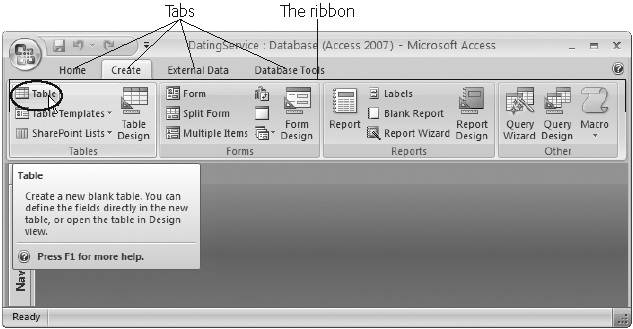
Figure I-1. The ribbonâs full of craftsman-like detail. When you hover over a button, you donât see a paltry two- or three-word description in a yellow box. Instead, you see a friendly pop-up box with a complete mini-description. Here, the mouse is hovering over the Table command in Access 2007.
The ribbon makes it easier to find features and remember where they are, because each tool is grouped into a logically related tab (more on tabs in a moment). Even better, once you find the button you need you can often find other, associated commands by looking at the section where the button is placed. In other words, the ribbon isnât just a convenient toolâitâs also a great way to explore each program.
Tip
Want to reclaim the screen real estate that the ribbon occupies? Just double-click the current tab, and the ribbon collapses, leaving only the row of tab titles visible. Double-click the tab again to pop the buttons back into sight.
One nice characteristic of the ribbonâs tabs is that they never changeâin other words, you donât see commands mysteriously moving around or winking out of existence. Microsoft designed the ribbon to be predictable, so commands always remain in the same place. However, commands will change their arrangement a bit if you resize the programâs window, so that they better use the available space (Figure I-2).
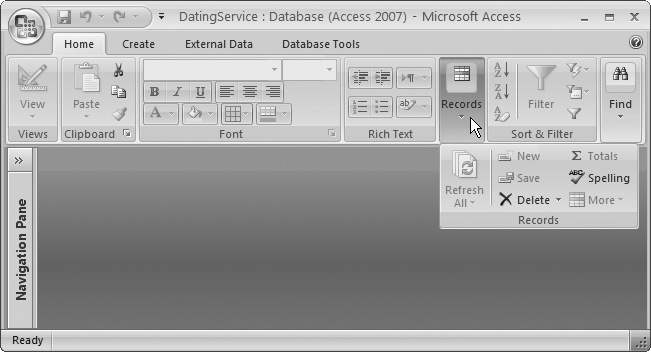
Figure I-2. In this example, Access doesnât have the room to display the Home tabâs Views, Records, or Find sections, so theyâre all replaced with buttons. If you click any of these buttons, then a panel appears with the content youâre looking for.
Depending on the size of your window, itâs possible that the button you need to click wonât include any text. Instead, it shows up as a small icon. In this situation, you can hover over the mystery button to see its name before deciding whether to click it.
To accommodate all these buttons, the ribbonâs divided into task-specific tabs. When you launch each Office program, you start at the Home tabâthe other tabs you see depend on which program youâre in. Excel, for example, starts out with seven tabs in the ribbon. When you click one of these tabs, you see a whole new collection of buttons (Figure I-3).
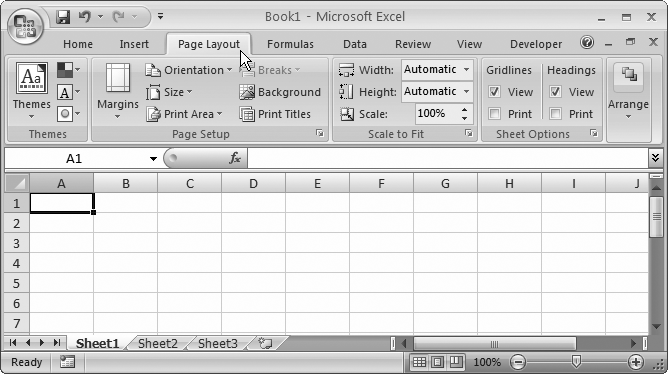
Figure I-3. When you launch Excel you start at the Home tab, but hereâs what happens when you click the Page Layout tab. Now, you have a slew of options for tasks like adjusting paper size and making a decent printout. The buttons in a tab are grouped into smaller boxes for clearer organization.
Contextual tabs are tabs that let you work with specialized kinds of objects, such as pictures or charts. They appear above the ribbon, and in this book youâll see them written with a vertical bar after the contextual part of the name: Chart Tools | Format. Contextual tabs appear only when you need them to and automatically disappear when youâre finished with them. For example, when you select a chart on your slide, the Chart Tools | Design, Chart Tools | Layout, and Chart Tools | Format tabs appear. Then, when you select a hunk of text, PowerPoint recognizes that youâre finished formatting your chart and hides the Chart Tools tabs.
Itâs worth spending some time getting accustomed to the tab-based ribbon. Try clicking one tab after the other, rifling back and forth through the sections to see what they hold. Youâll learn more about all these commands as you make your way through this book.
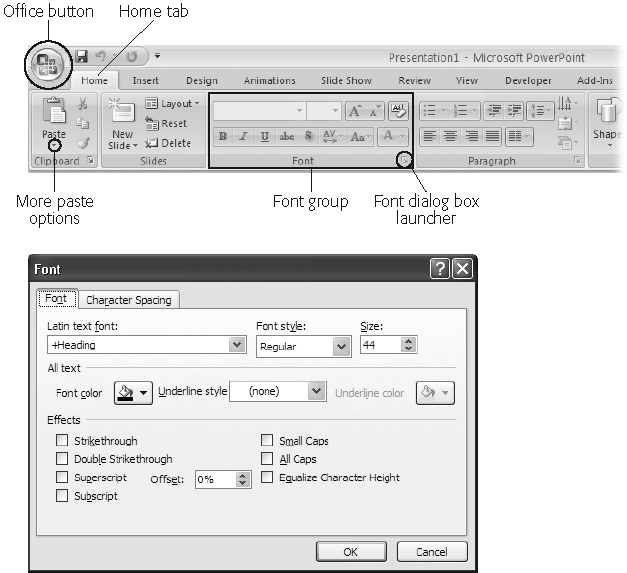
When you launch each Office program, the Home tab is automatically selected, which displays options organized in sections, or groups. For example, if youâre in PowerPoint, options in the Font group of the Home tab let you bold and underline your text; options in the Paragraph group let you align your text and format it as a bulleted or numbered list.
As youâd expect, to select one of the options on a ribbon, just click the button. For example, to underline a heading in PowerPoint, select the heading text you want to underline, zip to the Font group, and click the Underline button. To change the color of your text, first select it, and then head to the Font group of the Home tab and click the Font Color button.
To give you complete control over every element of your slideshow while sticking to their design philosophy of offering all options on the ribbon, the Office 2007 designers placed a tiny dialog box launcher button in the bottom-right corner of many ribbon groups. When you click a dialog box launcher, Office pops up a dialog box related to that group. For example, clicking the Font dialog box launcher in PowerPoint displays the Font dialog box as shown in Figure I-4.
If youâre an unredeemed keyboard lover, youâll be happy to hear that you can trigger ribbon commands with the keyboard. The trick is using keyboard accelerators, a series of keystrokes that starts with the Alt key (the same key you used to use to get to a menu). When using a keyboard accelerator, you donât hold down all the keys at the same time. (As youâll soon see, some of these keystrokes contain so many letters that youâd be playing Finger Twister if you tried holding them all down simultaneously.) Instead, you hit the keys one after the other.
The trick to using keyboard accelerators is to understand that once you hit the Alt key, there are two things you do, in this order:
Pick the ribbon tab you want.
Choose a command in that tab.
Before you can trigger a specific command, you must select the correct tab (even if itâs already displayed). Every accelerator requires at least two key presses after you hit the Alt key. You need even more if you need to dig through a submenu.
By now, this whole process probably seems hopelessly impractical. Are you really expected to memorize dozens of different accelerator key combinations?
Fortunately, Office is ready to help you out with a new feature called keytips. Hereâs how it works. Once you press the Alt key, letters magically appear over every tab in the ribbon (Figure I-5). Once you hit a key to pick a tab, letters appear over every button in that tab. You can then press the corresponding key to trigger the command (Figure I-6).
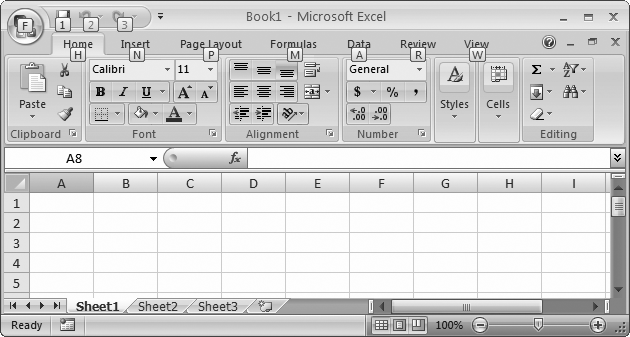
Figure I-5. When you press Alt, Excel helps you out with keytips next to every tab. If you follow up with M (for the Formulas tab), youâll see letters next to every command in that tab, as shown in Figure I-6.
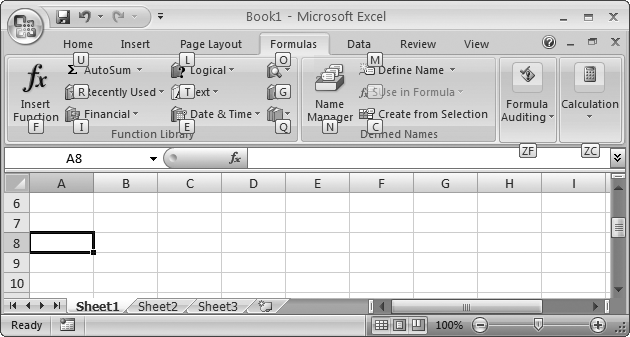
Figure I-6. You can now follow up with F to trigger the Insert Function button, U to get to the AutoSum feature, and so on. Donât bother trying to match letters with tab or button namesâthere are so many features packed into the ribbon that in many cases the letters donât mean anything at all.
In some cases, a command might have two letters, in which case you need to press both keys, one after the other. (For example, the Find & Select button on the Home tab has the letters FD. To trigger it, press Alt, then H, then F, and then D.)
Some other shortcut keysânotably, the ones most people have been using for yearsâdonât use the ribbon. These key combinations start with the Ctrl key. For instance, Ctrl+C copies highlighted text, and Ctrl+S saves your current work. Usually, you find out about a shortcut key by hovering over a command with the mouse. Hover over the Paste button in the ribbonâs Home tab, and you see a tool-tip that tells you its timesaving shortcut key is Ctrl+V.
Thereâs still one small part of the traditional Microsoft menu system left in Office 2007âsort of. The traditional File menu that lets you open, save, and print files has been transformed into the Office menu. You get there using the Office button, which is the big round logo in the top-left corner of the window (Figure I-7) of all the Office 2007 programs.
The Office menu is generally used for three things:
Working with files (creating, opening, closing, and saving them).
Printing your work.
Configuring how applications behave. Choose Word Options (the name of the button depends on which program youâre using) at the bottom of the menu to get to the Options dialog box, an all-in-one place for configuring each program.
Thereâs one menu quirk that takes a bit of getting used to. Some Office menu commands hide submenus that have more commands. Take the Print command. You can choose Print from the Office menu to fire off a quick printout of your work. But if you click the right-pointing arrow at the edge of the Print command (or if you hover over it for a moment), then you see a submenu with more options, as shown in Figure I-8.


Keen eyes will have noticed the tiny bit of screen real estate that sits on the right side of the Office button, just above the ribbon (Figure I-9). It holds a series of tiny icons, like the toolbars in older versions of Office. This is the Quick Access toolbar (or QAT to acronym-loving nerds).
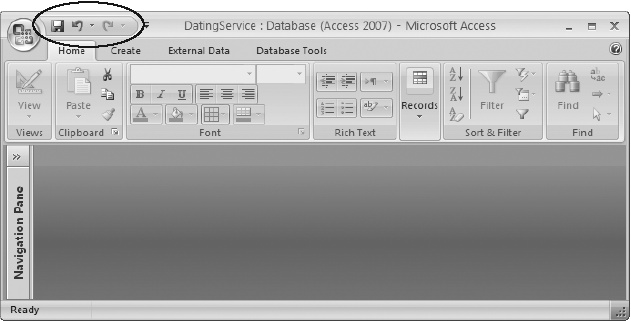
Figure I-9. The Quick Access toolbar puts the Save, Undo, and Redo command right at your fingertips. These commands are singled out because most people use them more frequently than any other commands. But as youâll learn in Appendix A, you can add anything you want here.
If the Quick Access toolbar was nothing but a specialized shortcut for three commands, it wouldnât be worth the bother. However, the nifty thing about the Quick Access toolbar is that you can customize it. In other words, you can remove commands you donât use and add your own favorites; Appendix A shows you how.
Microsoft has deliberately kept the Quick Access toolbar very small. Itâs designed to provide a carefully controlled outlet for those customization urges. Even if you go wild stocking the Quick Access toolbar with your own commands, the rest of the ribbon remains unchanged. (And that means a coworker or spouse can still use your computer without suffering a migraine.)
Have you ever paused with your mouse over a command or a formatting option and wondered what it would do to your document? Those days are over. Live Preview is a new feature of Office 2007. In Word, Excel, and PowerPoint 2007, when you hold your mouse over a formatting style or color, you see a preview right within your document, spreadsheet, or slide (Figure I-10). If you like the look, click your mouse button. If you donât, move your mouse away from the button or menu option, and your document snaps back to its previous appearance. And, of course, you can preview some more options.
Live Preview saves time and hassle by letting you instantly see how an effect looks on your document before you commit to it. (In the old days, you had to select an option to see how it looked; then, if you didnât like it, you had to select Undo and start all over again.)
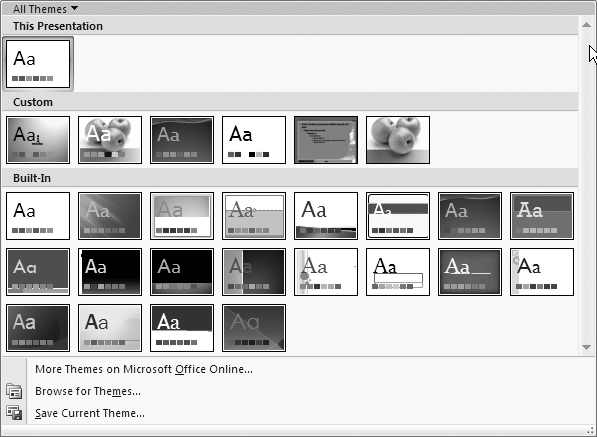
Figure I-10. The Themes gallery, shown here, is just one of many galleries you find in PowerPoint. Mousing over a gallery option automatically previews that option on your slide.
Note
Live previews arenât for everybody. Some folks donât like the idea of Office changing their documentâs appearanceâeven temporarilyâunless they tell it to by clicking something. To turn off Live Preview, choose Office button â [Word/Excel/PowerPoint] Options â Popular and then turn off the checkbox next to Enable Live Preview.
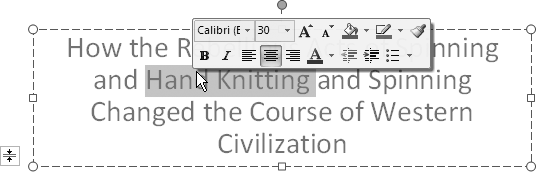
Office 2007 did away with most of the toolbars that appeared in earlier versions of the programs, but not all of them. One that remains is the pop-up mini-toolbar (Figure I-11) which appears in Word, PowerPoint, and Access. The formatting commands on the mini-toolbar are the same as those found on the ribbon, so you donât need it to get your work done, but some folks find it handy. If itâs driving you nuts, turn off the mini-toolbar by clicking the Office button â [Word/PowerPoint/ Access] Options and then, in the Options window that appears, select Popular and turn off the âShow Mini Toolbar on selectionâ checkbox.
Youâll find very little jargon or techno-geek terminology in this book. You will, however, see a few terms and concepts that youâll encounter frequently in your computing life. If your fingers have ever graced a computer keyboard, youâre probably familiar with the following:
Press the keys on your keyboard, and text appears in your document.
Hold the Shift key down to type capitals or to enter the various punctuation marks you see above the numbers keys (!@#$*&^).
Figure I-11. Technically, the mini-toolbar breaks the Office 2007 design teamâs commitment not to have stuff come out of nowhere and then disappear, but because so many people spend a lot of time formatting text, they decided it was worth keeping. The mini-toolbar appears slightly transparent, and disappears immediately if you ignore it and begin typing.
Press Caps Lock and your keyboard types only capital letters, but the numbers and other symbols continue to work as usual.
To correct an error youâve just made, you can use the Backspace key. Press it down once, and the cursor moves backward one space, erasing the last character you typed. If you continue to hold it down, it will keep on going, eating up your work like a starving man at a smorgasbord.
The Delete (or Del) key, usually on or near the numerical keypad, does the same thing but for the character in front of the insertion point.
If youâve got that under your belt, then youâre ready for the rest of Office 2007: The Missing Manual. This book assumes youâre familiar with just a few other terms and concepts:
Clicking. This book gives you several kinds of instructions that require you to use your computerâs mouse or trackpad. To click means to point the arrow cursor at something on the screen and thenâwithout moving the cursor at allâto press and release the clicker button on the mouse (or laptop trackpad). To double-click, of course, means to click twice in rapid succession, again without moving the cursor at all. To drag means to move the cursor while pressing the button continuously. To right-click, click as described above, but press the mouse button on the right.
When you see an instruction like Shift-click or Ctrl-click, simply press the specified key as you click.
Keyboard shortcuts. Every time you take your hand off the keyboard to move the mouse, you lose time and potentially disrupt your creative flow. Thatâs why many experienced computer fans use keystroke combinations instead of menu commands wherever possible. When you see a shortcut like Ctrl+S in this book, itâs telling you to hold down the Ctrl key, and, while itâs down, press the letter S, and then release both keys. Similarly, the finger-tangling shortcut Ctrl+Alt+S means hold down Ctrl, and then press and hold Alt, and then press S (so that all three keys are held down at once).
All roads lead to Rome. Office 2007 usually gives you several ways to choose the same optionâby clicking a ribbon option, by right-clicking an object on a slide and then choosing from the shortcut menu that appears, or by pressing a key combination. Some folks prefer the speed of keyboard shortcuts; others like the satisfaction of a visual command array available in menus or toolbars. This book lists the alternatives so that you experiment to see which you like best.
Despite the many improvements in software over the years, one feature hasnât improved a bit: Microsoftâs documentation. In fact, with Office 2007, you get no printed user guide at all. To learn about the thousands of features included in this software collection, Microsoft expects you to read the online help.
Occasionally, these help screens are actually helpful, like when youâre looking for a quick description explaining a mysterious new function. On the other hand, if youâre trying to learn how to, say, create an attractive chart, youâll find nothing better than terse and occasionally cryptic instructions.
This book is the manual that should have accompanied Office 2007. In these pages, youâll find step-by-step instructions and tips for using almost every Office feature, including those you havenât (yet) heard of.
This book is divided into five parts, each containing several chapters:
Part One: Word 2007 starts with basics like launching Word and starting a new document, and ends with advanced planning techniques like using Wordâs Outline feature. In between youâll learn everything else you need to know to master Word.
Part Two: Excel 2007 shows you how to create and edit Excel spreadsheets, perform calculations using formulas, and put your data into tables and charts.
Part Three: PowerPoint 2007 teaches you how to create everything you need to deliver a professional and visually pleasing presentation: slides, diagrams, handouts, drawings, slide transitions, and more.
Part Four: Access 2007 guides you through creating a database, sorting your data, linking tables with relationships, creating queries, and everything else you need to know to keep track of your important data.
Part Five: Appendixes. This book wraps up with two short appendixes. Appendix A is dedicated to modifying Office 2007âs new Quick Access Toolbar. Appendix B explains how to find your way around Microsoftâs built-in and online help pages, and how to get assistance from a vast online community of Office fans and experts.
Throughout this book, and throughout the Missing Manual series, youâll find sentences like this one: âClick Start â All Programs â Microsoft Office â Microsoft Office Word 2007.â Thatâs shorthand for a much longer instruction that directs you to click the Start button to open the Start menu, and then choose All Programs. From there, click the Microsoft Office folder, and then click Wordâs icon to launch the program.
Similarly, this kind of arrow shorthand helps to simply the business of choosing commands and menus, as shown in Figure I-12.
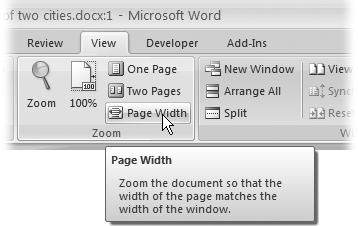
Figure I-12. Arrow notations help to simplify Office 2007âs ribbon structure and commands. For example, âChoose View â Zoom â Page Widthâ is a more compact way of saying: âClick the View tab, and then go to the Zoom group and click Page Width,â as shown here.
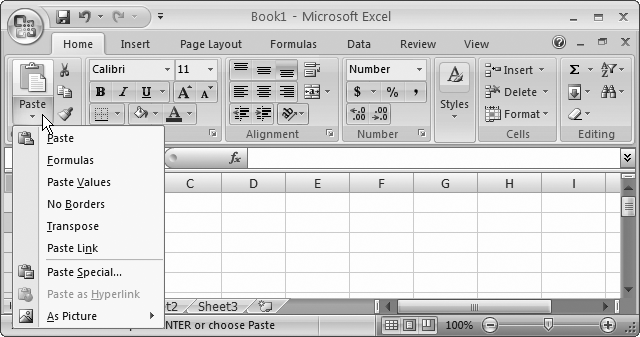
From time-to-time youâll encounter buttons in the ribbon that have short menus attached to them. Depending on the button, this menu might appear as soon as you click the button, or it might appear only if you click the buttonâs drop-down arrow, as shown in Figure I-13.
When dealing with this sort of button, the last step of the instructions in this book tells you what to choose from the drop-down menu. For example, say youâre directed to âHome â Clipboard â Paste â Paste Special.â That tells you to select the Home tab, look for the Clipboard section, click the drop-down part of the Paste button (to reveal the menu with extra options), and then choose Paste Special from the menu.
Tip
Be on the lookout for drop-down arrows in the ribbonâtheyâre tricky at first. You need to click the arrow part of the button to see the full list of options. When you click the other part of the button, you donât see the list. Instead, Office fires off the standard command (the one Office thinks is the most common choice) or the command you used most recently.
As you read this book, youâll see a number of examples that demonstrate features of each of the Office programs. Many of these examples are available as files that you can download. Just surf to www.missingmanuals.com, click the link for this book, and then click the âMissing CDâ link to visit a page where you can download a zip file that includes the examples, organized by chapter.
At the missingmanuals.com Web site, youâll find articles, tips, and updates to this book and all the books in the Missing Manual series. In fact, youâre invited and encouraged to submit such corrections and updates yourself. In an effort to keep the book as up-to-date and accurate as possible, each time we print more copies of this book, weâll make any confirmed corrections youâve suggested. Weâll also note such changes on the Web site, so that you can mark important corrections into your own copy of the book, if you like. (Click the bookâs name, and then click the Errata link, to see the changes.)
In the meantime, weâd love to hear your own suggestions for new books in the Missing Manual line. Thereâs a place for that on the Web site, too, as well as a place to sign up for free email notification of new titles in the series.
When you see a Safari® Enabled icon on the cover of your favorite technology book, that means the book is available online through the OâReilly Network Safari Bookshelf.
Safari offers a solution thatâs better than e-books. Itâs a virtual library that lets you easily search thousands of top tech books, cut and paste code samples, download chapters, and find quick answers when you need the most accurate, current information. Try it for free at http://safari.oreilly.com/
Get Office 2007: The Missing Manual now with the O’Reilly learning platform.
O’Reilly members experience books, live events, courses curated by job role, and more from O’Reilly and nearly 200 top publishers.

