Chapter 18. Creating a Database Report
In This Chapter
Creating a report with the Report Wizard
Displaying and printing reports
Modifying the appearance of a report
Erasing a report
Data is useless if you can't understand what it means, so that's why Access lets you create reports. A report simply provides a printed version of your data arranged in some useful way.
A report could dig through your data and print a list of your top ten salespeople. Another report may print out the top ten products you sold last year. Reports simply provide a way to make sense of your data and print it so you can examine your data on paper.
Using the Report Wizard
The easiest way to create a report is to use the Report Wizard, which guides you step by step through arranging and selecting which data to print on a report along with sorting your data at the same time. To use the Report Wizard, follow these steps:
Click the Create tab.
Click the Report Wizard icon in the Reports group.
The Report Wizard dialog box appears, as shown in Figure 18-1 .
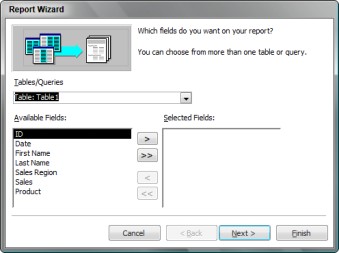
Figure 18.1. Figure 18-1: The Report Wizard lets you choose where to retrieve your data for your report.
Click in the Tables/Queries list box and choose the table or query that contains the data you want to print in a report.
Click a field in the Available Fields box and then click the > button. Repeat this step for each additional field you want to display in your report. ...
Get Office 2007 For Dummies® now with the O’Reilly learning platform.
O’Reilly members experience books, live events, courses curated by job role, and more from O’Reilly and nearly 200 top publishers.

